
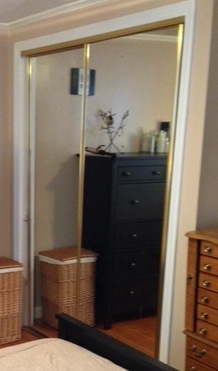
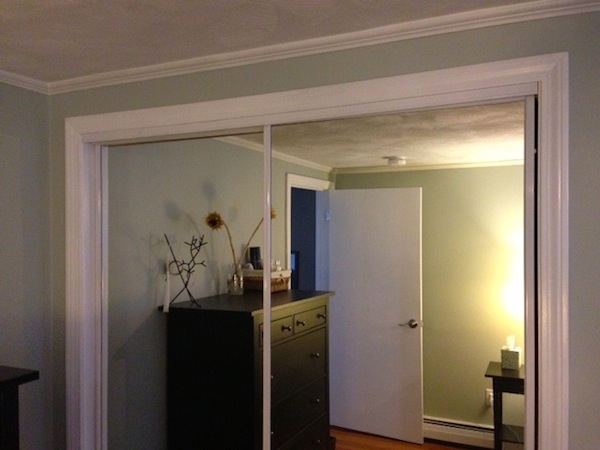
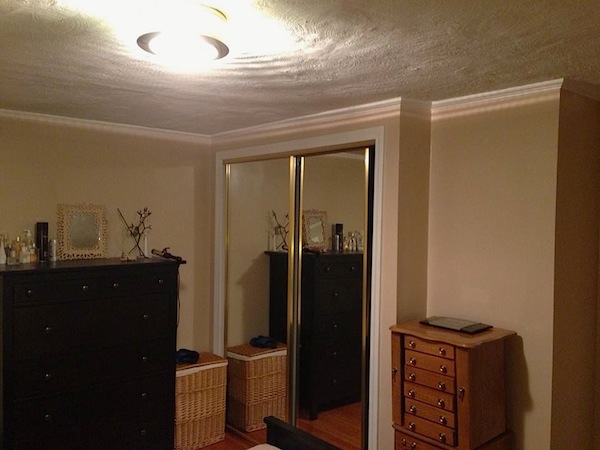
One of the, shall we say, special aspects of our master bedroom were the gold-framed, sliding, mirrored closet doors. I knew they had to go as part of the master bedroom revamp…or did they? I conducted a great deal of research into options for replacing them and everything I found was super expensive. Closet doors are not cheap and even making our own would entail significant materials costs. So, we decided to paint them. I wasn’t sure if this would work, but it did and was a $4 fix to a pretty hideous problem, which makes this our cheapest frugal home improvement project yet! Plus, I like having full-length mirrors in the bedroom–useful for checking out sweet thrift store finds and, they make the room feel bigger.
Total cost: $4
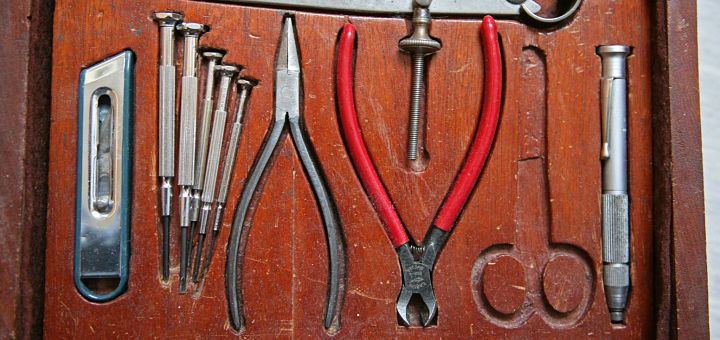
Supplies:
- Screwdriver
- Newspaper
- Drop cloths or old grocery bags
- Trash/recycling bins or a sawhorse
- Spray primer:
- We used Rust-Oleum’s Painter’s Touch 2X Ultra Cover Flat White Primer
- Spray paint:
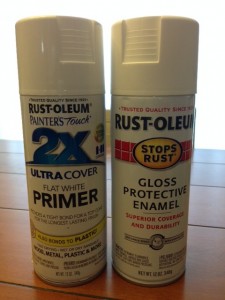
- We used Rust-Oleum’s Gloss Protective Enamel in white
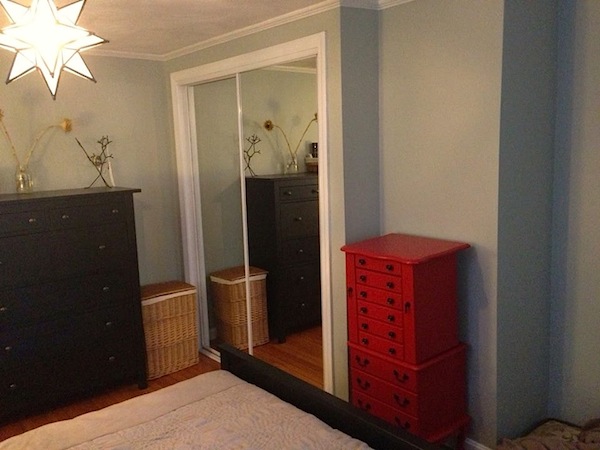
- I chose white so that the mirrors would blend in with the trim in our bedroom. You could get fancy and do a contrasting color–spray paint comes in about 1,000 colors.
- Good, non-windy weather:
- This is an outdoor-only project and if it’s windy, the spray paint will blow everywhere. Best to wait for a warm, windless day.
How to Paint/Refinish Gold Mirrored Closet Doors!
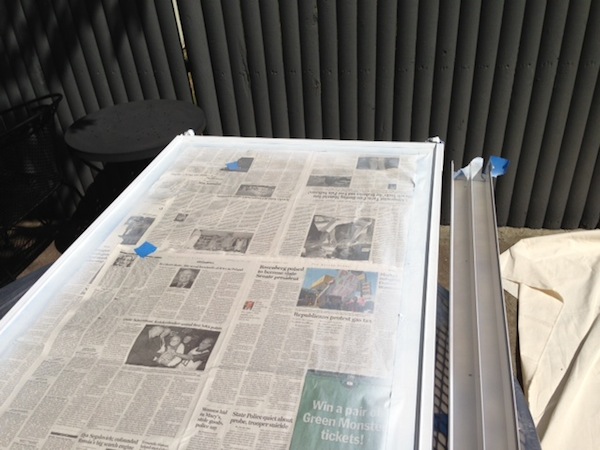
Step 1: Determine a staging ground.
- Since you’ll be spray painting, you really need to do this outside. So, unlike how Mr. Frugalwoods and I did it–plan out your work space BEFORE taking the doors out 🙂
- Frugal tip: We laid out a drop cloth on our patio (spray paint gets everywhere) and overturned our trash and recycling bins to make a platform to hold the doors. If you own a sawhorse use that, but no need to buy one if you don’t.
Step 2: Remove doors and all hardware.
- Carefully lift each door out of its track, then remove the top and bottom tracks and front pieces (no idea what they’re actually called…)
- Keep all screws in a ziplock bag.
Step 3: Position doors on top of your barrels/sawhorse.
- You need to elevate the doors so that you can spray all sides of the frame.
- Make sure the doors overhang whatever they’re resting on so the paint doesn’t get smudged.
Step 4: Cover the mirrors.
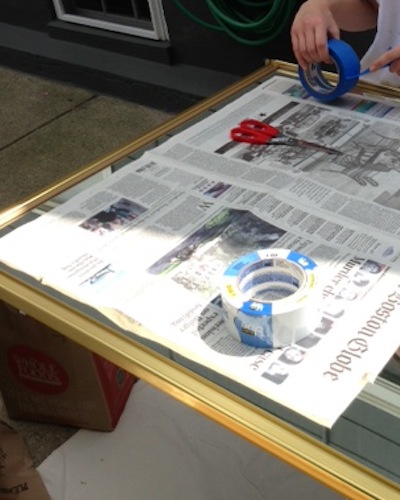
- You really don’t want to get paint on the mirrors–it’s very difficult to remove. So, cover every inch of each mirror with old newspaper/old paper bags.
- This was the most time-consuming aspect of the project, but well worth it since spray paint generates a fine mist that will completely ruin your mirrors.
- Frugal tip: I used painter’s tape (which is quite expensive, but performs superbly) around the edges where it was important to have a sharp line between the area being sprayed and the mirror. I used cheaper masking tape to hold down the paper in the center of the mirror
Step 5: Wipe the edges of the mirror down.
- Remove any dust or dirt from the door frames (the gold parts). The spray paint won’t adhere well if the mirror is dirty.
- Clean off the top and bottom tracks and front pieces and lay them out on a drop cloth.
Step 6: Spray away!
- Make sure there’s nothing within about a 5 foot radius–move all dogs, children, and patio furniture far away.
- Apply the spray primer first, then the paint.
- Shake the can of paint and spray in long strokes to avoid having the paint glob up. You want to move the can constantly at a steady pace while you’re spraying.
- Since the mirrors are propped up on their bins, you can easily walk around and spray as you walk. Make sure to get the edges of the frame since those’ll show when the doors are open.
- We did 1 coat of primer and 2 coats of paint on each door and the top and bottom tracks and front pieces.
Step 7: Remove paint from mirrors.
- Even with my copious taping and cover-up job, we still got some flecks of spray paint on the mirrors.
- Use a razor blade flat against the mirror to skim off dried particles of paint.
Step 8: Reassemble.
- Put the top and bottom tracks back in and maneuver each door back on track.
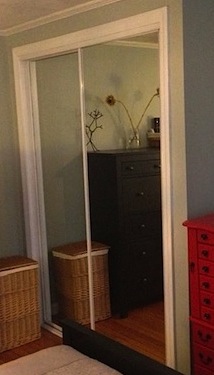
Step 9: Rejoice and admire!
Why not buy some new doors?
No, really, we’re not mainstream. And I suspect you aren’t either since you’re searching google for ways to make your 80’s gold sliding closet doors look nice for cheap. *High five*
We practice radical insourcing for most things that other folks would pay someone to do. It all part of our extreme (sometimes hilarious!) frugality. We’re busying saving money so that in 2017 we can quit our city jobs and move to a homestead in Vermont.
If you’d like the story from the beginning, check out our About page.
And good luck with the sliding closet door project! Don’t hesitate to ask questions in the comment section. We still read and reply to comments even though this post is over a year old.
(By the way, more than one year in and the doors are holding up famously. The paint is sticking well, even on the parts the get touched and abraded on a regular basis.)
I am thinking of doing the same. How is the paint holding up to everyday use? Thanks
Hi Luigi, thanks for the question! It’s actually holding up very well. I’ve noticed some peeling on the inside of the doors (where they touch the wood frame of the closet), but, it’s not visible when the doors are closed. I’m very pleased with the longevity of it so far. And, for the cost, I’m definitely glad I did it. Good luck!
I’m looking at changing my closet doors as well and stumbled across this post. Now that it’s been a year, is it still holding up? Still glad you did it? When do you think you’ll need to touch up? Thanks!
They’re holding up really well! It has actually been two years since I refinished them (this post came after the fact) and they’re showing no visible signs of chipping. I haven’t needed to touch them up at all yet, so hopefully they’ll keep going strong for another few years. Good luck with your project :)!
Good to hear! Thanks for the post and for replying. Very helpful.
Hello, You article was very useful. I am in the same situation. Since I won’t have help in removing the mirrored doors & putting them back in, is it possible to just brush paint (using the same brand paint you mentioned – except not the spray version) them in place? Will start with light coat first & perhaps second coat after it dries. Ofcourse after covering up all the other areas around where the paint will go. Is it doable? I understand it might be very time consuming, but I am willing to spend whatever time it takes.
Hi! Glad to hear the article was helpful! Your question is an interesting one and I’m honestly not sure. I think you probably could paint them in place, but, I’m not sure it would look as polished since you wouldn’t be able to fully paint all the sides. But, like you said, with time and patience I bet you can make it look awesome. Just be careful not to get paint on the mirrors–it was really hard to get it off ;)! Best of luck to you–I hope it turns out awesome!
Hi.. I’m interested in doing the same thing, without having to remove the doors. Did you end up using the paint? How’d it go?
Hello, great detailed post! thanks for sharing. I had my contractor do the same to my gold doors but he says that the paint for this particular product did not take in some areas especially in the grooves and just ran off. Did you need to sand some areas beforehand? Did you experience any running or not taking? thanks.
Hi Mark! I didn’t sand any of the gold, but I did thoroughly clean it before spray painting. If there’s any dirt or dust on the surface to be painted, the paint won’t adhere. I didn’t have any problem with paint not adhering and the doors are still looking great two years on. Good luck to you!
I just did this over the weekend, my closet doors that are probably from the 80’s look brand new! One step I did mess up on was not painting the back of the trim/valance piece, but I am the only one who can see it! Thank you for the advice, saved a ton of money on this simple update!
That’s so fabulous, Kristen! I’m so glad to hear it! Enjoy those trendy doors of yours 🙂
Love it! Never thought of doing that to mirrored doors. I have spraypainted lamps that didn’t fit our aesthetic, and that has worked super well for us.
Spray-painting lamps is a great idea too! I’m quite pleased with how the doors turned out and they’ve held up really well over the years.
Great post! Just moved and have 2 massive gold mirrored closet doors. From what you mentioned above , he paint is holding up well. Thanks for those updates. 2 questions – How is the bottom track holding up with all the sliding back and forth of the doors, i.e. is the gold showing through? I would think the weight of the doors would cause it to chip away over time. Did you have any sticking problems with the doors opening and closing smoothly when you first painted?
The paint is indeed holding up really well! The paint on the very inside bottom of the track has worn away a bit, but it’s not noticeable unless you’re looking straight down onto it. And, we didn’t have any problems with the doors sticking when we first painted them–just make sure to let them fully dry before you reinstall them. Best of luck to you :)!
Hello! My husband and I are recently retired and want to update our bedrooms as frugally as possible. Painting our brass framed closet doors is one of the first things we are thinking of tackling. Question — we noticed a very thin (also brass colored) rubber stripping on the inside edges of the brass frames (kind of a sealer between the mirror and the frame). Did you have this too, and if so, does the spray paint stick to it? Thank you!
The spray paint did indeed stick to that rubber seal pretty well. Plus, anything that’s on the inside won’t be noticeable from the exterior. Best of luck to you with the project :)!
Thank you so much for the reply!
Hi, I’m redoing one of our bedrooms and it has the same gold framed built-in wardrobe doors and was wanting to paint them. I’ve read all the questions others have asked and your replies but as this was first posted in 2014 I was wondering how the doors were standing up to the general wear and tear now in 2016! Thank you!
I need to replace the rubber seal on both doors. It is gold colored and I need a white rubber seal, Where do I go to buy the seal/
any help would be appreciated.
Did you find the rubber seal? If so, where did you find it? Mine is black.
I want to used the white Satin in the paint + primer. Do you think this would be ok? Why did you use flat white?
If you look back at the post, you’ll see that the primer is flat, and the paint is gloss.
How are they looking now? I have 5 rooms of gold wardrobes to do! Would be thousands to replace (in Australia) so love a good hack!
Hi I loved you post I have 4 Big gold mirror doors that I want to paint I have rust on one of the doors side and the track would it be possible to rub it down and paint it I would like it done in Crome
Thanks Marion .
Thank you for this post. My husband has tried to spray the frames but the paint keeps peeling off. I’ve asked him (he’d say I was nagging) if he cleaned it prior to spraying and he says he did. Any ideas why the primer won’t stick?
I sprayed the bottom track and they are now sticking. Any suggestions?
I am beginning this process in my MIL house who thinks I’m rude for not liking the doors and wanting to change them! She owns a glass shop! Lol! Wish me luck! I’m gonna need it!
So glad that I found this post. THANK YOU!
I just purchased two rental condos with these gold trimmed mirror closets. UGH! So my question is, do you think it’s a good idea to try to paint without removing the doors?
Hi
Inspired by this story, I have just finished painting the gold trims on two sliding-door wardrobes. I did the first one two months ago and since it wore well, I decided to do the second one over the holidays.
I could not take the doors down due to their size and the lack of a suitable workspace (I live in an apartment). So no spraying for me. I used the same paint as the walls (a matt grey, Dulux brand). Before painting, I applied a coat of Penetrol which helps hold the paint. I needed quite a variety of brushes: wide ones for large trims, tiny ones for the tiny nooks and crannies you don’t even realise are there until you see their reflection in the mirrors. The trickiest parts were the top box where the mirror door sits. You have to do the inside because it will reflect into the mirror otherwise but it’s awkward to reach. I finally used a sponge of the right size. Also tricky are the rubber joints.
The painting time is not enormous, but each coat needs to dry so the painting of one wardrobe was spread over the course of a week, doing 30-45 morning and evening. Some of the time was also spent cleaning any paint on the mirror from the previous day. I tried using painter’s tape around the mirror with the 1st wardrobe but found it did not allow the paint to go into the tidy gaps which then reflected in the mirror. It was just as easy to paint carefully without tape then clean up any spillage on the mirror the next day when dry. To clean the paint on the mirrors, I used plastic and wooden tools from my manicure set 🙂 which were small enough yet efficient enough to do the job without excessive pressure.
The overall result has been good enough for visitors to not even notice the trims were painted, yet saved me the A$2000 quoted by the wardrobe manufacturer to replace the trims (I understand they also have to replace the mirrors, hence the cost) and gives me the pleasure of achieving what I wanted at next to no cost.
I just wanted to take a moment and thank you for this DIY tutorial on how to paint and refinish gold-framed mirrored closet doors. It was quite a project, but thanks to your great instructions and taking the time to write them out, it made the job a whole lot easier! They are still holding up, too. Did the project about 3 years ago.
I love this whole post! I am going to copy you for sure!! However, my favorite part was, “Why not buy some new doors?…We’re weirdos….And I suspect you aren’t either since you’re searching google for ways to make your 80’s gold sliding closet doors look nice for cheap. *High five*”
haha!! You are darling!!
Hello! literally got my wardrobe doors down ready to start this project! my question – what about the black rubber along the inside of the mirror (which doesnt seem to remove easily) and the black rubber bumpers on the edges of the doors – remove or paint? (or replace is possible?)
Thanks
This is an update on my detailed comments of January 14, 2019, so one year later. I have used the doors on the main wardrobe several times daily and the smaller one weekly. In both cases, the paint has held up very well. The main wardrobe has a few scratches in the bottom track but I am the only one who has ever noticed. I also found a couple of very small spots I missed the first time (you have to look in the mirror from every direction to catch them all). I’ll be touching it up in the next few days with a teaspoon worth of paint and a fine brush.
All in all a very worthwhile project. Thanks to the Frugalwoods for showing me how it could be done!
I’m so glad to hear it has worked out so well for you! Thank you very much for the update!
Thanks for the help. I’m going to attempt painting my gold trimmed mirrored closet doors from the 80’s. Best to try this first before spending a ton of money on closet doors. Besides, the doors are still in great condition.
I did the same thing. Makes a HUGE difference. Except I left the closet doors up and used a brush to paint (huge mistake). Your way is the way to do it. Looks really nice!
Hi, thank you for the tips!!! How many cans of each did you use?
Hi there, I have 3 if these closet doors in my master and want to paint them matte black but the only question/fear i have is it it will hold up and not start peeling. Did yours ever peel?
Thank you! We were like 😫 at the price of new wardrobe doors … and it’s much better to reuse! Gah 80s gold though ..
Hi, I’ve been thinking about doing mine. Yours look great. What did you do with the glide rail at the bottom, which I presume was also gold. Surely that was rub off quite quickly.
I am so glad I found and read your post. My condo came with missing closet doors and I scored some from my neighbor. They are oriignal from the 70s-80s like yours. I plan to paint the gold to white or black and love your tutorial. Thank you so much!
Hi, I have a Mirrored door from the 70’s. I threw away the track thinking I was going to replace the door. But they were too expensive. Besides, I like the old doors. Where can I go to find the track for this door?