
Have you ever wondered if there’s a surefire way to get your pipes to freeze? Well, wonder no more! You’re in luck because Mr. Frugalwoods and I have uncovered this miraculous and amazingly practical wisdom!
All’s you have to do is go out of town on a weekend when the temperatures are predicted to be sub-zero. And presto! You’ll return home on Sunday night to the glory that is frozen pipes.
As I previewed in our February expense report, quite a few things decided to helpfully break last month around the ol’ Frugalwoods HQ. So many things, in fact, that I’ve decided to launch a miniseries devoted to this excellent topic. Stay tuned for riveting new editions as sundry bits continue to degrade in and around our home!
It Started Innocently Enough…

As you might’ve surmised, this is–unfortunately–not hyperbole. Nope. This tale is drawn straight from real life events at the Frugalwoods abode. Being geniuses, we decided to go up to Vermont for a snowshoeing trip on what turned out to be the coldest few days in Cambridge this year.
But, we’re geniuses remember? And so, we carefully opened all of our sink cabinets, turned the heat to a scorching 67 degrees (up from our usual 62 during the day and 58 at night) and left trickles running from our faucets. This is our standard operating procedure for extreme cold and it has always worked in the past. The operative word there being “past.”
The upside is that we had a delightful weekend tromping through the woods on snowshoes with Babywoods and Frugal Hound. So yay for that! But when we returned home on Sunday evening, I went to wash my hands in the bathroom sink and… no water was forthcoming.
Cue the mild panic. I checked the kitchen faucet and similarly, nothing gushed forth. I raced down to the basement fearing I’d find a foot of water, but mercifully, it was dry. Hence, we deduced that our pipes were frozen.
A Moment Of Angst
In that moment, I’ll be honest with you, we were pretty frustrated–to put it mildly. We’d just driven three hours with a 3-month-old and a greyhound and we were all hungry, tired, and grouchy. Frugal Hound needed a walk, Babywoods needed to nurse, and Mommywoods and Daddywoods were ready for a frozen pizza, a beer, and bed. Dealing with an absence of indoor plumbing really was not high on our bucket list. Our initial reaction was to call someone to come make the problem disappear for us. In the heat (or rather, cold) of stressful moments, that temptation to just pay a problem away is visceral and hard to overcome. But, we took the dog out, fed the baby, ate a snack, and re-grouped.

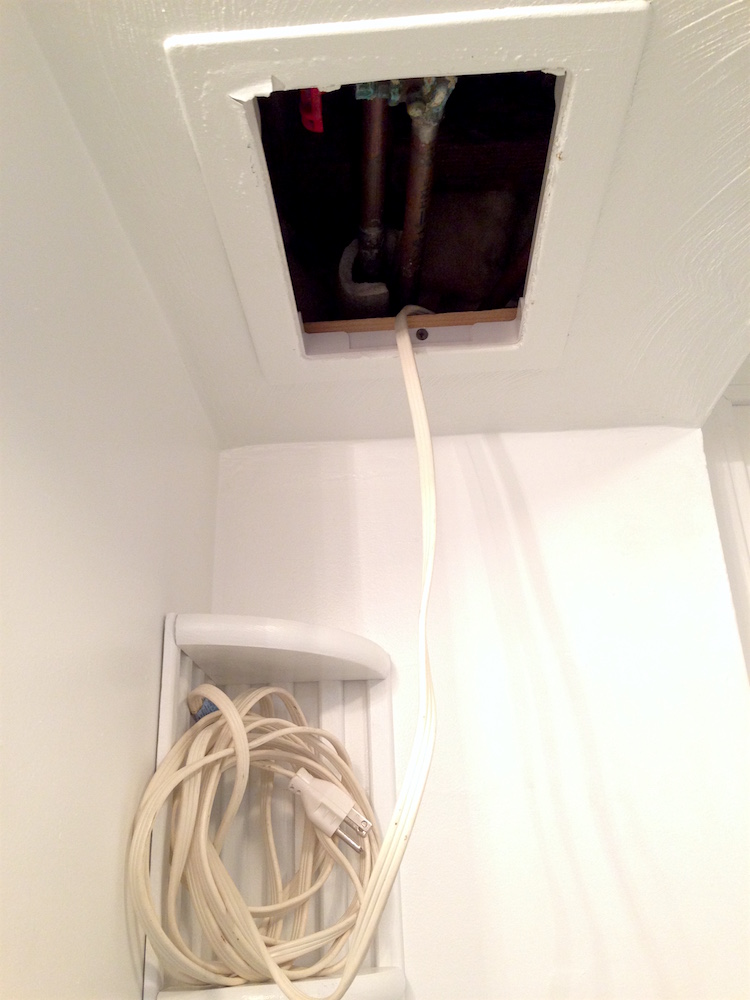
After gathering our frugal wits about us, we set about performing the patented Frugalwoods pipe warming methodology. This involved opening up the access hatches to the pipes in the basement and then wrapping them in heating pads (including my lavender-scented rice neck warmer), pointing a hairdryer at the offending pipes, and setting up our space heater to do its thing. We were successful in restoring life and vitality to our main floor bathroom pipes. Tragically, one of the kitchen pipes met a different fate: it had burst and when we thawed it out, water sprayed everywhere…
Fortunately, in anticipation of this suboptimal outcome, Mr. FW had leapt into the crawl space where the pipes are located and positioned a plastic tub to collect water. Thus, we were spared the agony of water damage. I was now simultaneously breastfeeding Babywoods (babies do not wait for their dinners) and holding a hairdryer on the pipes as Mr. FW shut off the main valve to prevent additional water from flowing into our meagre collection buckets.
We Called A Real Live Plumber (and then changed our minds)
Following this exciting string of events, we decided to call the professionals. While Mr. FW monitored the unfolding fiasco in the basement, I called a veritable ton of plumbers. Being both a Sunday and an evening, I quickly discovered this would cost us A Lot. Plus, most plumbers were backed up due to the apparently epic number of pipes that’d burst over the frigid weekend. I finally found someone willing to come over that night, but he was going to charge us $350 just to step foot inside the house–a hefty sum that didn’t include any parts or labor.
Mr. FW and I debated the merits of paying a professional for about a minute before Mr. FW decided he’d take a crack at repairing the situation himself. Having not done much plumbing before, he first hit up two invaluable tools in every frugal weirdo’s belt: YouTube and This Old House. You can learn how to do anything on YouTube. Seriously, anything. We’ve used it for everything from giving haircuts to putting up drywall. And This Old House is our gold standard for home improvement info.
An hour later, Mr. FW emerged from behind his computer with a Home Depot shopping list in hand, basic plumbing knowledge, and the optimism of a true frugal weirdo. Thusly armed, he set off to fortify himself with tools and materials.
The Actual Plumbing (boring if not interested in DIY plumbing; wonderful if are; should probably read anyway since it’ll mess up story if don’t… just saying)
For those of you similarly interested in DIY-ing a fix to your own plumbing clustercrap at some point, here’s the rundown on our specific issue.
The underlying problem is that both rooms in our house with plumbing (the main floor bathroom and the kitchen) are built on top of unheated (though insulated) crawl spaces and not over the basement itself. Additionally, the pipes in those unheated crawl spaces run up exterior walls (which are colder than interior walls).
Also, all of these pipes are copper. If you were trying to design an absolutely terrible system for plumbing, you could not possibly make it any worse than this. Whoever installed this plumbing in our 120-year-old house should seriously win a Darwin Award for failed architecture.
When the temperature plummeted to -8 one night while we were away, the cold water pipe in the kitchen crawl space froze hard enough that it burst and when we set about warming it up, water spewed forth. The hot water pipe froze too, but didn’t burst. Both pipes in the bathroom froze as well, but thankfully didn’t burst.
Mr. FW did the following to fix the kitchen plumbing branch:
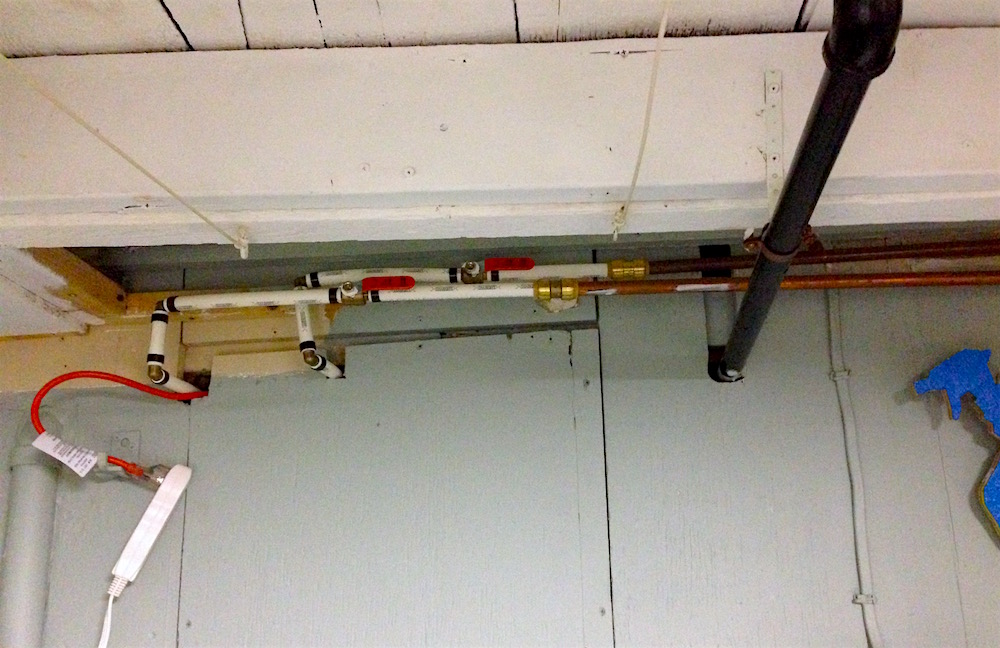
1) The ancient gate valve on the kitchen plumbing branch would not fully turn off after the pipes were thawed. So, we turned off the main water valve. Mr. FW installed several new ball valves to that branch to enable fully turning off the water to that section of plumbing, which allowed us to turn the water back on for the rest of the house (as it happens, this is pretty crucial for people like me who like to use the bathroom occassionally).
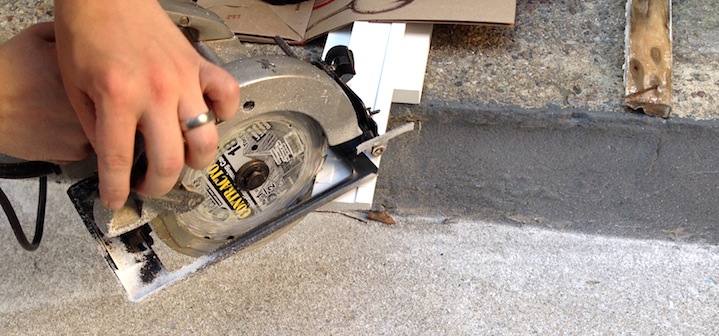
2) He then cut out all of the old copper pipe on the kitchen branch and replaced it with PEX (a type of plastic tubing), which both resists freezing and also tends not to burst when frozen, because it’s cleverly designed to expand. In the interest of future-proofing, he went ahead and replaced both the hot and cold water pipes in the kitchen because why not when you’re already having so much fun?!
3) Mr. FW installed heat tape along the PEX (note: this is heat tape specifically rated for use with PEX) and then wrapped fiberglass pipe insulation around the pipe and heat tape. This is a belt and suspenders approach to keeping it unfrozen in the future. Heat tape is basically an electric blanket for your pipes–it’s a wire that you connect to a pipe via electrical tape. It has a thermostat that senses the temperature of a pipe, and when a pipe gets below 40 degrees, the heat tape turns on. Brilliant!

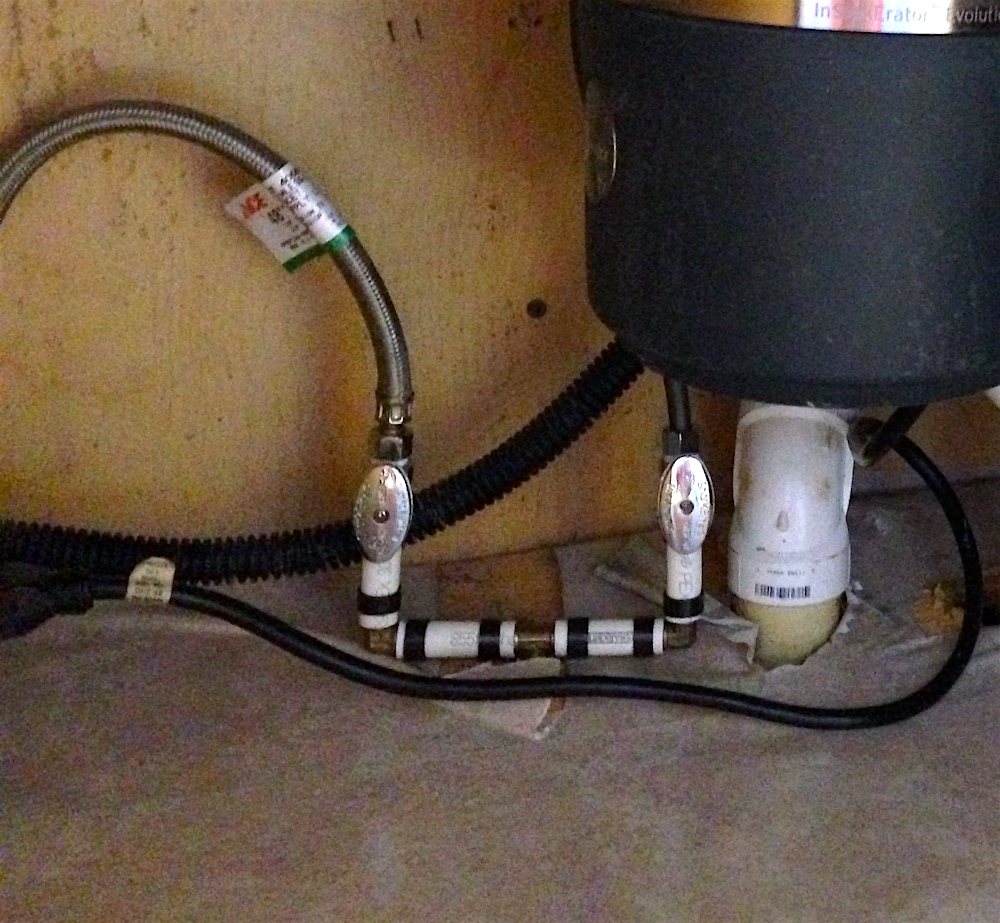
Additionally, Mr. FW ended up taking apart and cleaning out our kitchen faucet because once the water came back on, it mysteriously wouldn’t flow out of the kitchen faucet at a normal rate. A bit of googling revealed the likely culprit: sediment in the pipe was dislodged when it burst and traveled up to–oh so helpfully–clog our faucet. Rather than spend several hundred dollars to replace our faucet, he discovered that it was possible to take it apart, clean it, and re-install it. Frugal woot!
For our bathroom, since neither the hot or cold lines burst and it would be impossible to re-plumb without ripping apart the tile in the bathroom (not something we want to do), he just ran heat tape along the existing copper pipe and added insulation on top of that.
Several lessons we learned in this process:
1) If you’re not going to repair your plumbing yourself, try to avoid calling a plumber after hours on the weekend (especially following a historically cold night when lots of people’s pipes burst). This’ll save you from paying “emergency” plumbing rates.
2) If you do a project yourself, you can over-engineer it however you see fit (heat tape and insulation!) in the hopes of ensuring you won’t encounter the same botheration ever again.
3) Doing it yourself also means you’ll reveal the nuances of your home’s plumbing systems, which puts you in a good position to deal with future issues. Also advantageous if you plan to take on elective plumbing ventures, such as adding or relocating a bathroom.
4) Know where the main water valve is in your house. If water starts spraying out of a burst pipe and you’re able to quickly turn off the water to your house, that’s the difference between having a puddle to mop up vs. thousands of dollars in water damage. Go find your main valve right now if you aren’t already familiar with its location.

5) Fixing one problem invariably leads to a new problem. To whit: we discovered that our main water valve is an ancient gate valve that now must be replaced. It’ll be a good investment to replace it with a modern ball valve as that’ll provide an “oh crap water is going everywhere” solution for our eventual tenants should a dastardly frozen pipe transpire down the road.
6) Greyhounds and babies are both totally worthless in assisting with a plumbing conundrum. But they both look adorable while doing it!
7) PEX is really easy to install. Mr. FW was pleasantly surprised at how simple it was to work with and he feels pretty confident he could teach a 7-year-old how to do it. I then asked if he could teach me how to do it and, after a pause, he said yes. So that should be a great indicator of its ease of use.
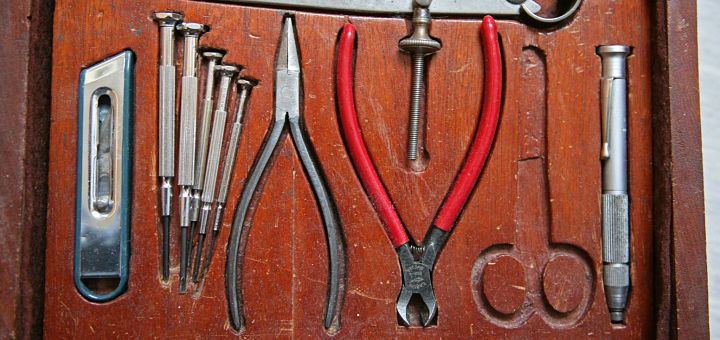
The Tools and Materials We Used
- Mr. FW chose white PEX because he didn’t feel the need to color code our plumbing. Really, he just didn’t want to buy two rolls of tubing. Color is purely aesthetic.
- He used sharkbite couplings to join PEX to the existing copper plumbing in the basement. These things are magic, but are also expensive; so, he only used them on the copper-PEX union.
- For joining PEX, he used the crimp copper ring method with this crimper and these rings.
- Right after the sharkbite PEX-copper union, he put new PEX barb ball valves.
- Then, he ran the PEX up into the crawlspace with a series of 90 degree couplings as needed.
- Once he routed the PEX all the way under the kitchen sink, he finished it off with some 1/2″ to 3/8″ ball valves.
- Other tools used include a cheapo PEX cutter and a small-spaces copper cutter for removing the old copper pipe.
- This is the heat tape he used.
How to cut, crimp, and sharkbite PEX pipe connection
The Double Benefit Of Insourcing (aka why we do these things ourselves)
Although we spent $324.16 on plumbing parts and tools, in our minds this was a far better expenditure than hiring a plumber. Why? Because of the beautiful double benefit of insourcing: not only is the problem ameliorated, but Mr. FW also learned basic plumbing. Plus, we now own plumbing tools that can be used in any future iteration of plumbing predicament.
Another reason it was advantageous to have Mr. FW do the plumbing himself is that we wanted to redeem this mess both for the present moment but also for the future since this house is destined to be a rental property. He did his level best to future-proof the pipes against a similar calamity once we have tenants. There’s also a great deal of pride that stems from extreme insourcing. We don’t just have working pipes, we have a catalogue of Mr. FW’s accomplishments in PEX form.
Insourcing is the ultimate frugal endeavor as it enfranchises us to take on projects, develop new skills, and ultimately save money. The talents we’ve accrued over the years compound our savings because we essentially save money each time we fix something ourselves or perform a task on our own. It’s the paragon of teaching oneself to fish. This isn’t to say that we never pay professionals–we most certainly do in some instances. But, we’re very circumspect about deciding when to do so. The mindset of not automatically defaulting to paying other people is a valuable approach that makes us generally more creative and industrious (and occasionally foolish) frugal weirdos.

Go Mr. FW! Home repair is one of those areas where DIYing saves so much. And it’s awesome, if inconvenient, to learn those skills as well. Last winter we discovered that our home’s exterior wall underneath the deck had rotted from a combination of water and carpenter ants. It was a big project but with the help of his brother and the Internet, we insourced the project and saved around $6,000.
Totally stinks that this happened to you but I’m glad you were able to make a go of repairing the plumbing yourselves. I’m totally not handy but I suppose I can be when I want to. The real issue is fear — of screwing something up or of wasting even more money on trying to DIY something and then having to call a pro on top of things.
A few things I have successfully DIYed (don’t laugh- you have to start somewhere): painting (and I have 14-foot ceilings); fixing my broken toilet handle and sinker; fixing my garbage disposa.
Babywoods is getting cuter by the minute 🙂
I assume you can sell the old copper piping for a tidy sum (you can here!) so you may even end up with less net cash outflow. The copper is so valuable that people in my area have problems with people stealing copper pipes that are accessible from outside (we do not have foundations or basements – everything is built on piers and most of the houses date from the late 1800’s, early 1900’s).
I have started a mantra of “try it yourself first” and have found that many things are simpler….or at least more doable….than we think. Unfortunately, our pipe burst this year was outdoor, in the main water line, right in the middle of the cement driveway. Upon inspection, we learned the pipe used in our area just 20-30 years ago would complete with your Darwin Award nominee so it’s more logical to replace the entire line than fix the trouble spot. Not sure my novice DIY skills are ready for concrete demo and main water line playing when we plan on selling in the next few years!
One question – when you are going rogue on these DIY adventures, are you ever concerned about proper permits or inspections or all those things the professionals always ‘include’ in their work?
“I have started a mantra of “try it yourself first” and have found that many things are simpler….or at least more doable….than we think.”
Yes! YES! YES!!
I try to do everything myself and almost always succeed. Friends look at me in awe, but I tell them that their day job (programming computers, accounting, engineering) is much harder than hanging a ceiling fan or changing out a car part. The hardest part is mustering the courage to try.
funny you use those examples – I changed my spark plugs for the first time a couple months ago when I usually used my brother for such activities. And I have a ceiling fan that’s been sitting in my garage for 2 years begging to be installed and I just haven’t done it so it made my list of 100 things to do 🙂 Once I do something, I call myself basically an expert. Fixed a toilet – basically a plumber, changed the spark plugs – basically a car mechanic, took an American Ninja Warrior class at my gym (SO FUN) – basically a ninja!
You are ninja; a Life Ninja! Now, get that fan out of the garage and on your ceiling!
Love this. Our old Somerville apartment had the same issues in the hallway (unheated and underinsulated) but we were luckily able to heat the pipes with a hair dryer. I’m sure you’ll do the appropriate research but it’s helpful to have a guide for tenants on “If this happens, do this…” otherwise as landlords, you might get stuck with the bill for the plumber if the pipes freeze. We had to instruct the future tenants to keep the heat on in the hallway to avoid it since we didn’t want to pay for a plumber.
Our new insourcing project is learning how to use and fix our well water system. It’s been worth it for drinking water safety to pay for the company to come out to service it but my husband has been staying home for those appointments to learn how to do the services. The workers are usually willing to explain what they’re doing so instead of a $200 service visit, we can order the filters online for $10 and my husband installs them. It still needs a yearly service but we can cut down on the costs.
It sounds like whatever genius planned out your house designed mine as well! (1900 rowhouse in Baltimore) I had to replace the plumbing under the sink last year, but wanted to stick with copper so rather than DIY I called Dad and his blow torch to weld it in. Although the I did watch and ask questions, I have a healthy “respect” of blow torches after some past failed attempts :(. Curiousity question: is there any kind of funny or off taste with the PEX pipe instead of copper?
Babywoods is adorable!!
We just remodeled part of our home and we did quite a bit ourselves. We did the demo of course, and my husband installed the new plumbing and fixtures. We also painted everything, which saved a ton of money because painters are so expensive!
Glad you fixed your pipes up and didn’t have too much water damage or anything!
I have to say this is pretty amazing. I need to replace all 3 of our toilet shut off valves (first world problems: having 3 indoor toilets to maintain!). I’ve been procrastinating and planning on calling a neighborhood plumber guy to see what it’ll cost. Now I’m tempted to try DIYing it. Plumbing scares me because water can go everywhere if you mess up and the mistake might not be apparent for a while.
Do that yourself! I am a huge klutz, terrible at anything mechanical, and I’ve done both toilet valves and the two kitchen sink valves in our house. Watch a few YouTube videos, but I’m pretty sure literally all the tools I used were two adjustable wrenches. Or maybe a wrench and a pair of pliers. There is no wall cutting involved. Unless your plumbing is really old or corroded, or you mess it up taking the old valve off, you can probably just reuse the old compression ring assembly that’s already on the pipe coming off of the wall, even though a real plumber would not do this. The nice thing about toilet valves is it’s easy to check if they start leaking, and the floor is probably already water resistant, so they are really low risk. You can get the new toilet supply hoses with the easy-on attachment that you just hand tighten until they click on the toilet side. Also get quarter turn shutoff valves, they are easier/quicker to turn off and there is ~no scenario where you need your toilet valves to be halfway on – either you want then on or off.
You need to shut off the water supply to your house to do this, but you should figure out where/how to do this anyway if you don’t already know, so you can mitigate damage if there is some emergency like a burst pipe where you need the water off immediately.
You can get the fanciest toilet shutoff valves ever and have to make six trips to the hardware store for things you forgot and you will still be cheaper than calling a plumber, so that should also make you feel better.
I ended up going with a plumber. 3 toilet shut off valves plus a kitchen sink hot water shut off valve (with 2 way splitter for sink and dishwasher). $225 out the door.
This guy did them right. Blowtorch to sweat off 2 of them and then reconnected to copper pipe using compression fittings. Other than the 2 way splitter in the kitchen, these are quarter turn valves.
Wonderful insourcing story, stinks your pipes froze but at least they were still frozen when you discovered it… the worst is having them thaw, leak, and you discover it because of all the water!
I love insourcing projects because you learn a lot. Most jobs are fairly simple, especially with Youtube and TOH, and it’s just a matter of knowing the vocabulary so you can get the parts from your local hardware store. Just this weekend I had a simple project of refilling calcite on our acid neutralizer tank. A normally $150+materials job done in about an hour and without much headache… and I don’t have to wait for a stranger to show up!
Well done, but in the name of public awareness, I have to throw this out there! In some states (like ours, Fl and I’ve heard CA as well), PEX is not considered to be a good product and can seriously limit your options when it comes to homeowner’s insurance coverage. We briefly considered putting in a PEX line instead of copper when we had to re-do the water line for our refrigerator (the flexibility would have made for an easier install, but insurance companies around here don’t all insure houses that have PEX plumbing and we didn’t want to close off any options to us.
Hi Mrs. PoP! I remember you telling me this as well. This seems to be nearsightedness on the part of insurance companies. I did some research (“Hello Google!”) and the only thing I could find was this:
“The issue regarding a Pex installation is not the piping itself but inferior Zurn brass connectors that were used at the plumbing connections. Again—made in China.”
I wonder if Florida builders use more junk from China than the rest of the country? I know there was an issue with Chinese made drywall in the state too. If you have found a different reason, I’d love to hear it!
In cold weather areas, using PEX should result in an insurance discount. I had a significant amount of PEX freeze solid during a particularly nasty Wisconsin cold spell. While PEX doesn’t claim that it can survive a hard freeze, it is much more likely to do so than copper.
And then you have the issue of lowlifes stealing copper. In the same WI house, someone broke in and stole ours. I actually walked in while he was in the basement removing it. Scary story! He stealthily ran out the back door and was gone by the time I realized what was going on.
From what our insurance guy told us, it sounds like the old fittings were more susceptible to “dezincification”, but that a lot are still skeeved out about PEX down here because it is vulnerable to UV deterioration. Leave PEX out in the sun for a week or two before you use it and it might still look fine, but its integrity when it comes to withstanding chlorine in water will be severely diminished.
Don’t get me wrong, plumbers still use PEX down here (our neighbors just had their whole house replumbed with PEX, but we’ve had enough trouble finding companies willing to insure our house that we don’t want to add another challenge.
I’ve learned so much from both the FIRE blogs and the comments! Really appreciate this community. I never would have considered that an insurance company would decline coverage based on the types of plumbing used. Fascinating. Now, will I remember this when the need arises?
We are also Floridians (originally from MA), and I agree…nothing upon nothing is worth messing up your homeowners’ insurance over. We live on a barrier island, and we have very few insurers who write out here. It’s more economical to follow their rules than it is to end up on Citizens’ involuntarily!
That’s funny you bring up the Zurn connectors. We just had to have ours replaced- there is actually a class action lawsuit out there for them! The Zurn connectors were definitely a problem in our house and de-zincified, leading to possible leaks.
Wow, impressive! Funny how you can always do (or learn to do) more than you think at first. True Renaissance persons you are!
And Babywoods looks adorable while overseeing the plumbing works indeed.
I never knew plumbing could be so fascinating. I am sure Babywoods learned something too! She is SO adorable.
Okay, this is a super lame example of ‘in-sourcing’ but I learned how to snake hair from a drain in order to keep my mother from calling a plumber to do it for us. Nothing like a little elbow grease to save you a good $250+!
When our oldest son was 15 months old, after a big ice storm, our roof started leaking. Over our bed. Since my husband was working long hours and I was chasing a toddler, we decided to hire a roofer. We got estimates and finally found a roofer willing to start right away- all of the others were at least 2 months out. Then our roofer (who had been in business for 30 years, very reputable, etc etc) failed to ever show up. We could not reach him by phone. We ended up calling everyone we knew and organizing an intense weekend long roofing party. This happened in February. It was freezing cold. There was an icy drizzle. I don’t know that we learned a lot of valuable roofing skills (roofing is pretty straightforward) and we did not save much money over the estimate, but we did learn that dang, a lot of people really love us.
Bravo! Hubby is HVAC/Plumbing pro and he says you did a good job. And I second selling the scrap copper — even if you only have a little, it will bring in a few bucks.
So did you borrow or purchase the $120 PEX Crimper tool, noticed it was not mentioned in your list.
They do have a link to a crimper, $67.97 on Amazon, but it lists for $59.92 at Home Depot where I think they went. My local Lowe’s lists crimpers for as low as $39.00.
Ahhh, The Joy of PEX! Almost as good as The Joy of … Never mind!
PEX is wonderful. I redid all of the plumbing in my crawlspace in about 8 hours with PEX. And I had never used it before. It would have taken me 4 hours if wasn’t on my hands and knees dodging spiders the whole time.
Plumbers should fear PEX like taxi drivers fear Uber or like mailmen fear large canines. Well, may be that is extreme, but there was just no way I was going to pay a plumber $3500 for my own home addition when I knew I could get it done for 1o% of that.
Great post FW. Sounds like Mr. FW earned some points on this fiasco!
We don’t have problems with pipes freezing here out west, but if ever I have a plumbing problem…its PEX to the rescue!
Open question: why do plumbers hide the main shutoff valves in such hard-to-get places?
Sharkbite couplings are nothing short of miraculous… I might like them even more than PEX (blasphemy, I know). Plumbing is the one “handy man” project that I can deal with (although my husband is admittedly better), and once you have a nice set of tools (including a blow torch if you’ve got copper pipes), you’ll save hundreds or even thousands per year.
One thing you might consider for when you have a renter is teaching them to use a drain snake. If our renter has a clog, and she informs us that she snaked the drain and used draino we give her a $35 credit off her rent. Since the plumbing is super janky, this has happened 3 times in the last year, but it also saved us from having to make the arduous 15 minute journey to our rental property or from calling a plumber if we’re out of town.
Whoah there Hannah with the Drano! If you have old pipes, Drano can do some damage! If you PVC or ABS, you’re fine.
I do love the idea of incentivizing your renters to fix the problem themselves though!
Drano is about the worst thing that ever happened to an innocent pipe. Please do not use it, especially if you think you are going to have to snake the drain later on. When the clog busts open, you can get splashed with Drano (basically lye), and it will burn holes in your clothes. DH has several sweatshirts that he reserves for drain cleaning for just this reason. Try vinegar and baking soda, followed by boiling water, first.
And it also goes into the water supply. We use a dedicated (to the kitchen sink) plunger.
You guys rock!!!!!
Just want to send a shout-out to our hardworking plumbers, of which DH is one. It is one thing to fix a broken water pipe yourself; it is quite another if you want to install a hot water tank, mess around with a furnace, etc. Those jobs require professionals because you have to pull a permit with the town plumbing inspector.
I am in NH. I so enjoy your posts and your lovely little family with baby woods and frugal hound. I went to graduate school in Boston and lived in Cambridge.. I have learned so much from your posts in a a very enjoyable way. I am 55 now, and wish I had the understanding you both have about money, when I was your age. Thank you so much.
Super impressed! The last time I monkeyed with the plumbing, I did a couple hundred dollars’ worth of damage. (No excuse–the leak was under the kitchen sink and I REALLY should have noticed it.
The most recent thing I decided NOT to insource was replacing a circuit breaker. Electricity can (a) kill you, although apparently this is quite rare in residential work0 and (b) burn your house down while your children are sleeping, so I thought better not.
On the other hand, I lived without a dishwasher for a full week so I could fix it myself, and the root cause of the circuit breaker’s death–a burnt-out oven heating element–I feel confident I can do myself.
I’m trying to be more confident. My mother, who is 4’11” tall, rented a drum sander and refinished her own hardwood floors. And they looked beautiful! (Full disclosure: the first room she tackled had to be redone.
This post reminded me why I am so glad I sold my house and now rent. I’m glad it worked out for y’all so well.
Bummer about the pipes – my family in New England had a near miss with just frozen, not burst pipes a few weeks ago. Great to see you fixed it quickly and came out ahead with a new skill set. Optimism win!
Insourcing has totally changed my perception on becoming financially independent. From DIY home repairs, car repairs or even homemade cooking learning a skill reaps multiples beyond paying someone else. In my experience I have yet to do a repair that requires tools that have not paid for themselves. Floor jack and jack stands, new for several hundred dollars? No problem, those oil changes and brake jobs in my garage paid for themselves.
I think you had another often overlooked point beyond money. Now you both know how your house is plumbed – and what needs to be updated. I became intimately knowledgeable about my old car’s coolant system. So much, to the point where I could predict down to the specific o-ring when there was a leak.
My father always in-sourced all the plumbing, carpentry, and electrical. I’m glad he did because now all the little things people don’t know how to fix and hire people for, I know how to do 🙂
Kudos to Mr. Frugalwoods for fixing the pipes and kudos to you momma for feeding Babywoods while using a blow dryer to thaw pipes. As a new momma myself, I’m in awe of your multitasking skills!!
Mrs. FW, I absolutely LOVE reading your blog. You are such an entertaining writer! Good on ya and Mr. FW for doing it yourselves.
RE: coming home to plumbing disaster – My partner and I moved to our new (to us) homestead a couple of years ago. After several delays, we finally headed across country for a 4-day, 3-night road trip with our pets, camping out so we would not have to find hotels that would take the pets and schlep them in and out from the vehicle. So there we were, finally home, tired, dirty, hungry, thirsty, in need of showers, and of course, there was no water when we arrived. It was late spring, so had nothing to do with frozen pipes, but turned out the pump had failed. We called the contractor who had done plumbing work on the place in anticipation of our arrival, and he was available to make good, but not until the next day. Our good move was to have redundancy in place at our rural homestead, and so at least we were able to draw water with our hand pump and run it though our water purifier to have cooking and drinking and washing water (although no showers until the next day, *sigh*). If we’d not had some sort of warranty in place, I suspect it would have cost a bundle to have the contractor come out and fix the pump. We subsequently taught ourselves some plumbing skills when we had to install a water heater and replace a leaky pipe. It’s worth the time for the money savings and the satisfaction of knowing you can do it yourself and do it right.
Anyway, thanks again for a great read.
This is great! My husband has been doing this for years, renovating two homes for us since he first learned how to put a pex pipe on 10 years ago. Plumbing is super easy these days with Shark Bites and other options. Happy you’ve tackled another new learning experience and didn’t settle for a pro (who sometimes doesn’t ever completely fix the problem anyway!).
That is a pretty handy crimper & a lot smaller than the one we are using for our project. We are building our house & doing as much work as we can ourselves. We are installing PEX & the crimper we have has interchangeable dies & you grab each handle with a hand. I’m sure it’s more commercial & durable, but it can be tedious remembering to get all the 3/4″ before changing the die to do the 1/2″ couplings. We try to have one of us work ahead & the second person does the crimping as much as possible.
Nice work!! I just texted me husband, asking him to show me our main water valve tonight. 🙂
Good for you. Marge hates when I attempt any plumbing. It usually ends up taking days or weeks. Luckily we have two full bathrooms, so an out-of-commission toilet is not a huge problem.
I had to call the experts on a weekend for our rental property when the boiler wouldn’t turn on and it was getting cold. It was either call the expert or be the landlord that takes two weeks to fix something! Painful, but necessary. And then came the verdict: Someone had turned off the boiler at a switch I never saw before. $200 for labor and materials (a piece of tape to put over the switch so it doesn’t happen again)
When something like that happens I think of it as tuition for homeowner’s school.
So, in Canada when we leave home in the winter for a short time we turn of the main valve and open the tap farthest from the supply. And hot water pilot light goes to low. If the house is to be left for longer than a week or two you do the previous steps, and drain the hot water tank (and turn it off). I know snowbirds that do this for the entire winter; no burst pipes and insurance is still valid. (Obviously you’d want to check that with your provider).
Nice Mr. Frugalwoods. I don’t have that kind of skills. I wish I had because I spend so much on hiring a contractor if there’s a repair at home. It’s nice that you’re able to do this on you own and wouldn’t spend much.
Hey Frugalwoods, long time reader first time caller… er, poster. Thanks for another useful, informative post! I wanted to ask, how much energy does the pipe warming tape use when in ‘standby’ mode? This could be a great solution for us but was curious if the tape ends up being a silent energy hog.
You guys rock! When we bought our old farmhouse, Hubby crawled underneath and emerged to announce that it did, indeed, have plumbing – GARDEN HOSES! He got the Readers’ Digest How To book out and replumbed the whole thing. It’s been 27 years and the plumbing is getting tired. Fortunately, we are now retired and are looking at this as one of our (many!) warmer-weather projects. All the best and thanks again for this great post! Lee and Lee
We did repairs with PEX and Shark Bites last winter. It was without doubt the easiest and most inexpensive repairs I’ve done compared to hiring a plumber. I’ve decided to continue to replumb the whole house with PEX to avoid future disasters so common in Northern New England.
I noticed the comments about the crimper and just want to add that when we did our repairs we only used three things: PEX tubing, Shark Bites, and a pipe cutter to cut the old pipe out and to cut the PEX which I suppose could be cut with a razor type box cutter or hack saw.