
If you’re just tuning in, this is a recurring series in which I document each month of our lives out here on our 66-acre Vermont homestead. After leaving urban Cambridge, MA in May 2016 to chart this wholly different life, we’re experiencing a constant learning curve of exploration (and plenty of stupid novice moments). Check out last month’s installment here and enjoy the best and worst (ok, mostly the worst) moments of our first year on the homestead here.
October 2017
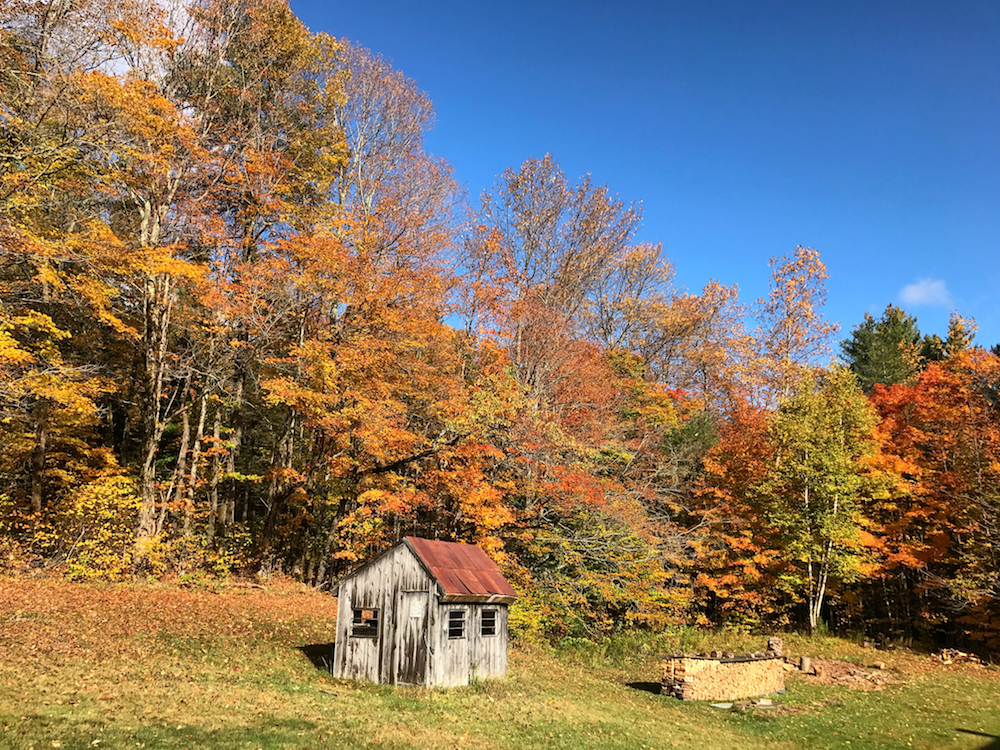
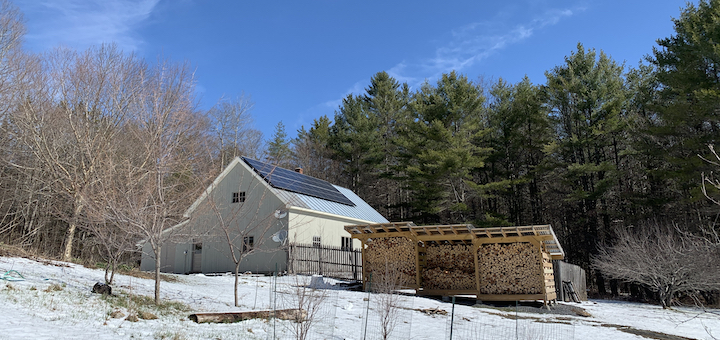
October is, without a doubt, leaf month. Gone are the monochromatic, dewy greens–all replaced by the wildfire hues of fall. Even our blackberry bush leaves turned a burnt amber in solidarity with their taller brethren.
Peak leaf–when nature’s colors are at their zenith–took place the first weekend of October. The hills of our little town were punctuated by flaming reds, yellows, and oranges that jutted ostentatiously among the effervescent green pines.
A herd of cows that grazes on a sloping hill near our home enjoyed the best view of all, situated as they were in a virtual theater-in-the-round of leaf colors most of us would pay good money to see. Yet the cows, unbothered by this transmutation of the trees, grazed on. Heads down, bent on their purpose, cows are among the more unconcerned, zen residents among us. And it was with this backdrop of fall’s enduring, but always surprising, palette that we relished our second October on the homestead.
The Last Of The Garden
October heralded the final month for our vegetable garden as our first frost rolled in mid-month. We savored our final meals fresh from our land: Mr. Frugalwoods’ Asian-inspired spicy stir-fry of kale, chard, beans, and hot peppers, all grown mere feet from our kitchen. I harvested the final few cucumbers, which Mr. FW ably pickled and canned. Babywoods and I gathered up the final green beans on the vine, and picked every last tomato and pepper the day before our first frost.
In our classic laid-back (some might say lazy) fashion, I forgot about left the un-ripened tomatoes in a leftover cottage cheese container on our counter with a promise to research how to store un-ripened tomatoes and peppers. Lucky for me, before I could get around to googling this, they up and ripened themselves! That’s my kind of gardening. We’re still munching on the remaining tomatoes and peppers as they slowly ripen indoors. A final jolt of foodie summertime to take us into winter.
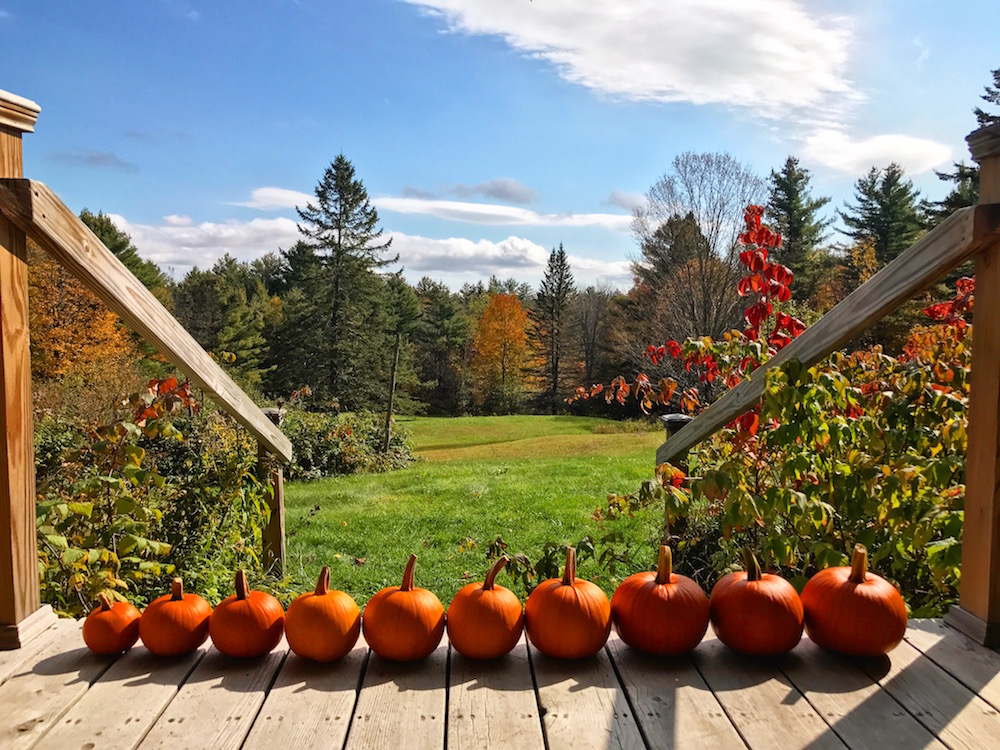
Mr. FW also harvested our adorable little crop of ten wee baby pumpkins! They grew quite well this year, thanks in large part to the cardboard he put down underneath them, which kept the invasive weeds at bay. Babywoods found true love with these little pumpkins and she hugged each of them and then carried them around the house with her for weeks. I found her reading a story to one of the pumpkins and another pumpkin carefully placed on the couch with a blanket around it. My little farm girl. I have to break it to her that the pumpkin’s days are numbered as they’re destined to become pumpkin stew in the very near future.
But the most audacious, the most beautiful, the most delectable, and certainly the most labor-intensive (funny how those things often go together… ) harvest of all were our…
APPLES!!!
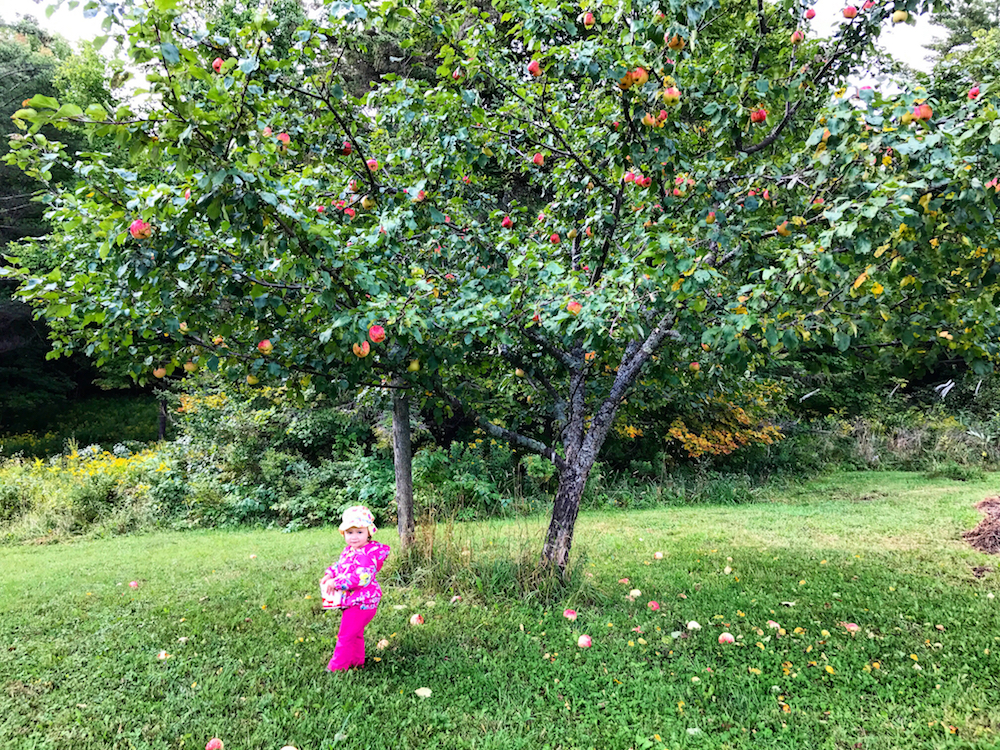
We have one early ripening variety of apples, called Red Duchess, which we harvested back in September. These apples grow to the size of what I call “grocery store” apples and they’re almost uniformly round and lovely. I have no idea why this tree is so darn happy, but it produces amazing fruit every year (well, all two years we’ve been here).
Mr. FW judiciously pruned all of our apple trees this past spring (after attending several workshops on “how to prune apple trees”) and we definitely experienced an increased yield from all of our trees. Since the Red Duchess apples are so large and round, we used every last one of them in one of the following three ways:
- Eaten as is! Delicious right off the tree. I’m pretty sure Babywoods ate about 19 of them while Mr. FW and I harvested the tree. Every time I turned around she had another apple in her mouth…
- Dehydrated! We have this dehydrator, which I highly recommend, and we use an apple peeler/corer that we found on the side of the road to peel and core the apples into rounds. I then slice the rounds and place them on the trays of the dehydrator. I don’t add anything to these apples whatsoever–they are fresh, pure, dried fruit goodness. To preserve them for the winter, I freeze them in our deep freeze. Dried apples are the perfect toddler (and mama and daddy and anyone else) snack.
- Apple butter! Mr. FW peeled, cored, and chopped a bunch-o-apples and stuffed them into our crock pot along with some molasses, brown sugar, nutmeg, clove, and salt. There they simmered for 12 hours and cooked down into a jammy consistency. He then used his stick blender to make a smooth, creamy sauce, which he canned and preserved. Delicious. It’s not a very sweet concoction, it’s more of a deep, smoky, resonant apple flavor.
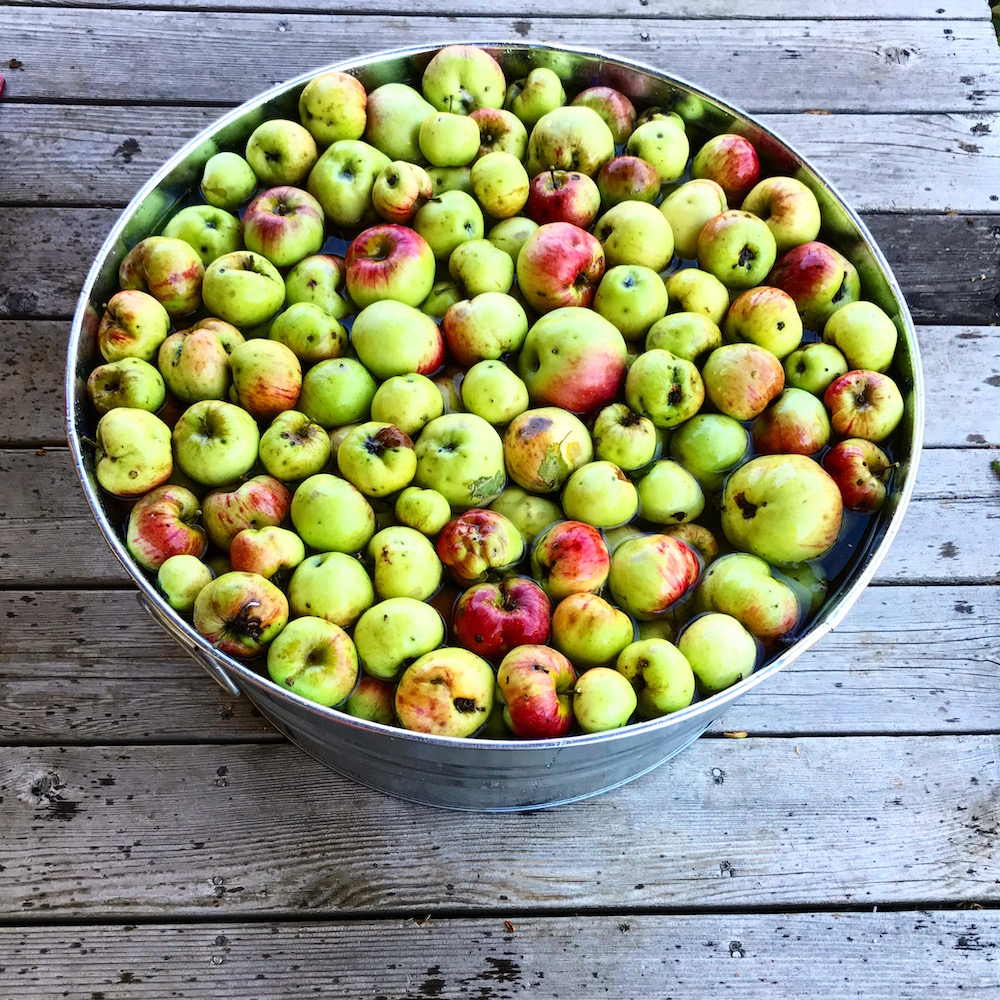
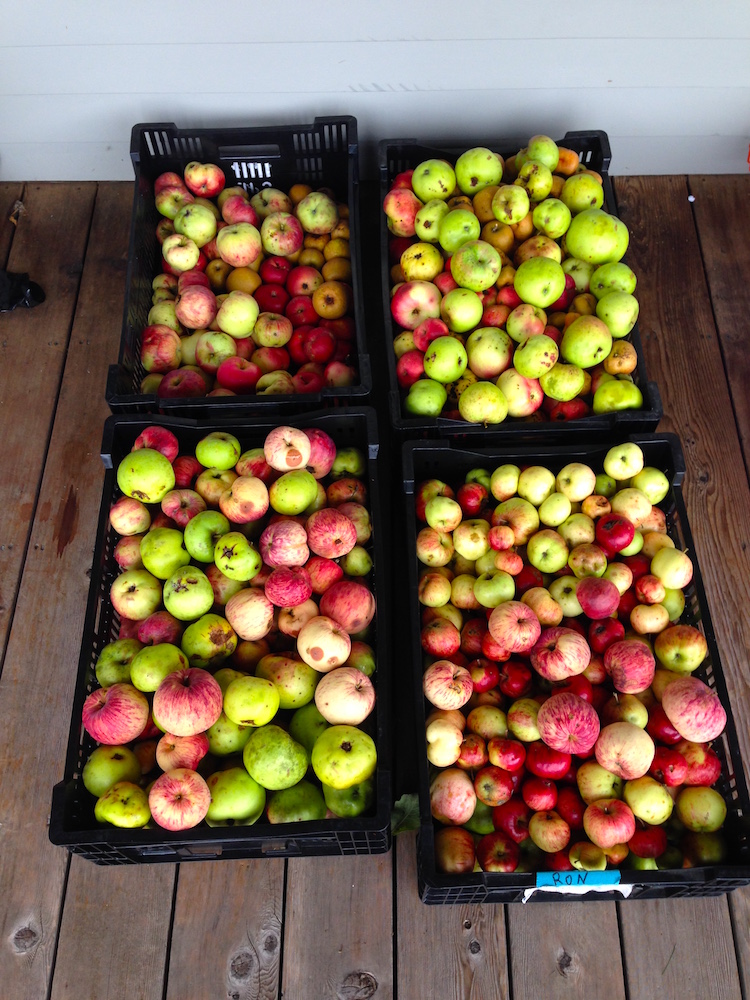
Apple Ciderin’
All the rest of our apple trees–I’d estimate we have about 15 to 20–produced what you’d call cider apples. Many of these apples are edible right off the tree (and we ate plenty), but they’re all smaller, jagged, and not round, which means they’re not conducive to being dehydrated or made into apple butter as you can’t get them peeled and cored in any sort of efficient manner. When your trees give you cider apples, you must make cider!!!!
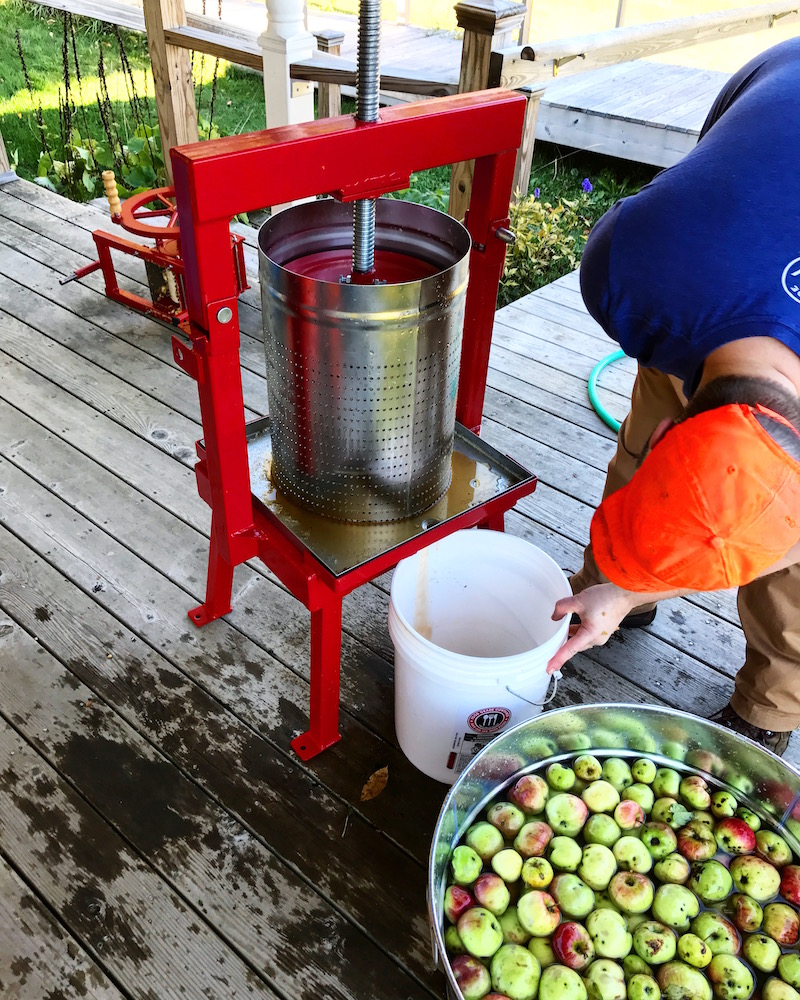
As I shared a few months ago, we broke down and bought ourselves a cider press this year in order to facilitate the making of cider. Last year, inundated with apples, we tried our best to borrow a press, visit someone with a press, or buy a used press, all of which failed. In a desire to actually use our apples this year, buying a press made perfect sense. For those of you similarly blessed with apples, we purchased the 36 liter Maximizer Fruit/Apple Cider Press with a grinder and stainless steel basket for $691.93 from Pleasant Hill Grain. And I highly recommend it! Easy to use, easy to clean, and a large basket capacity.
Turns out, making cider, as you might imagine, is a fairly in-depth process, especially when you’ve never done it before. To help us out, we invited conned some friends from Cambridge into coming up for a weekend of “homestead fun,” which means we roped them into doing manual labor with us. Be forewarned: anytime your rural friends invite you for a weekend of “fun farm activities,” they really just need your help with chores. Lo and behold, we urbanites figured it out and managed to make us some darn tasty cider. The steps to get from apples on the tree to cider in your glass are as follows.
How To Make Apple Cider
1) Wait for the apples to ripen. The easiest way to know they’re ripe is when a bunch of apples spontaneously fall out of the tree. Voila! They’re ripe.
2) Pick the apples. This is the most time-consuming, toughest aspect of the job. Apples do not just come down on their own (except for those first few harbingers of ripeness). They must be picked. For apples on lower branches, we simply plucked by hand. For apples on higher branches, we use these handy dandy fruit pickers (a necessity for ensuring you can reach all of your fruit and much safer than teetering on a ladder).
3) Store the apples. We picked some of our apples several weeks in advance of making cider and stored them in plastic, vented crates in our basement. I acquired these crates for free from our town dump and washed them out with water and dish soap. They originally held flower bulbs, but they work perfectly well for storing apples.
4) Sort the apples. Any apples that are too worm-filled, rotten, or appear to have been bitten by a mammal (human or otherwise, ahem, Babywoods… ) get tossed into the compost pile. Fortunately, you can make cider from very dented, craggy, hole-y apples, so most of them went into the “keep” pile.
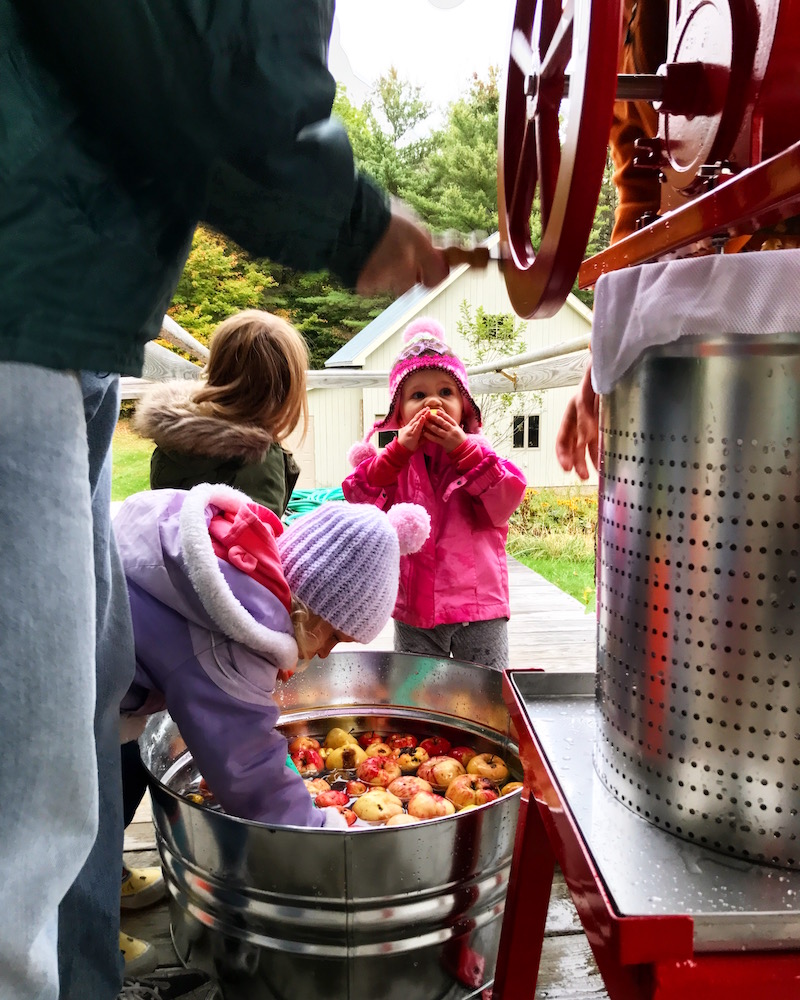
5) Wash the apples. Next, we dumped a bunch of apples into a galvanized steel bucket, which Babywoods and our friends’ kids gleefully filled with water from the hose (well, Babywoods more sprayed everyone with the hose… ). We sloshed the apples around in there for a bit to rinse them off and the kids did their best to fully immerse themselves in the water. As we did this, it occurred to me that this was the origin for the classic pastime of bobbing for apples! I aspire to mostly live inside a Norman Rockwell painting, so you know, life goal achieved.
6) Get the cider press ready! It took Mr. FW several hours to assemble the cider press so thankfully, he’d done this in advance. On the day of pressing we lined the press’ steel basket with a mesh cheese cloth to strain out the apple juice.
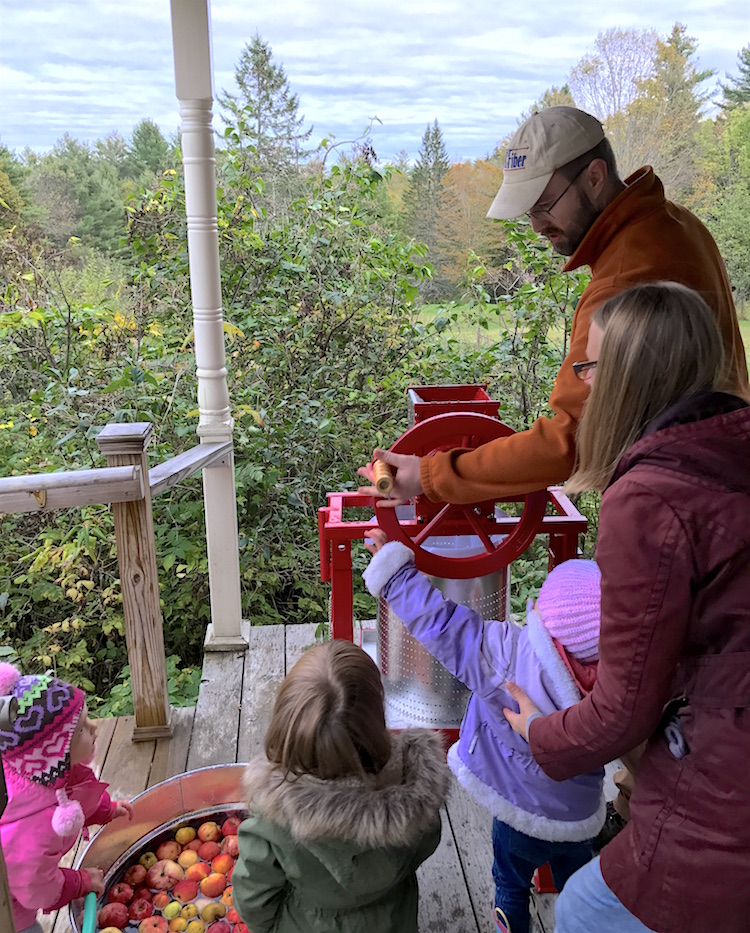
7) Load apples into the press and grind. My friend and I loaded apples into the top of the press–where the grinder is–as our husbands took turns grinding the apples using the wheel located to the side of the press. Don’t worry, gender equality reigned and we switched spots with the guys for the second bucket load of apples. The kids did their level best to turn the wheel, but it is no easy feat. Newsflash: apples are hard to grind!
8) Press the apple mash into cider. After filling up the basket with apple mash (the chunks of apple that result from their trip through the grinder), we took the grinder off the top of the press and bolted on the press, which is basically a flat, circular steel plate. Then, the four adults took turns turning the crank to press the apples down. As we pressed, apple juice began to flow out of the bottom of the basket, through the spigot on the press, and into the food-grade bucket we had waiting. It literally presses the apples into cider! So cool. This is where we saw the utility of the mesh cheesecloth–it prevented things like stems and seeds from seeping into the cider.
9) Drink some cidery goodness. We all took turns filling up a glass with fresh cider and savoring the fruits of our labors. The kids were especial pros at this step of the process and Babywoods nearly dove headfirst into the cider bucket in a quest for “moah cidah peeeeeez.”

If you’re making juice cider, that is to say non-alcoholic cider, this is basically where the process ends. You can then freeze the cider or can it (it won’t last forever in the refrigerator) and enjoy drinking it straight. No need to add sugar, preservatives, or nothin’. We kept out a small amount of cider to drink as juice, but the bulk of our cider will be transformed into hard cider. I’ll detail that process next in my aptly named…
How To Make Hard Apple Cider
1) Transfer the raw cider into a carboy. Mr. FW purchased several glass carboys (large glass containers for making fermented beverages) on Craigslist for this purpose, which was ideal since they’re pretty expensive brand new. Using a large food funnel and the help of our friend, he carefully poured the cider from the bucket through another mesh food strainer and into the carboy. We filled up three carboys of cider totaling 15 gallons, which is, uhh, A LOT of cider. Local friends, prepare yourselves for cider at our house this winter!
2) Add yeast! Yeast is what makes the cider go from virgin to alcoholic and, in our inaugural year of cider-making, Mr. FW decided to test out three different yeasts to see which tastes best in the finished product. We experimented with two different methods of adding yeast and three different varieties of yeast to see which ends up tasting the greatest. Here are the three methods Mr. FW employed in our three carboys:
-

Mr. FW, and his able assistants, turning the crank to grind the apples into mash In the first carboy, Mr. FW added yeast immediately (called “pitching the yeast”). For this batch, he used Safcider yeast.
- In the second and third carboys, Mr. FW first added campden tablets to kill the natural yeast, waited 48 hours, and then pitched the yeasts. For the second batch, he used Danstar Belle Saison dry yeast (owning to my enduring love of farmhouse Saisons).
- In the third batch, he added Wyeast 4766 Cider yeast.
3) Cap and cover. Next, Mr. FW put fermentation airlocks on all three carboys, which allow CO2 to escape, but keep potentially bad stuff in the air from infiltrating the brew. The carboys were then nestled atop blankets in my office (in case you’re wondering, yes, my office smells amazing). He borrowed Frugal Hound’s doggie heating pad to put underneath the carboys to keep them warm. A whole lot cheaper than specially-made fermenting heating pads! He also wrapped the carboys in blankets to protect them from sunlight and there they sit.
4) Wait. Mostly the process of fermenting cider is one of waiting. We will now patiently wait three to six months for our cider to ferment. I say three to six months because the cider might not be palatable at the three month mark. We’ll give it a taste at that time and, if it’s awful, we’ll leave it another few months in the hopes that the taste’ll improve. TBD as we also potentially have three large batches of totally gross hard cider. We won’t know until we try!
5) Bottle or keg. I’ll discuss this exciting activity in greater detail when it actually happens, but briefly… Once the cider is finished with the fermentation process, we’ll need to either bottle it or keg it in order to preserve it until we drink it all. To be determined which method we employ, but fear not, I will keep you posted!
Here ends my windbaggy detailed description of making cider! The joy of doing these things for the first time is one of the primary reasons we moved out here from the city. Mr. FW and I want to learn every day. We want to try new things, to fail, to succeed, and to keep on trying.
Having the time and the space (not to mention the free raw resource of apples!) to continually experiment is one of the more fulfilling aspects of living on 66 acres in the middle of nowhere. I’m grateful everyday and I wouldn’t trade it for all the cities in the world.
Want More Fotos?!
While I only document homestead life once a month here on the blog, I post photos to Instagram and updates to Facebook with much greater regularity–usually daily! Join me there if you want more of our frugal woods.
And if you want to make sure you don’t miss a post here, sign-up for our handy dandy email list in the box below. You’ll get a message from me if you do…
Onward to November, frugal comrades!


October was an awesome month for my wife and I. We welcomed baby #2 on the 7th of October. So we’ve been settling in trying to get into a routine. On top of that we had another great month as our net worth increased by 2.5% and we’re on track for a net worth increase of 30% for the year. So we’ve been really happy with the year and especially month of October 🙂
Congratulations on the baby! That’s so exciting and cute. Hopefully you can get the frugalwoods to invite you to make cider next year. Looks like all the kids are having fun hanging out. They say it’s manual labor, but how bad can it be to get a workout, let kids socialize and learn about how their food is made, and have some yummy cider at the end (to drink while surrounded by beautiful fall leaves)???
Congratulations! Early October is a great time to have a baby, my very own first baby was born on the 9th, and my beloved last baby was born a bit earlier than his 2nd Oct due date, to arrive 26th Sept… it’s perfect. Just as Christmas and the holidays roll around, he or she will be getting big enough to be cute in pictures and you’ll be getting the hang of things enough to really enjoy the season.
My husband and I were just talking about how we hope to make apple cider from the apples on our property next year… and now we have the recipes to boot!
This year (year one in our new home) has been a year of discovery and learning. We moved to our new home late last fall and did not realize how many amazing flowers, vegetables, and fruits were growing on our acreage. We tried to document the produce so that we can research and properly prepare the plants next year (pruning trees, training grape vines, etc). Even without this, we feasted on delicious apples and made a mean cinnamon applesauce this past month.
Always, always find it strange that Americans call apple juice cider and cider hard cider. What a great harvest though. We get windfalls from next door’s tree that are always rotten or damaged in some way so I cut round those bits and make apple sauce, since it doesn’t matter that the pieces aren’t consistent. There’s also an apple sauce chocolate brownie cake that’s delicious!
What Americans call Apple juice is the bland, yellow, sweet stuff you buy from the grocery store year-round. What we call cider is the tangy, brown, delicious fresh non-alcoholic Apple beverage that you can only find in the fall.
Yay cider! I’m excited to hear how it turned out! We’ve talked about making cider next year instead of gallons of applesauce. We may not have a homestead, but we do live in a small city, where nobody picks their apples!
And I was so disappointed to get the first frost and say goodbye to the garden for a few months. We still have some kale, carrots, and beets outside, patiently enduring the frosts.
Sounds like a great month. Reminds me of a day many falls ago when my Dad, grandparents, and other family members all got together to try out an old cider press that my Dad had restored. It’s a fun “farmy” event for everyone!
Wow that’s truly an amazing harvest of apples! Mr. FAF eats an apple every morning to help with his digestive system. If we had one or two apple trees in the garden, it would save us so much money!!
Your writing is so beautiful! As I read the intro of this post, I can literally picture what fall looks like where you live! I’m starting to wish that Mr. FAF and I could live on a homestead one day 🙂
We always buy a ton of apples and turn them into applesauce, which the kids (and we) absolutely love. Just a bunch of apples, cored, and boiled down.
It brings up an interesting question, as you make your apple butter, do you think it’s faster to peel and then cook or cook them down a bit and use a food mill to remove the skins?
Hmm, I’m not sure. We put them through our peeler/corer before putting them in the crock pot as that’s a super quick way to peel and core them. But I haven’t tried the other method!
To make applesauce or apple butter, I cut the apples into quarters and cook down on the stove and then put everything thru the food mill. Doing it this way uses the pectin in the peelings and adds wonderful color to the end product.
The best way to make apple butter is to cook it slow and not rush the process. You can chop the applies up and place in a crock pot at low heat. It can take up to 48 hours or more for the apples to break down while the liquid cooks off and the jam darkens and develops a subtle rich quality. If you rush the process, the butter will appear the same as slow cooking but will be missing something, a kind of hidden caramel quality.
Also recommend making apple chutney in a similar fashion.
It was definitely a good year in terms of apples. Even though we live in an apartment in the city, we got apples from our lovely neighbours. There are quite a few old houses in the area, with big gardens. To get rid of their excess apples, they just put them in baskets outside their gates, for anyone to take for free. 🙂 This happens almost every year (we live in Finland). I made apple pie and puree and still have some apples left in the fridge.
As I grew up on a farm, it is so interesting to read about your gardening. And the story about Babywoods playing with the pumpkins is adorable.
Just curious why you freeze the dehydrated apples? My mum stores hers in a dry/dark cupboard and they are fine at least for a year. I mainly use them in my granola.
I put them in the freezer out of an abundance of caution. We have plenty of space in our chest freezer, so I figure they’re likely to last just a bit longer that way.
I saw a jar of spiced pumpkin apple cider in Sprouts the other day.
Do you know how to make that version of apple cider?
You have teased us with comments about your husbands kale/green bean Asian-inspired stir fry for months. This vegan wants the recipe!
And jumping into the conversation about processing apples (re: Jim Wang’s post above). I absolutely adore my food mill and use it all the time. I find it faster and easier.
I wish Mr. FW cooked from recipes, but alas!, the man is impossible to pin down as he cooks entirely without them. His meals are different every single time–even this stir fry! He made it probably 15-20 times this fall/summer and it tasted different each and every time.
I love how productive your garden / orchard is in the fall! Since it’s just now getting into the 50s, our fall / winter garden is starting to wake up and enjoy the cooler weather. 🙂
While I was at FinCon ~someone~ forgot to water our garden seedlings and they mostly died. I’ve been trying to revive them for two weeks and I’m pleased that half of them have risen from the dead! I plan to transplant them to our raised beds this weekend. I also re-grew green onions we used for dinner and I’ll plant those too. Green onions fo’ days!
I’m also going to make an herb planter using a very nice moss hanging basket I picked out of the neighbor’s trash. I’m sick of buying herbs from the store!
What an awesome experience and a great use of apples! We went apple picking up in Vermont this year and were pleasantly surprised to see the massive bumper crop. I actually felt bad for the farmers, as a few trees had broken trunks from being weighed down by the fruit. But it did mean we got a ton of apples for very cheap and were able to make lots of applesauce for winter! My son loved testing all the varieties of applesauce we made – an easy favorite was the blueberry vanilla applesauce!
My husband and I don’t drink alcohol, but we LOVE some fresh apple cider each fall. I’ve always been curious – how many apples does it take to get how much cider? Good luck with your fermenting process!
Liz, I relived my childhood on a farm with our apple harvest while reading this post! Not to offend vegans but have you folks considered raising chickens? You’d have large brown hormone free eggs and perhaps a little bit of delicious chicken in that wonderful stir fry.
Also, chickens make great assistant gardeners. We used to let ours loose in the vegetable plots and they would eat all the bugs. Put a compost heap in the chicken coop and they will help turn it over regularly with their scratching (and add all kinds of lovely nitrogen fertilizer with their droppings).
Chickens–for meat and/or eggs–are definitely on our longterm to do list. But, no farm animals for us yet! We’ve got to focus on baby #2 first :).
Oh boy, you had me at Hard Cider…yum! 🙂 I don’t drink bear – gluten intolerance- but I do drink and love Hard Cider.
I’ve also made a little Hard Cider on my own for fun, but it never turned out as well as the stuff I can buy. You’re doing it on a bigger scale and I look forward to reading about your results.
I think Ron is an excellent name for a crate, but it made me a little sad to see the other crates did not have name tags. Maybe Babywoods could name the rest of the crates so they don’t feel left out?
If you’re ever in Wisconsin I’d encourage you to try Spotted Cow beer from New Glarus brewery. It’s extremely well known in this state and is often the go to choice for non-craft beer drinkers. It’s a farmhouse ale and since you like saisons you might enjoy this beer. New Glarus is an excellent brewery but they only sell their beer within Wisconsin, if you’re in the area let me know! Mr. FW might enjoy either Moon Man or Scream IIPA
Yum! Sounds delicious! We do love craft beer. And hey, that crate was just lucky to be named (and you can see how lazy I am… didn’t even bother to peel off the previous owner’s tape ;)!).
Adding a dash of cinnamon to the apples before dehydrating is a delicious alternative.
I hope the cider turns out well!
I love fall and apples and pumpkins! Could that row of pumpkins be any cuter? I am ashamed to say I live on a rural property and have not started a garden. :-S I grew up on a farm with apple trees and big gardens and all kinds of preserving, so you think I would be all set. Goals for next year for sure. My great grandfather was known far and wide for his hard apple cider (and maybe for drinking a bit too much of it…) Our farm had a huge apple orchard just for that. 🙂 Sadly he died when I was young, so I only heard the stories and was too young to learn how to press and make the cider.
Absolutely loved this installment- it made me so nostalgic and filled me with good old-fashioned autumn warmth.
Hello. Long time reader (I found your site 2 years ago googling “is costco coffee good?”, and then it eventually led me to MMM and other FI resources and we have made epic changes since then, so thanks!) , first time commenter –
I have made cider with fresh pressed orchard cider for 5 years now… 3-6 months seems really long to wait. Most times the yeast does its job within 5-7 days, quicker if kept warmer. In fact if you want the cider to remain somewhat sweet you actually want to stop fermentation before it goes below 1.010 on a hydrometer. That being said, if a dry cider is what you are going for, I don’t think you will have any issues letting it age longer than I would, I just think it would be ready to drink before then.
I normally use Danstar Nottingham yeast, but branched out this year and tried Munton’s and Windsor as well. My normal recipe is:
* 5 Gallons Soergel’s Unpasteurized Cider
* 1 packet of Nottingham Yeast
* 1.5 lbs of Brown Sugar
Primary fermentation for 5-7 days (check hydrometer every other day or so), then rack into a secondary with 1/2 teaspoon Potassium Metabisulfite (campden tablet) and 1/2 teaspoon of Potassium Sorbate to kill off the fermentation. I leave it there for a few days, and then transfer to a keg and carb it up, and its normally drinkable within 1-3 weeks.
This post on HomeBrewTalk.com is a wealth of information on cider – http://www.homebrewtalk.com/showthread.php?t=83060
Good luck!
Hard cider is my drink of choice – so this whole process is fascinating! I’d love to be able to make our own. “Craft” ciders are a thing now (at least here in Canada) but to me, they usually taste pretty much the same unless you add strong flavours. I saw one in the store the other day that was a pumpkin spice cider that apparently can be enjoyed warm or cold. Not sure how I feel about that one…
My husband and I made fig butter with our slow cooker, really delicious with crackers. Our little niece was over and she kept asking for “moah peeezzzzz” too – they’re sooooo cute when they like something because it’s the most wonderful, real expression.
October has been freezing up here in the Pacific Northwest. There’s definitely no fall this year, it was for 2 second and everything is now frosted over. Thank you for the photos! Coastal cities do terrible with seasons.
I’ve been a beekeeper and never had time to treat my apple trees in the spring (not a bad thing, but it can be done organically) so my fruit had a lot of maggots. A Swedish farm girl taught me to make apple sauce using windfalls which is fairly efficient and gives a fuller flavour. Quickly wash them and simply cut out all that’s bad, keeping skin and cores. Then I cook it all in my pressure cooker , then sieve it. I have a Kenwood sieve but maybe your cider press could be used. I mostly store it in small jars for one or 2 servings, in mason jars or frozen in the small pots & plastic pots I’ve accumulated over the years. I can’t eat raw apples, but have apple sauce nearly .every day with my breakfast. I do it with damsons & greengages, too
I love your articles. I’m 82 and retired now for 5 years and am reliving your experiences from going “back to the land” 42 years ago in the South of France.
On the tomato preservation front, we ran across a tip on the internet that has worked really well for us. Wrap green tomatoes individually in newspaper, then layer them into a box with more newspaper and put it all in a cool place, like a basement. Check regularly for ripeness. They last a surprisingly long time this way, and we had tomatoes slowly ripening for months after frost forced us to pick them. Alternatively, there are lots of yummy things you can do with green tomatoes outside of the traditional fried green tomatoes.
We have a single ancient behemoth backyard apple tree of unknown variety that produces bushels and bushels every year. They’re not really great for eating fresh, but this fall we made apple cake and apple crisp to take to various potlucks, made and froze batch after batch after batch of slow cooker applesauce, and my husband and a friend got together to make a big batch of hard cider that’s currently fermenting in our garage. And we took like 80 pounds to the food bank. And there are more of them rotting on the tree that we just didn’t get to…
I dehydrate my apples with skins on – and just go through the cores. I eat them mostly in my granola and when I break them up into pieces I don’t notice the cores. Usually the seeds fall to the bottom of the dehydrator during the drying process.
What an awesome post! Picking the trees bare, using the apples, making cider and hard cider (hopefully) is all wonderful, but the real bonus is family and friend time. How fabulous to be together, all ages, learning and tasting in nature’s bounty! Anyone can buy cider off the shelf, but the “acts” of making it is what makes memories. Just awesome! And……..I learned a lot about the process.
My word of the day last week was mudita, meaning to take joy in others joy. Reading this post totally fit that. So glad to see you doing an activity that seems to epitomize why you did the years of hard work and budgeting to get to the woods. Well done.
Good times! I can’t wait to taste some 🙂
Thank you so much for your help! And for letting us con you into so much manual labor ;). You must come back to visit once the cider is ready!
Last year we made both sweet and hard cider with apples picked from local parks and public lands. (They just fall and rot otherwise. The waste!) The hard cider was, uh, not so great in the beginning. It wasn’t until we were gearing up for this year’s cidering party that we opened and tasted it again. It’s delicious! Mild but still flavorful, it’s been a big hit among our friends. People who helped us make cider again this year got to carry home both sweet and hard cider, so it was rewarding for everyone. It’s definitely going to be a yearly tradition.
Love your article on the the fun times autumn brings us. Yes to the cider project! We have made our own wine and watching the carboys and waiting for final product is maddening, but so worth it. Every season is an adventure. Thanks for this fun read today.
How ’bout dem apples! Looks like you guys could start selling at the farmers market if you wanted, that’s a lot. I hope to have more time soon to plan food-growing experiments for next season. But my history is that everything I touch tends to wilt and die. I need to learn to turn my thumb green
We love how you guys get the most out of your crops! Picking every last tomato before Mr. Frost steals them! Also love that someone else thinks dual purpose about pumpkins being decorations and food. We like how you guys took the big jump buying cider press, expensive up front but long term what a great investment and self sufficient. You guys are so inspirational!
We have been using this method, which we got off mrmoneymustache’s site http://www.mrmoneymustache.com/2014/04/22/brew-your-own-cider/
with our apples, It works amazing and is a lot quicker, since we are not patient i suppose. Also its surprising how little 15 gallons of cider is? best of luck and enjoyed this post very much
I’ve just been making hard cider for the first time also, but not starting with the raw apples! I followed MMM’s guide of buying it preservative-free and fermenting in the glass bottle itself. It only took two weeks to ferment, and after another week, the result is actually drinkable, although I guess you’d call it “apple wine” not hard cider. We used champagne yeast and it came out very dry, which isn’t necessarily a bad thing.
Now I’m already thinking of fermenting on a large scale and bottling for Christmas gifts. Better get cracking.
Great use with all the apples you have and had fun in the process of making the cider with Babywoods.
Always love your pictures you have up on Instagram, great to check out the scenery from your homestead.
Liz, I loved reading about how you made cider and turned the whole thing into a family & friends event. I’m sure the kids were in heaven! And the pumpkins…oh my, what a fun childhood you are giving to Babywoods!
Oh my, your introduction with the cows makes your life in the woods seem so idyllic! With regards to the tomatoes, I remember my mother and grandmother always placing rows of unripe tomatoes in the windowsill in autumn. They were never as ripe as their sun-ripened cousins, but it was still a treat to pick them off, one after the other, as all but a few ripened.
I’ve never tried to make cider before, but that spiced up applesauce sounds absolutely fantastic! Will have to give that a go when I once again have access to apple trees! 🙂
In the BC Okanagan, fruit growers sell cider in boxes, packaged the same as boxed wine. It can go without refrigeration for months, and doesn’t quickly spoil even when you begin to consume it, since no oxygen can enter the product. I’m not sure how that translates for the homestead, but there might be a way….? We don’t have apple trees where we currently are, but we have many neighbours with trees that, tragically, can’t be bothered to pick, so we are bold about asking! (On the extra-bonus side, they also can’t be bothered to spray, so we know the apples are organic!) While it’s on a smaller scale, with a few quick cuts to remove the cores and a centrifugal juicer (skins and all), we enjoy fresh apple juice as well. Also, slices of tomatoes make delicious dried chips as well! I haven’t tried with green ones, but the red are super yummy.
Our homestead is moving slow this month. Month 2 with new baby. Temp finally dropping here in Texas so we need to get on our projects we put off in the summer heat. (New reader and love your blog!)
I love your homestead updates. Thanks for letting me indulge the “toss it all and move to the woods” part of my soul on a regular basis.
Oh my gosh, with BW1 loving her pumpkins, you HAVE to read her Sophie’s Squash by Pat Zietlow Miller.
I do so enjoy the monthly updates. This one was interesting and educational. You might consider a “Lessons From Frugalwoods Annual”. A book following your adventures each year. Keep ’em coming!
Clearly I’m a total urbanite. I had no idea what went into the process of making cider, so I loved the detail and step-by-step pictures. I also laughed out loud at Babywoods 1’s adoption of the pumpkins. Love has no boundaries.
“I found her reading a story to one of the pumpkins and another pumpkin carefully placed on the couch with a blanket around it. My little farm girl. ”
AWWWWWW…a gazillion puppy pictures can’t match up to the the sheer cuteness of this image! I’m having a “IT’S SO FLUFFY I’M GONNA DIE!” moment!
I learned this year that yes, tomatoes will ripen on the counter! We had picked a bunch of our tomatoes prior to the first frost and all were green. I looked up ways to see how to ripen and found a site that just said leave them out. Within days they were turning and in a few weeks, I had tons of ripened tomatoes. Over time, as some never ripened I just composted them. At that point, they would never ripen (and most were small cherry or plum tomatoes), but I’m sure they could’ve been pickled or something else. We just don’t can anything just yet! I look forward to hearing how the ciders turn out!
On tomatoes – we have tomatoes from the garden with one simple trick. When we get the first warning of frost, we pull the tomato plants from the ground and hang them upside down in the attic. It is dark and cool, not cold, and all the tomatoes that didn’t ripen before frost do so in their own sweet time in the attic. You probably could use a basement, too.
Liz – OMG – your October intro is so beautifully evocative! Idea: if not every month, at least every season, create a card or poster you can pair with a photo (the pumpkin one is amazing) to put up in your house. Start with October – it’s just gorgeous with so many chewy words “jutted, ostentatious, effervescent” come on!
It was so nice to meet you and Nate at FinCon! Take care!
I vote for the keg. I’ve bottled many a beer in my time and it is messy and time consuming. You already have a CO2 tank, so a keg setup would be simple. You could also carbonate a keg of water instead of using the soda stream. 🙂 Simplify a bit.
Those pictures are gorgeous, especially the cute 10-pumpkin picture! Having apple trees in the yard? That’s lovely. You brought us to the Shangri-La. Thank you.
I am drooling over the fresh apple cider!! My favorite part of fall! I just found this post as part of your series on moving to VT and cannot wait to catch up. Living in CT and frequently visiting VT, it is our dream to have a house up there some day. For now, I’ll live vicariously through your posts 🙂
You might try making apple cider vinegar if you are interested in trying it. Looks super simple,
And, huge frugal benefit… you can eat your apples AND make apple cider vinegar out of them too. All you have to use is peels and cores SO, make pies, etc, with the apples and use the rest for vinegar. http://talesofakitchen.com/raw/homemade-organic-raw-apple-cider-vinegar/