
July 2018
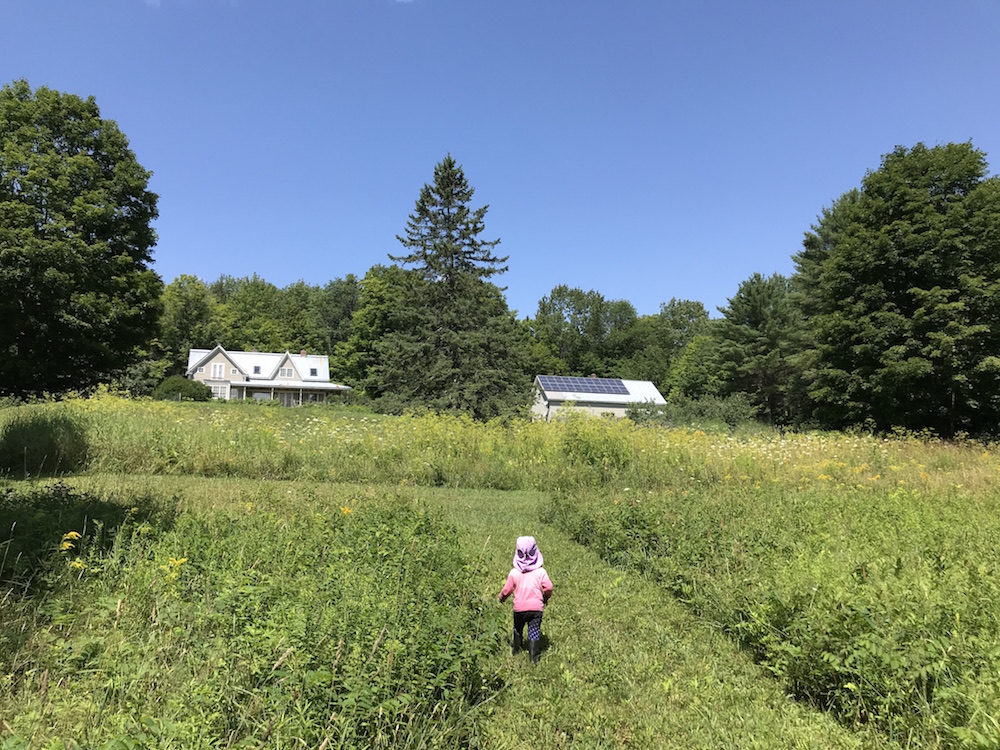
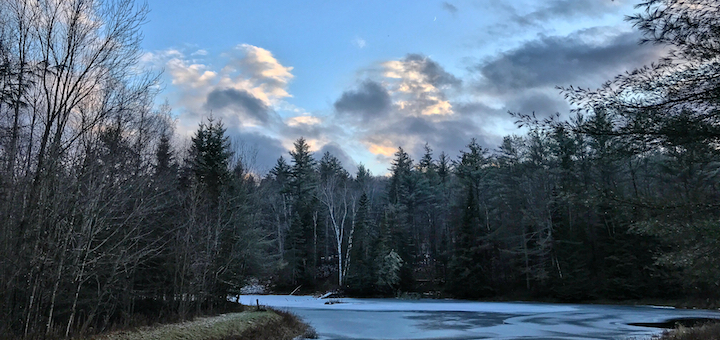
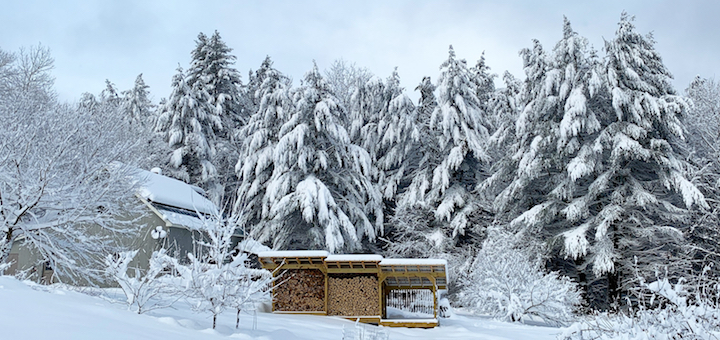
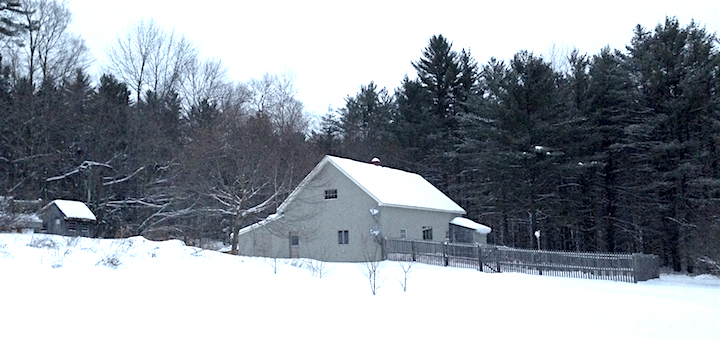
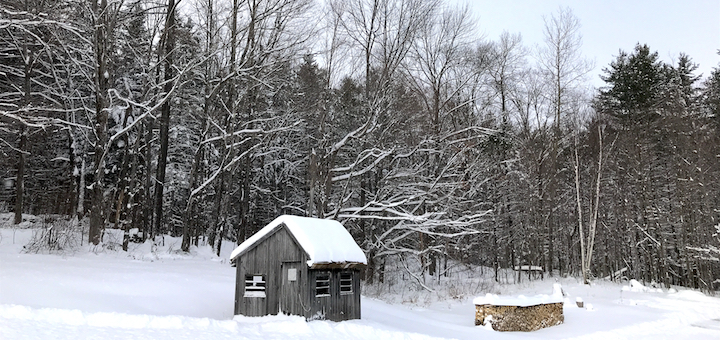
Verdant and warm, July on the homestead was awash in the lushness (lusciousness?) of summer. July is the month when the literal fruits of our labors begin to bear. Much of our springtime work is in preparation for July: we till, we weed, we plant, we prepare. And finally, stuff begins to ripen. July is the counterbalance to its half-birthday of January. The striking similarity is the monochromatic landscape: all white in January and all green in July.
In July, nothing un-flowered remains and no leaves have yet turned toward fall. July is the mid-point where we relax into summer and the woodstove gathers dust. Spring is a time of discovery as each new flower presents itself and snow melts to reveal long forgotten troughs in the landscape. But by July, most of these secrets are laid bare.
If you’re just tuning in, this is a recurring series in which I document each month of our lives out here on our 66-acre Vermont homestead. After leaving urban Cambridge, MA in May 2016 to chart this wholly different life, we’re experiencing a constant learning curve of exploration (and plenty of stupid novice moments). Check out last month’s installment here and enjoy the best and worst (ok, mostly the worst) moments of our first year on the homestead here. Wondering if it’s less expensive to live rurally? Check out: City vs. Country: Which Is Cheaper? The Ultimate Cost Of Living Showdown.
Garden Check
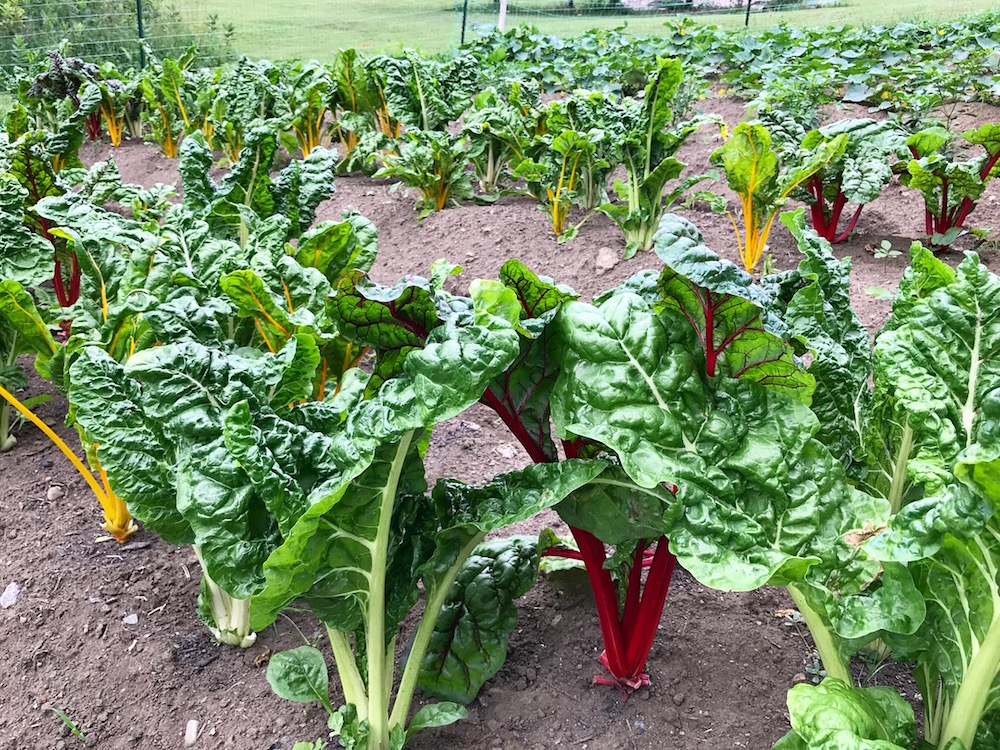
Harvesting began in earnest with cucumbers, chard, tomatoes, ground cherries, cayenne peppers, jalapeño, and snap peas all ripening. A friend described Vermont as a lot of winter followed by jungle-esque growth. Apt, I’d say. Vegetables suddenly burst forth and we find ourselves harvesting by the wheelbarrow-load. Since there’s no way we can consume everything we grow in real time, our major focus is on longterm food preservation. We dipped our toes into the world of preservation last year, but we’re throwing our entire bodies in this summer. This year, our garden is an order of magnitude larger–and it’s also a lot healthier, thanks to Mr. FW’s ministrations–so we are in veggie processing overdrive.
Chard! (and Kale!)
I did a “Day In the Life Of Chard” series on Instagram this month, which chronicled how we harvest and process our mountains of chard and I’ll regale you with the tale. Spoiler alert: it doesn’t end well for the chard…
Harvesting the Chard (and kale!)
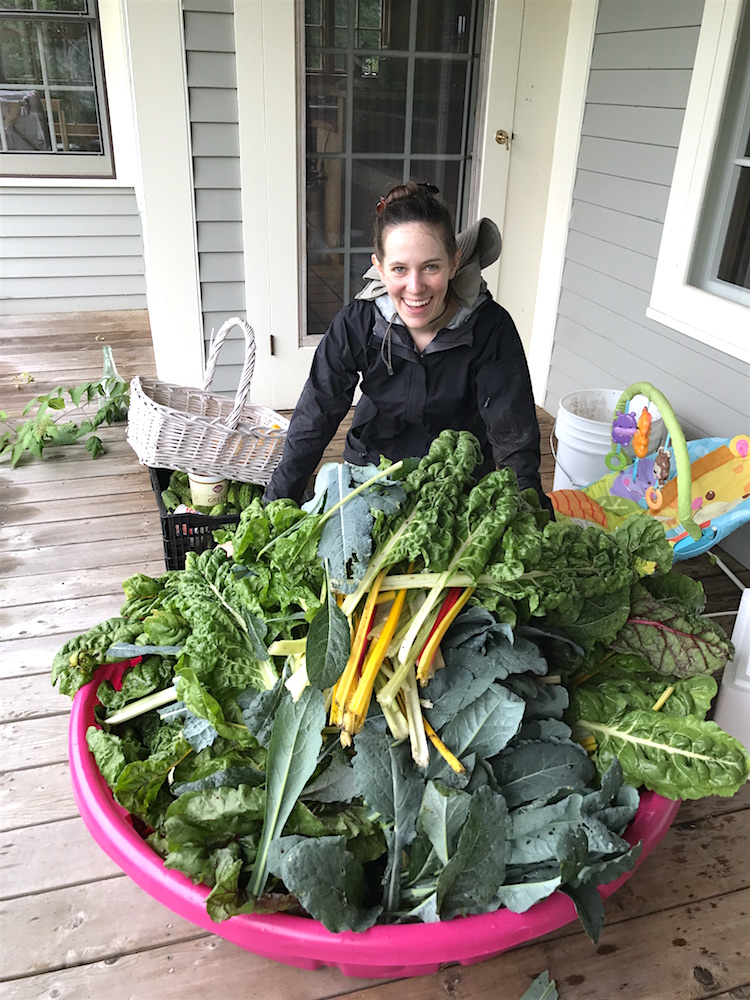
Last year, Mr. Frugalwoods and I would harvest chard and kale haphazardly and in small batches–usually just enough to cook up in a stir fry. This year, thanks to the fact that we planted about 80 chard plants, we’ve streamlined. Every two weeks, we do a MASSIVE chard harvest and cut the plants back to just a few strong center stalks. The plants seem to thrive with this regime and it allows us to create efficiencies around our food preservation process. We learned last year that it’s so labor intensive to wash, chop, and cook chard (and kale) that you might as well do gigantic barrel-loads of it at a time.
When harvesting, I like to use clippers to cut the chard stalks close to the base because I find that tearing them off often damages neighboring stalks. The best system we’ve found–when we’re lucky enough to have both adults (plus kids) in the garden at the same time–is to have one person cut stalks and hand them up to the other person, who runs them down the row and plops them into the wheelbarrow. Fortunately the wheel barrow fits in between our garden rows. We tried to con Babywoods into helping with this task, but she just took the chard stalk and starting eating it, so, uh, not useful.
Harvesting this way yields roughly two wheelbarrows full of chard, which is a monstrous amount. The only container that’ll hold it all? The baby pool. Babywoods was concerned that we’d requisitioned her pool as a chard holding pen and requested to climb in and–I kid you not–“live with the chard.”
Washing the Chard
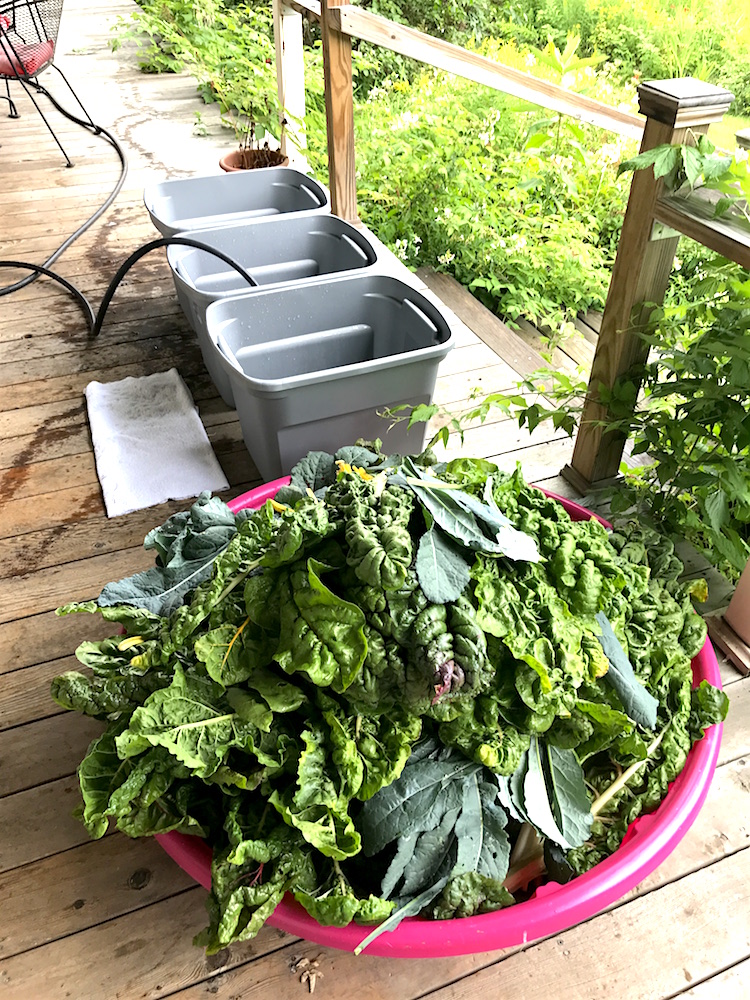
Next up is washing! Thankfully we’re organic gardeners, so we don’t have to worry about pesticides on our plants, but we do have to remove dirt and bugs. Yum! Last year, like a moron, I washed EACH and EVERY individual chard leaf in our kitchen sink. It took me about a year to get through a batch. This year, we did some research and learned that non-moron gardeners do a three-part dunk washing system for their greens. Brilliant!
I line up the baby pool-o-chard next to three large plastic storage totes on our back porch. Two of the totes are 3/4 full of water (from the hose) and the third tote is empty. I first pressure wash the chard (in the baby pool) with our hose. Next, I take a bundle of chard and dunk it in the first water bath and rub the stems clean. Then I shake the leaves off and dunk the bundle into the next tote of water. Finally, I remove it and put it into the third, empty tote to await intervention by chef Mr. FW. Then I pressure wash the next layer of chard in the baby pool and continue on with my washing system. The only downside is that the water coming out of our hose is approximately 40 degrees and so I nearly freeze my arms off. By dint of me writing this, you know I survived.
As a perfectionist/germaphobe/neat freak, I was CERTAIN this dunking system wouldn’t work and that I’d be up for 48 hours washing chard in the sink. I am delighted to report that I was wrong. The dunking system totally works and we’ve found very little residual dirt after this three-part baptism. Woohoo! It still takes me about 1.5 hours to wash two wheelbarrow loads of greens, but that is phenomenally faster than last year’s laborious moron-at-the-sink system.
Processing the Chard
We’re doing chard three ways this year:
- For immediate consumption in an Asian-spice inspired stir fry of chard, kale, onions, garlic, Hoisin sauce, oyster sauce, rice wine vinegar, soy sauce, and ginger. Yum. Mr. FW cooks up a certifiably GIANT batch of this once a week and it’s what we eat for dinner all week along, atop organic brown rice.
- Blanch and freeze (detailed below)
- Kimchi (what you’ve been waiting for)
And we had one failed idea:
- Pickled chard stems (gross)
Blanch and Freeze
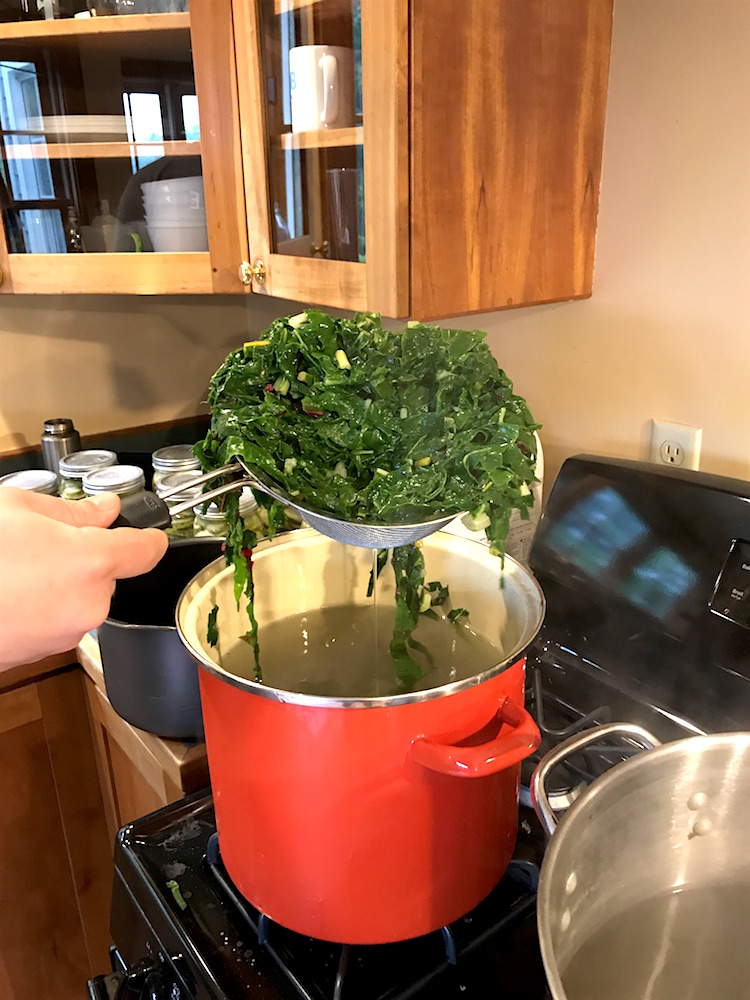
This is a time-honored, straightforward method for preserving greens. After harvesting and washing, we rip the leaves from the stems (faster than chopping) and Mr. FW chops the leaves into ribbons and puts the stems into the food processor using the slicer attachment, which slices them thinly across the grain of the stem (he then adds the stems to the stir fry).
We then blanch the leaves (put them in boiling water for a minute and then dunk them into cold water). After blanching, we wring them out and pop them into plastic bags and into our deep freeze. The reason for blanching is that it locks in the nutrients of the chard. Our plan is to defrost these bags in the winter for Mr. FW to make chard stir-fry. We didn’t do this system last year, so we’ll have to see how well it defrosts and cooks up.
Kimchardashian
I have been waiting for MONTHS to tell you about this, because my adorable husband came up not only with the idea to make kimchi out of chard, but also to call it–wait for it–Kimchardashian. I love this man so much. Kimchi is a Korean dish of fermented cabbage (typically Napa cabbage) that’s used as a flavor additive. You can put it on top of just about anything and it provides a zesty, zingy flavor. I will note that kimchi is not universally loved and so I advise you try some before you go to the trouble of making your very own Kimchardashian. Is Kimchi ever made out of chard? Not that we know of, but we are pioneering it over here. And it tastes great, I have to say. It’s not traditional kimchi–and if you’re a stickler for the traditional, you’d probably would sneer at ours. But Kimchardashian tastes fantastic (in our opinion) and adds spice and zest to our lives (plus the fermentation is supposed to be super healthy for you!). The other great advantage to Kimchardashian is that it preserves the chard in a shelf-stable manner, since it’s fermented and then put in shelf-stable canning jars. This is good because we are running out of freezer space in a BIG way. I should note that it’s sort of shelf-stable. This is also sort of to be determined… we’re thinking that if kept in our cool, dark basement it will remain shelf-stable. We’ll test it out and see.
Thus far, we’ve eaten more than half of the Kimchardashian that Mr. FW made, so I think we’ll try and ramp up production to make enough to actually save for the winter.
Pickled Chard Stems
This was a bad idea. We thought that perhaps we could pickle chard stems using the same solution we pickle cucumbers with and so we did just that. And they taste awful. It’s rare that Mr. FW and I don’t like a food–we’re both adventurous eaters–and we almost never waste something we’ve cooked. But these things are pretty much inedible. We each ate one and frowned. Somehow, they do not taste right. At all. So, uh, don’t try that one at home. I think we’ll be dumping them into the compost, which is a sad end but one that’s unavoidable I fear.
Cucumbers!

Our other gargantuan crop this year are cucumbers, thanks to the 9,000 cucumber plants Mr. FW planted. Ok maybe it’s only 8,500. Why so many cucumbers? We have a pickle obsession. Mr. FW coined a spicy pickle canning recipe last year and we inhaled our entire pickle supply before the first frost.
This year, we’re ready for such wanton pickle consumption and, as of publication, we’ve made no fewer than 60 (yes, sixty) quarts of pickles. We may need to build an addition onto our home in order to store all of our preserved foods…
Here’s Mr. Frugalwoods’ pickling recipe:
Pickling Brine:
- 4 cups water
- 4 cups white vinegar
- 1/2 cup sugar
- 1/3 cup salt
Place in each jar:
- Crushed garlic
- Mustard seeds
- 1/2 a hot pepper
- Tons of cucumber rounds
Directions:
- Stuff jar with above ingridents
- Pour pickling brine into the jar
- Process jars in a water bath for 10 minutes
He usually quadruples this recipe, which yields about 15 quarts of pickles.
Note: please follow a real canning recipe to ensure you know and understand canning risks and particulars. This recipe is a guide off of which you could base an actual canning recipe. Please do not give yourself botulism. Thank you.
Tomatoes!
After a disappointing run with “big” tomatoes last summer, we went with all cherry tomatoes this year and, so far, this seems like a good decision. The big tomatoes never fully ripened, were disease-ridden, and the flavor wasn’t that great. The cherries, on the other hand, thrived, so we quadrupled down on those. Mostly we eat these things like candy and I put them in our daily lunch salads. Mr. FW also makes batches of garden salsa using the tomatoes, hot peppers and cilantro from the garden, along with red onion and lemon (from the grocery store). Yum! I’m going to experiment with freezing some salsa to see how it turns out (we can’t can it as we don’t have a pressure canner). I fear it might lose its crunch in the freezer, but still might taste fine. To be determined.
Black Raspberries

We have cultivated black raspberries (a different berry species from either red raspberries or blackberries) growing in one of our garden beds. Last year, Mr. FW built a trellis system using rope twine and a number of readers pointed out that this was a dumb idea. Turns out, you guys were 100% correct. Rope twine was a totally dumb idea for the very obvious reason that it wasn’t strong enough and it, uh, for lack of a better term, collapsed under the weight of the berry vines. This year, emboldened by our past mistakes, Mr. FW built trellises out of STEEL twine. Hooray!
These trellises survived the season and are still going strong. Bonus is that the local birds adore perching on top of them. Downside is that they then poop on our berries (rude). Bird poop aside, we harvested a lovely crop of black raspberries this year, which I freeze in gallon-sized plastic bags and then mete out for our consumption throughout the year. I know that a lot of people recommend first freezing the berries individually on a cookie sheet, but I’ll be honest here, I do not have the time for that, so I just shove them all in a bag and they do just fine. This is my third year of the shove-n-freeze method, as it’s known in technical circles, and I see no downside to my lazy brilliant methodology.
Snap Peas and Ground Cherries
Rounding out our garden bounty are the snap peas and ground cherries. The snap peas aren’t doing all that well–they appear to be afflicted by some sort of fungus among us–so we’re just munching those as they ripen. The ground cherries are thriving, but we only have nine plants, so the haul isn’t spectacular. Plus, Babywoods had decided that these are her plants and so has assumed sole consumption responsibility for any and all ground cherries. I’ve managed to eat three and they tasted divine.
Logging Winch Comes to Town
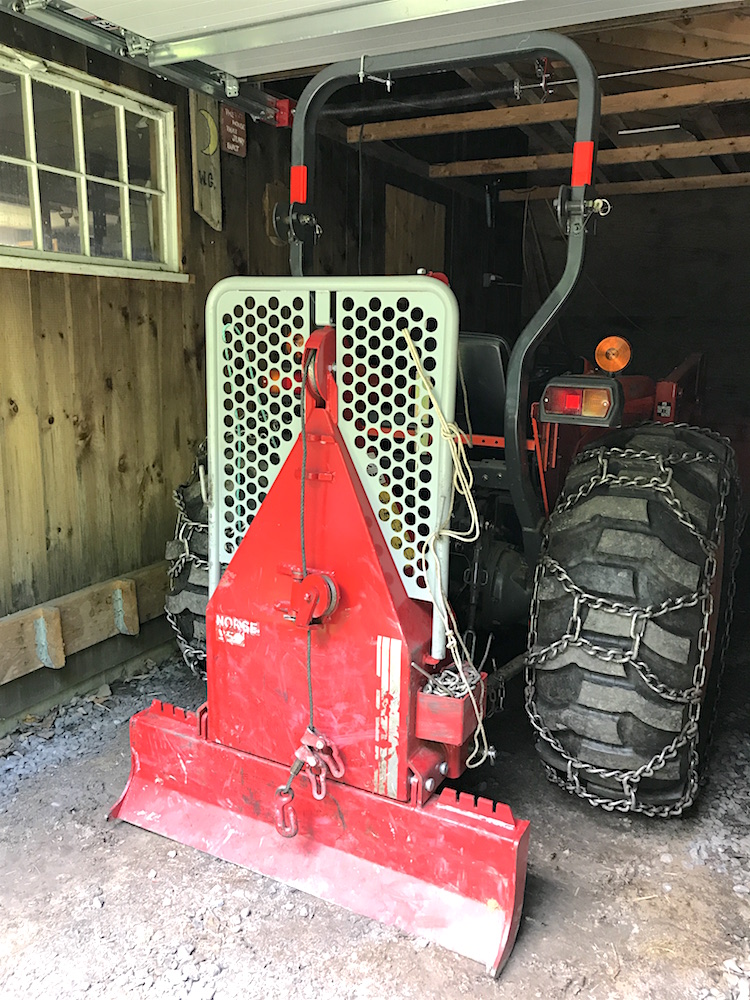
A new-to-us piece of equipment joined the homestead in July: a logging winch! This is one of those things that Mr. FW had a saved Craigslist search set up for as it’s tough to find a used winch that’s in decent condition. Lo and behold, just such a good condition used winch popped up and Mr. FW leapt into the truck to go buy it. It’s taking us some time to build out our farm supplies via the used market, but it is so much cheaper when we’re able to find things used that its worth it to us. As I’ve written previously, the challenge is that most folks keep and use their equipment for decades, which puts a real damper on the used market, but speaks volumes for the ethos of reduce, reuse, and recycle.
What’s a winch? You are perhaps wondering (as I did). It is not, I learned, a medieval bar maiden. Rather, it is a sort of pulley system that hooks up to the back of the tractor to pull logs out of the woods for firewood.
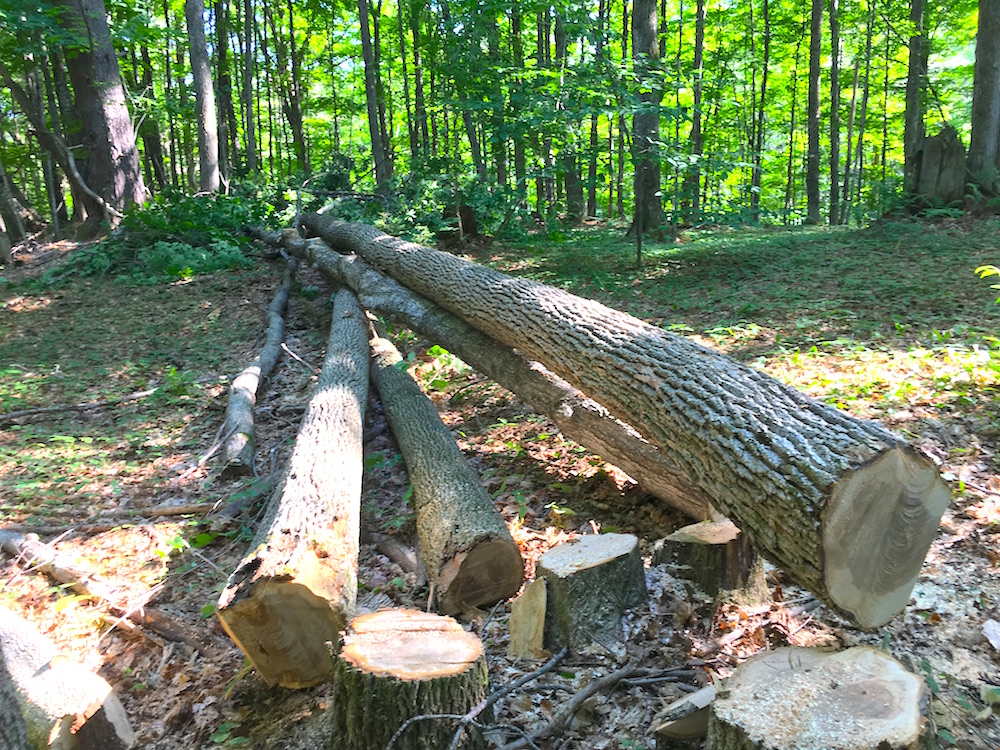
We heat our home with our woodstove and Mr. FW harvests all of our wood from our forest of many hundreds of thousands of trees. Properly harvesting wood is an important aspect of managing a healthy forest as it encourages new growth and eliminates diseased/problem trees. It’s also an efficient way to heat our home! I have a number of posts detailing Mr. FW’s directional felling (that means cutting a tree down and having it fall where you want it to fall) techniques as well as how we split, stack, and store wood. The winch is used in the second step of the process. After Mr. FW cuts down a tree, he then needs to transport that tree back to our yard where he can split and stack the firewood. The winch greatly simplifies the process of tree maneuvering.
I made Mr. Frugalwoods dictate the below so that I could explain it right proper to ya.
The purpose of the winch is three-part:
1) Using a winch saves labor because you can pull tree-length logs out of the woods (after felling them) as opposed to bucking them in place (that means cutting a log up into little sections) and loading the rounds (those are the sections of log) into the tractor bucket. It removes an entire step in handling the wood. Mr. FW’s work flow is incredibly faster with the addition of the winch!
2) It allows him to reach trees that are inaccessible by tractor, which vastly expands the perimeter of trees he can fell. This is important since he focuses on diseased/dying trees or dangerous trees that need to be removed. This expanded perimeter will let him target more problem trees.
3) It enables him to dislodge hung-up trees in a safe way (a hang up occurs when you fell a tree and it snags on another tree). Even with safe directional felling techniques, sometimes trees get stuck in other trees and this allows him to pull the tree down safely and with no risk that the tree will fall onto him. Bonus!
The winch itself attaches to the tractor using the PTO and is a pretty basic machine: it’s a spool of 160 feet of 3/8 inch steel cable with a clutch. The brand is a Norse 350, which delivers plenty of pulling power for what we need and we bought it in excellent used condition for $1,900 (retails new for $2,600 ). Another possible use for the winch is pulling a car out of the snow or mud. We haven’t had to do that since moving here, but seems like something that could happen to us…
Thanks to the advent of the winch, Mr. FW was able to fell, split, and stack close to an entire cord of firewood in mere days. The dream team of the winch and our log splitter has made firewood harvesting faster and more efficient by several orders of magnitude. Machines well deployed make our work much more tenable. I would be remiss if I didn’t acknowledge that the other key element of getting all this wood stacked so quickly was the valuable assistance of my dad, who was visiting us (along with my mom)! Beware: if you visit us in the spring/summer/fall, we will put you to work…
Side note: chainsaw safety is paramount. Mr. FW took several courses on chainsaw safety as well as safe directional felling techniques prior to working with a chainsaw (for locals interested, it was the Game Of Logging course, which he highly recommends). He also wears full protective gear including chainsaw boots, chaps, gloves, helmet, ear protection, and a face mask. Please do not operate a chainsaw without all of these safety precautions in place and please learn how to use one from an expert! As in, not me!
Parents On The Homestead
My parents came to visit us in July as part of an epic three-month road-trip through the United States and Canada. They drove their Prius in one incredible loop from San Diego cross country to Vermont and then up through Canada and back down the west coast to their home in San Diego. While they were here we put them to work harvesting blackberries, helping stack firewood, and above all else, caring for our children!
Mr. FW and I actually went hiking ALONE together without children. Several times!! It was glorious. Hiking with kids is nice and all, but going without them meant we actually covered some distance and didn’t have to constantly address questions about trees, birds, and random sounds in the woods. “What’s that sound, mama?” After awhile, I have no idea what sounds even are anymore. Hiking alone gave us the chance to rediscover one of the reasons we moved here in the first place: the ability to hike right outside our front door! Many thanks to my parents for all of their help and many thanks to Mr. Frugalwoods’ parents for all of their help during their June visit.
Critter Mania

As we returned from one of those soul-refreshing sans-kids hikes, a rotund, furry football bolted in front of us and leapt into the woodpile next to the barn (like he thought we wouldn’t see him in there?). This, we quickly deduced, was a groundhog, enemy of yummy gardens and nice lawns everywhere. We’ve since spotted said hog–also known as a whistle pig, woodchuck, and general world-class nuisance–skulking around our septic mound and mincing ‘neath the apple trees. We haven’t enacted eviction proceedings quite yet, but if that thing gets into our vegetable garden, someone will be in a stew.
The whistle pig is not the lone menace of the season. As we prepared dinner one evening, we spied a beast in our Red Duchess apple tree, which is our most favorite, most successful, most beautiful apple tree. Not to be trifled with by a beast. I sent Mr. FW out there armed with nothing more than his wits and cheered him on from the porch (someone had to stay inside with the kids, right?). Upon closer inspection, he deduced it was none other than Pork U. Pine, the surly, stinky porcupine who haunts our yard. Pork U. Pine managed to lumber his quill-ridden self into the apple tree and was arrayed on an upper branch, feasting on our prize apples with rude abandon. Mr. FW threw some rocks in his general direction until he got the message and slung himself out of the tree and ambled towards the woods. In disgrace, I might add. Fortunately for Pork U. Pine, Mr. FW is no baseball player and I have to say, I think he hit more apples out of the tree than anything else… but the Pork seemed to internalize the spirit of the rocks (if not their actual force) and hasn’t returned (that we know of… ).
Want More Fotos?!
While I only document homestead life once a month here on the blog, I post photos to Instagram (almost every day!) and updates to Facebook with much greater regularity! Join me there if you want more of our frugal woods.
And if you want to make sure you don’t miss a post here, sign-up for our handy dandy email list in the box below. You’ll get a message from me if you do…
Onward to August, frugal comrades!

I can salsa every year in a water bath canner. You don’t need a pressure canner. I took a class from our county extension office to first learn how to do it.
Absolutely, you can salsa in a water bath. Just google it.
Another long time canner here who echoes the above writers: you absolutely can can salsa in a water bath.
Yes I fourth that. Good recipes on the ball canning website.
I really loved this post! Planting the seeds and taking care of the garden might not be fun for me. But harvesting is!
Hubby has been talking about buying a stretch of land in the Midwest or somewhere inexpensive to do farming once a month while working his FT job. I have little interest in farming, but the right of having lots of greens in our garden really excites me. I told hubby about your and Mr. FW, and he seem to be really inspired!
Peak harvest for us in the Pacific Northwest (especially up at foothills elevation like we are) isn’t until early to mid August – as in RIGHT NOW. We have just a quarter acre and not all of it is garden, but I’m always amazing by just how much food we can grow in even that space. We didn’t grow any kale this year, but our neighbors did and have been telling me to harvest some, so now I’m absolutely going to try my hand at kimchi. Having a neighbor to swap with is so awesome because we can each grow different produce and swap the difference (ie the harvest from my 8 blueberry bushes). Summer is just so dang rewarding in the garden.
Epic post. I love reading your posts and homestead living vicariously through you and Mr. FW.
Be careful with the ground cherries. They are delicious but they will overtake your garden like nobody’s business. I love them but I plant them in pots now.
Also, I really need the recipe for kimchardashian.
You’d enjoy The CSA Cookbook. It has a killer recipe for kale stem pesto and many recipes using parts of the plant you might not think to eat and for fermenting garden oddments. Second topic–one summer I was kitchen crew at the Michigan Womyn’s festival. We had a 6 x 6 foot screen set horizontally about 18 inches off the ground. We tossed the dirty greens on the screen and pressure washed them with the hose. Amazingly quick.
That is a lot of chard! We have frozen salsa and it does just fine. I also just found this recipe and have my first batch fermenting right now…. I’m weirdly excited! https://zerowastechef.com/2015/07/14/fermented-salsa/#salsa
You made me laugh so much – a’winch’ in Scotland is a big smoochy kiss – I thought your blog was taking rather a romantic turn . . . 😂
Excellent, as always, thanks for the pickling recipes!
Ahahaha, this was a great post!
“We may need to build an addition onto our home in order to store all of our preserved foods…” I feel similarly about our own future. Pickles are the best!
Seconding the request for a recipe for kichardashian!
Something odd is going on with your blog website. If you google “Frugalwoods”, the link takes you to an old version of the site with no recent posts.
You can ferment salsa (or pretty much any vegetable) in the same way as kimchi, look it up, it is delicious!
Your frozen chard will be absolutely yummy when you use it this winter. One of my favorite veggies to preserve.
I’ll second the fermented salsa – I made two batches last year and it was delicious.
Also, their are recipes to can salsa in just a water bath. The Ball canning cookbooks usually have some. They do loose their crunch but it’s great to have in the middle of winter.
Yum!! Do you have a fermented salsa recipe you like?
Cultures for Heath is always dependable for fermentation recipes. You will just need to strain some whey from some plain yogurt. A strainer lined with a bit of cloth will do the trick. You could use your pour-over and a coffee filter too.
When we lived in our house, we had a large raspberry patch and several neighbour kids who loved to pick them. After too many spilled containers and tears, my husband took containers, like the one your daughter was holding, punched 2 holes and put a cord through each so they could put the container over their heads and be hands free. No spills after that and one hand could pick for their mouth and the other for the bucket.
That is genius! I should do that for myself! Babywoods doesn’t actually put any berries in the bucket… they all go directly into her mouth ;). But I would like hands-free picking myself!
Living in a small 3rd floor apartment, but taking full advantage of the balcony. I generally have been producing enough chard/salad and cherry tomatoes to put in my breakfast wrap most mornings. Additionally my beans have been going nuts, and I have enough to cook about once a week.
The big step has been home brewing! Keg system is set up for 2 small batches (2.5 gallons), plus a 5 gallon keg of fizzy water! Even if bottles can be recycled, it takes energy/fuel to transport, reprocess and ship the liquids. Loving the lower footprint of our home set up.
“Non-moron gardeners” .. ha! I always appreciate that you share the many things you’ve been learning 🙂
Hah! Yep, we still qualify as morons, but we’re getting better… I think!
Ha ha, I like how you said that you “only” have 9 cherry bushes so the yield isn’t that impressive! I can only imagine how overwhelmed I would feel with 9!
I’m embarrassed to admit I’ve never tried chard, but reading through this post (and seeing that impressively full kiddie pool), I’m tempted to remain in ignorance no longer. Farmer’s market, here I come!
Impressive! I would never have thought of using chard in so many different ways.
Can’t wait to see what you do for fall 🙂 For apple harvest time, I’d highly recommend a dehydrator (borrowed or used, though new isn’t that much to pay considering the work it can do for you!) to preserve those yummy apples in your pantry, no freezer space or additional glass jars required! My grandma made dried apples every year with windfalls from the local orchards–just a few cents per pound!–and they were always fantastic. She always stored them in 5 gallon ice cream containers. We trialed dried pears and plums, which are stickier but no less delicious.
Yes! I’m with you on dried apples. Although we made so many dried apples last year that we’re still eating them!!! Our dehydrator was a great purchase!
I made the mistake of going away for a week in early August – my mini homestead is coming on strong! Beans are sitting in the fridge to process. Last night was getting pears into the dehydrator – I LOVE home dried pears. I’ve gotten most of the ones off my tree and am eyeing an apparently abandoned tree across the alley for tonight. So far extra tomatoes (what I can’t eat fresh) have been turned into tomato powder. Tomato powder you ask? Great for sprinkling on pasta with pesto, or for creating my own backpacking meals. Next batch of tomatoes will be sliced and dried in pieces, or maybe roasted. If time allows – this weekend I’ll go blackberry hunting.
I, too, was going to recommend kale stem pesto (thanks, Mary!) but also, we just freeze the kale and chard stems and then chop them up all winter to add to soups, quiches, pasta sauces, etc. We freeze “whole” and then chop off pieces about the size as diced onions so we can throw them in when we’re sauteing the onions. (Shhhh…. don’t tell the kids!!)
Our spaniel-mix Adrian is an all too enthusiastic killer of whistle pigs. I mean, I’m impressed with her skills but that doesn’t make the end result any less horrifying. Will rent out her services in return for spicy pickles. 😉
We will 100% take Adrian up on her skills. We’d like this whistle pig, uh, dispensed with… ;). Pickles are yours–done!
I’m also struggling with tomatoes. I just moved from a mild climate to a much hotter climate and my plants are not happy. Unfortunately I did not think to plant any cucumbers, but I’m looking forward to planting this fall.
Kimchardashian is adorable. When I first saw the word I thought you were going to say you made a little person out of your extra chard like a scarecrow.
I’m really loving the homestead series, thank you for sharing your experiences! My family recently acquired grandpa’s 10 acre farm in Washington State. It has a lovely 1932 farm house and a big red barn sitting in the middle of the 10 acres of mostly pasture, with some woodland as well. We are working toward FI in just under 4 years and hope to move there then. In the mean time we are working on fixing up the home, barn and fencing and then generally getting the place back into shape since it has been sitting empty for a few years. Reading your posts is really helpful in giving us insights in what is possible and how to avoid some mistakes (no pickled chard, got it). We are doing a lot of research into sustainable living, so I can’t wait to read your post on your solar set up. Thanks for all of the wonderfully helpful information!
That’s so exciting, Leigh! Thank you for sharing your story–I’m wishing you all the best :). And yes, please learn from our moron moments!!
Leigh, how wonderful! We are in WA too – Seattle, and dream about getting property one day. If you blog or Instagram your adventures, I’d love to follow along! 🙂
I wish you had a picture of your kimchi made with chatd!
another fun thing to do with tomatoes is to dry them in the oven (or in the dehydrator…) And make like a roasted tomato pesto. You can also make a confit and freeze it. Definitely think you want to get a pressure canner soon!
Oooo I never thought of drying the tomatoes! Does it work OK with cherry tomatoes? We have a dehydrator, so I could easily pop them in there.
One of the pizza pans with little holes in it works really well.
Yes, we’ve dehydrated cherry tomatoes in a dehydrator before. Cut them in half, or they turn into little rocks.
Ok, I have my first batch in the dehydrator now! Thank you all so much for the idea! Can’t wait to see how they turn out. Yum.
I’m experiencing leg raising ENVY at that beautiful harvest. My god you month has been stunning. I don’t even like kale or chards hah! They will be delicious kimchi-ed.
My Korean friends mom put little fruits like apple or pear slices into the kimchi for that sweet unique flavor to the spice. It’s just a little hack from home Korean kitchens 🙂 every mom has their own special recipe but pear slices make it taste the best in my opinion.
Wow, what a phenomenal garden! I keep trying to convince my husband to dig up our lawn and just grow food. So far, it’s a no go, but we *are* expanding next year, so it’s a start. 😉 I don’t have nearly the space you do, so we’ll just have to be thoughtful about the space we do have.
I so enjoy hearing updates about your life. Rural living absolutely isn’t for me, I’m much more of a suburban gal, but you make it look so attractive! I’ll live vicariously through your posts, as someone said above!
I just love your posts; and thank you for sharing your recipes!
Could we purchase a can of Kimchardashian ? We love kimchi and want to try this creation!
Please let us know if this is possible.
Thanks,
Vanessa S.
We need a recipe for your kimchardashian (hilarious, BTW)!
We’re big fans of kale and rainbow chard in our house, but they’re kind of a pest to process. I was doubtful when I bought this little gadget at my local grocery store, but it’s been a huge lifesaver! I’m now a professional kale stripper. 😉 I saw a stainless steel one on Amazon that might be a good option, but don’t want to recommend it without trying it. We have this version, only it didn’t have the holes for herbs which would be nice: https://amzn.to/2o0wahf
I use the stems of rainbow chard similarly to celery in recipes, I just saute it and it can add some nice crunch. Another option is kale balls, which is really just whatever greens we have on hand with onions, rainbow chard stems, feta, and panko similar to this recipe: https://food52.com/recipes/37163-fried-greens-meatlessballs It’s a great way to use up greens that are starting to look sad and they freeze nicely and reheat easily in the oven. Shaping them into patties makes for better leftovers – reheat in a 400 degree oven until crisp.
I used to try to can all kinds of sauces, salsas, soups and such with my tomatoes. Now I just can jars of stewed tomatoes and process them into whatever I need after I reopen them. Then you don’t have to worry about acidity levels for waterbath canning and you don’t end up with too much salsa and not enough pasta sauce. I bought a mechanical food mill and I use it to make tomato soup out of my stewed tomatoes. It removes the seeds nicely, but retains all the delicious and nutritious pulp.
Owning a homestead seems like A LOT of work, so I’m thrilled with reading the reports of all your work while enjoying the luxury of sitting down. Gotta make hay while the sun shines…. Or in your case gotta garden and harvest while there’s no snow. I love reading your hilarious descriptions of life on the homestead. Keep up the great work!!
Oh my god. I’ve never seen so much chard in my life. We used to belong to CSA that washed all of that stuff in an old washing machine. That’s definitely one way to do it.
Yes. When I first moved to Florida and began to eat only from the local farms, I asked the farmer what is the best way to clean kale, as I never had it before. He said “put it in the washing machine tub, fill it with water, no soap!, let the agitator do the work, then spin dry.” It works wonderfully in my huge wash tub with very little work from me.
Thanks for the chard preservation info. I grew chard this year and realize I don’t really like it? I’m hoping to freeze some of it for adding to soups and sauces in the winter. Maybe I’ll like it better then.
Laura, I’m with you. Sadly, just not a chard fan! It’s ok and I’ll eat it if it’s in something. But I do not seek it out.
That is one impresssive kale haul! haha Maybe a salad spinner to dry it? Granted you would have to fill it with small amounts at a time , but it would get the leaves nice and dry.
Ahhh wow! That is quite literally a MOUNTAIN of greens. I’m super jealous! We got a ton of okra out of our garden in July, but that was pretty much it. It’s so hot here in Texas that not much is growing in our full sun. I’m debating getting some kind of sun screen for the garden during these hot months. Oh, and we’ve also gotten a good amount of figs, too. One or two will ripen at a time, so I just freeze them in one huge bag. Once I get enough I plan to make either a figgy pudding or a fig tart.
Sra. Picky Pincher
Angi is in South Texas and his garden is amazing, in a simple and uncomplicated way
She also does sewing and crafts.
https://www.schneiderpeeps.com/
If you make a cooked salsa rather than a fresh pico de gallo type you can freeze it and it comes out very nice. Lots of recipes for cooked salsa on the internet of course. I also just shove the berries in the zip top bag and put them in the freezer – they are great for baking and making jelly later in the year. You are spot on about growing the cherry or grape tomatoes – they taste so much better and the success rate is almost 100% vs the big tomatoes. It’s always fun to hear about your adventures in country living!
I don’t know if you want to try the pickled chard stems again, but my CSA came with pickled chard stems (the chard had been ruined in a storm but they were able to salvage the stems!) that were made tsukemono-style with rice vinegar and they were delish!
Oh man, ok maybe!! Any idea what their recipe was? Ours are SO BAD! haha
Brilliant!! My 6 year old son is the only other person I ever heard use the word ‘gargantuan’!! With your garden salsa – I note you bought lemons… I’m assuming you don’t have a lemon tree? Do they not do well in Vermont? Every back yard here in Australia has a lemon tree! Such a great versatile citrus…. not sure about in the states but very expensive to buy here… anyway, great post, enjoy that chard!!
Sadly, it’s too cold for any citrus to grow here! We so wish we could grow avocados, lemons, oranges… but it’s just not possible in our climate. We do have plums though :)!
Have you looked into dwarf citrus trees? Plant in pots, put outside in the summer, and bring inside for the winter. If you have a sunny southern exposure inside, they could do quite well, and you’d get at least some fruit off of them.
Whoo hoo hoo hoo! What a seriously large batch of greens. Try drying some. Just strip the stems off and pile them on your drying treys. Set your dryer for no more that 115 to 125 degrees, or low, depending on how your dryer is set up. You need to use your fruit roll up screens on top of your treys or everything will fall down between the holes in your treys. If you don’t have enough (or any) cut out rounds of parchment paper and use that. The paper is made for use in baking at much higher temps so it will do well in your dehydrator. You will end up with scraps and crumbs – just toss them in a canning jar and mash them down with something. You can also run them through your blender to get all crumbs if you like. I don’t bother, it’s just an extra step. Use these dried up leaf particles to mix with other types if you like and do what Heidi does; she creates a mixture at the end of the season and uses it all year to toss in almost every thing she makes. You apparently can’t even taste it when used this way and you are adding extra nutrients to your meals. Heidi also makes vinegar out of apple peals, peach peals, etc. etc. etc. and, believe it or not, pine needles. The latter apparently is wonderful as a cleaning product. She is heavily into self-sustainability, herbs, vinegars, and a million other things including soaps, lotions, shampoo, laundry soap, and much more. She would probably love to hear about your kimchi recipe. She can be found on You Tube at Rain Country Homestead. I recommend you check her out.
Salsa: Yep you can water bath it. The key is the amount of onions and peppers in relation to the tomatoes and the amount of added acid. The only safe way to do this is to use a tested recipe. The Ball Canning Book is one source, and the University of Georgia is another. UofG is on the web so check them out.
Best of luck. The kids are adorable.
I am so jealous of your harvest. I just cannot get things to grow/produce. I have wondered about hydroponics. Anyone have any experience with it? I would only go small scale, at least at first.
Preserving Everything by Leda Meredith is my go to book for everything. Salting, canning, pickling and drying
Was bumper year for cucumbers here – I quit counting after 100 from our single plant. Shared the bounty with friends, family, and co-workers. Good year for tomatoes despite not having any paste tomatoes. I freeze paste tomatoes whole then husband uses them in chili, spaghetti sauce etc. This year freezing slices of tomatoes – after removing the gel/seeds (some varieties have less than others). I am intrigued about the tomato powder and will have to give it a try.
I’m surprised black raspberries don’t grow wild in your woods. I harvest very few these days, the wildlife enjoys most of them.
Kimchardashian! That’s a great name! Here in the UK chard will overwinter if it doesn’t get too cold, so there are a few pickings to be had before it bolts in the spring. Nevertheless, it’s been such a good crop this year (though not as good as yours) I’m going to following your preserving suggestions and definitely try your washing method -so much better than standing at the sink, flicking water everywhere and squinting into the many chard crevices searching for soil and insects.
Thank you for an informative and entertaining post.
My parents are in their own personal battle with ground hogs. We give them bags of dog hair to put around their barns. I think it helps but ultimately they fight them with traps and “removal”.
Are there soybean fields near your parents? We rarely saw ground hogs unless the farmer planted soybeans. And they do love apples – green or otherwise. Their hearing is phenomenal, sight not so good. BUT the downside (besides consumption) is skunks LOVE to move into holes ground hogs have dug. At the prior house, we only had issues when we did not have a dog. Only one so far here at the new house and the dog dispensed of Mr. Ground Hog.
I keep saying they should get a dog. They travel a lot so they probably never will. They rent out cropland sort of nearby and sometimes the farmer plants soybeans but the groundhogs seem to show up even when there aren’t soybeans.
FYI, you can water bath salsa, since it is acidic. OR, even better, can the tomatoes, dice and freeze the peppers, and use them to make “fresh” salsa all winter long, just add fresh onion, cilantro, etc. You can hardly tell the difference from fresh salsa. Also, keep an eye out at thrift stores for pressure canners. I’ve picked up two that way. Your local extension agency can pressure test the gauges/weights. Enjoy your garden!
We’ve had a bumper crop of Roma tomatoes here on the North Shore of Boston. Two plants in two 5 gallon buckets (with holes in the bottom) have lead to possibly thousands (or at least a hundred) tomatoes. The Roma’s are firm, and after review, didn’t seem like great sauce canning tomatoes. Plus, they’re coming in 10 at a time rather than a bushel at a time. Solution- the best tomato soup I’ve ever eaten! Roast the tomatoes on a cookie sheet (I use a 350 oven but I have no idea if that’s correct) with a bunch of garlic. (The more the better over here, but tastes vary). Caramelize an onion in a stock pot (I use enamel dutch oven), add some stock/ broth (veggie broth from scraps works great), the roasted tomatoes and garlic. I give it a quick whir of the immersion blender (a gift after I gave myself third degree burns trying to use a blender for soup. I kid you not…), then add fresh basil (also in plentiful supply), and simmer. Half an hour? Maybe more? Whatever looks good. Re-blend, and you’re done. I add the other half stick of butter to the pot to make it more rich, but season with butter, salt, pepper, and oregano to taste.
No non-butter dairy, but I still wouldn’t can it. (Even with a pressure canner). It froze beautifully though and its been added to our freezer of homemade pesto to last us (hopefully through the winter). But the first batch of soup only lasted three days…. so you know….
Enjoy the summer and the bounty of the season! In New England we have to catch those beautiful days and beautiful produce while we have the chance! 🙂
Oh that sounds divine!!!
I am jealous of your Roma bounty. Somehow the two plants I put on the counter at the nursery turned into slicing tomatoes (oh well). I would like to try San Marzano which I’ll probably have to start from seed.
Dehydrated kale keeps forever, is shelf stable, and can be added to soups, stews, rice–pretty much anything that cooks in water for a bit. I have found that the dehydrator is a wonderful addition to preserving and paid for itself quite quickly.
Good to know! We have a dehydrator and use it to dehydrate apples, but I hadn’t thought to do the kale and chard. Do you sort of crumble it up into soups and stews after it is dehydrated?
Kimchardashian for the win! Also, I need to try pickling one of these days. I’m more and more reluctant to buy them off the shelf lately as I’ve seen jars going over $8 for pretty standard pickles. :/ Also, cucumbers are one of the few veggies I’ve successfully grown in the past. 🙂
Is a pressure canner on the radar? I would expect so, seeing how much your gardens yield!
any more interesting shots from the critter camera? Haven’t seen those anywhere on social media!
Oh! Good question! We’ve forgotten to check it in awhile!!! Hah! I’ll have to go get the chip and let you know 🙂
I’d like to put an order in for Kimchardashian please…! No harvest on my homestead, and I don’t think the association allows veggies/fruit to be grown. Now while I’d love to go get a plot of land, I’m interested in a CSA for fresh local produce since my luck with plants is nil. Glad to see things thriving for you guys! I kept up my uber frugal month carried over from last month and it’s going great. Summer must be so busy for you guys! Good luck! BTW-did you plant any strawberries??
Yes Liz, it was me who suggested the dehydrating of leaves. I am getting to the point of wanting to dehydrate everything due to the fact that it saves so much storage space and is a better procedure for saving nutrients. Just stir it into your stew or whatever. Remember the leaves are dehydrated so will rehydrate when you toss them in. Just stir them in and let it rip with the rest of your vegies. Also works as a good thickener if something seems too watery. You can do the same thing with dried tomatoes either as is or ground up as you want. When you stuff the dried leaf bits in a canning jar and mash them down, you will end up with a combo of small bits and powder, thus when you use it you will have some small chunks to bite down on and miss the powder entirely. Try it this way first and if you like it you have saved a step in putting the stuff in the blender to powder it. Heidi has some good videos on all this so that will give you a visual on it.
You guys are doing great in moving along with your long held plans. Congrats!
Check out, if it’s possible to can your stuff in the oven (with a little water on the cookie tray added). I made pears (only cut in half) with white wine and cinnamon this way. They were so yummy, and they were safely canned.
I wondered, are you thinking about starting your own chicken herd? I would love to have some chickens, and get fresh eggs every day or week. But I just have a rented appartement without garden.
I’m a little jealous of your chard and kale haul! Maggot root worms did in our kale this year, we have just a few plants that survived. I highly recommend dehydrating kale! I tear and chop it into little pieces. Once it’s dried you can throw it into soups all winter. If you have smaller amounts of chard to deal with it freezes beautifully after having been sautéed with garlic and olive oil. But I wouldn’t want to saute up that mountain….
Yum! So with the dehydrated kale/chard, do you need to freeze it? I’m liking this idea…
Acid items are usually fine for water canning, it’s the non-acid items that need the pressure canning, think meats and pumpkin butter. And some advice on the snap peas: they were originally called snow peas for a reason, you can almost plant them when there is still snow on the ground! Once it gets warm they do get fungal growth, but I consider them an early crop, rather like spinach and lettuce. Try and water at the roots, and give them lots of sunlight. Don’t fertilize until the blossoms form, or you will mostly get lush leaves and few peas. I also tend to plant them every few weeks, so you have constant crops coming on, and pick them often as soon. As they are eating size, as you will end up getting a better, bigger harvest. A later crop, but related, are green beans, we love them, and would plant both Bush beans and climbing beans. Buy the shortest to harvest (we live in Seattle/NW area, a short growing season), and wait until it’s warmed up. They grow very easily, and if you keep them picked, you will be rewarded with daily basketfuls of crops until frost! Easy to freeze,and great protein source. You may be able to grow some into actual dried beans, but we never tried that. And all I was able to grow in a short season her was Early Girl tomatoes, and cherry tomatoes. But try the small Romans, sweet million (or 100s), and the Yellow Pears–tasty & different, and they looked like tiny yellow light bulbs! I enjoy reading your posts!
You can absolutely can salsa and preserve in a water bath!! It’s just that the canned stuff has a little more vinegar. Just different than a fresh pico that you make at the height of summer.
Here are my two favorite recipes:
Charred tomato and chile salsa from Canning for a New Generation http://www.reporterherald.com/lifestyles/flavors/ci_30171935/canning-tomatoes-dont-sweat-it
Fresh vegetable salsa from Ball https://www.freshpreserving.com/fresh-salsa-recipe-%7C-recipe-for-salsa—ball-fresh-preserving-br1031.html
You can change the hotness of peppers and spice ratio and things like that, as long as you keep the veg-to-acid ratio about the same.
You’ve been BUSY! How did your parents like Canada?? 😀
It seems there is a renaissance in going back to smarter , simpler ways of doing things. We are becoming homestead farmers, doing the orchard, vegetable garden, fruit plants, bushes, chickens, keeping bees and trying to make it all mesh together. We are doing our best to be 100% organic and keeping hives of bees on the property reminds us of how important it is to our environment and our “pets” as I call them. I have made a couple forays in driving hubby’s tractor, but it is so big and tough to reach all the controls when you are on the petit side. We are planning to can again this year and hubby is researching fermentation of pickles and other vegetables, not just his beer, cider, mead and vinegar for the probiotic benefits as well as tasty foods. We have our deer tags and would like to fill the freezer again with free range, antibiotic free meat. We love venison. Some of our family members think we are crazy to be doing what we are doing. But we are financially solid, we are not trying to keep up with the latest foolish trends. Are more interested in attending lectures on bee keeping and food preservation than the latest movies. I do my own nails and pedicures, wear little makeup and my husband cuts my hair for me. He does my braids for me as well, and I get compliments and asked how I do them. Umm, tell hubby I would like this braid and he does it. And they joke they would like to borrow him and I say no, he has too much work he needs to get done at home. But I do share some. Hubby cuts my children’s hair, my mom’s and gives haircuts to two of my best friends. So I am not selfish. I did chuckle when we got an invitation to a barbecue last month and I asked what I should bring. She said bring a vegetable salad, some of hubby’s sausage, onions and peppers.. and could you come a couple hours early to help set up and I really need my hair trimmed, it is looking ratty, please have him bring his hair shears and tools, and can I get him to give me a french braid so I can look good for the party? Yes they like my chef’s cooking and I did share my stylist with my best friend. I think she fawns over him cutting her hair to stroke his ego, every guy had too big of one. Telling him he does a super job and she only trusts him ensures he will never tell her no. Yes, guys are gullible.
1. dry kale and eat it like chips.
2. We cut cherry tomatoes in half, roast/dry with some olive oil, garlic and thyme until they are caramelized, stuff in small jars, top off with olive oil and freeze. Use like sun-dried tomatoes
3. Try a different brine for the chard stems — although I cut mine in tiny pieces to use on egg salad, fried eggs, etc. . https://food52.com/blog/9032-pickled-chard-stems
4. Recently had a dinner up in Montreal where the chef packed unripe blueberries in salt for 6 months and used them like capers. They were delicious!
After a long lasting winter, it’s good to see you harvested so much! All looks so yummy. I’m just super pleased we had a hot spell this summer in the UK so the basil on my balcony grew!! Small steps 🙂
You can also halve your cherry tomatoes and put them into the dehydrator plain to use like sun dried tomatoes. They’re delicious!
Oops just saw that someone commented the same above! Not reading carefully!
Chard pizza. This is the recipe I use: htt p://www.farmgirlfare.com/2009/01/swiss-chard-and-artichoke-white-pizza.html
Except artichokes aren’t something I have around so I usually use something else (e.g., cooked italian sausage, roasted red peppers). Google turns up lots of recipes.
OK, in answer to your last question about freezing dried chard, etc., no you don’t need to freeze it. As long as it is thoroughly dry it will keep in any old jar for at least a year. If you want to keep it longer (a nifty idea if you want to reduce your planting next year and use the extra space for something else), keep it in a canning jar and seal the lids. This is done with canning jar attachments to your food saver, if you have one. They are about $20 on Amazon. You get two sizes, one for wide mouth jars and one for regular jars. If you don’t have a food saver you can use a brake bleeder. You can also find that on Amazon. That was in the same neighborhood in price as I recall. The down side is that you have to hand crank it, and on some models you have to hold the tip of the brake bleeder thing on top of your jar with one hand and crank with the other. Not for me! The plus side is that Mr. F can use it on the car if needs be. An inexpensive food saver is, in my opinion, the best option. It will also help to reduce or eliminate freezer burn if you save your vegs, etc. in food saver bags instead of what you are using. They can keep at least two years in the freezer this way as you eliminate the freezer burn issue. Apparently Amazon has another brand of bags for the food saver that work just as well and is less costly. I’m going to check that out when I need some more. Thus ends my THIRD post on this issue.
By the way, on my second post, I didn’t realize ((read the preceding post ) that another person had also commented about drying your greens. If she sees this, I hope she realizes that and that I didn’t mean to step on her post. I apologize if this bothered her.
If you are jam-eaters at all, ground cherries are excellent for jam.
I have also frozen blanched greens (including chard) and it’s a yummy addition to soups/stews in the middle of winter. And ditto on the salsa, can be canned in a water bath.
Just get rid of the kardashian reference completley and all will be well. Dont bother with that. You are splendid.