
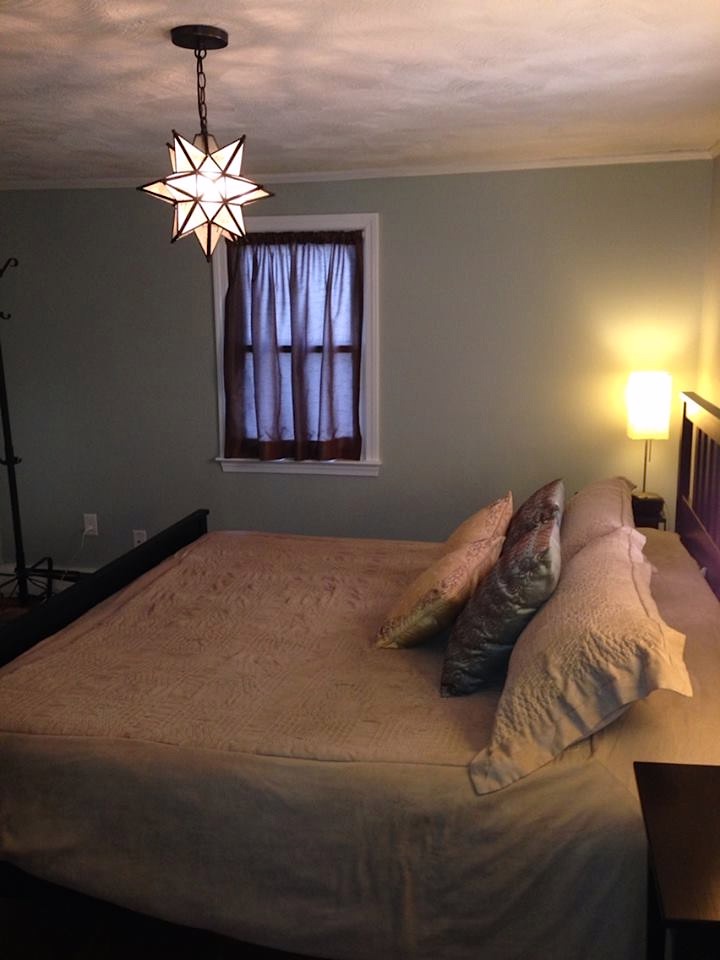
One of our first Frugal House projects was updating our master bedroom. It was in sorry shape with bruised-peach walls and classy gold ’80s accents. We went from before to after for $163.70–learn how!
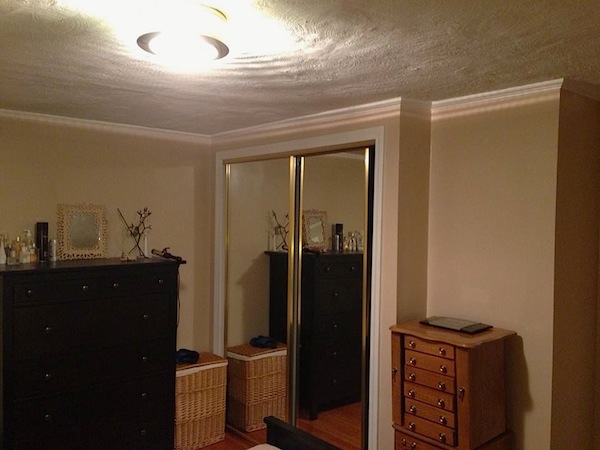
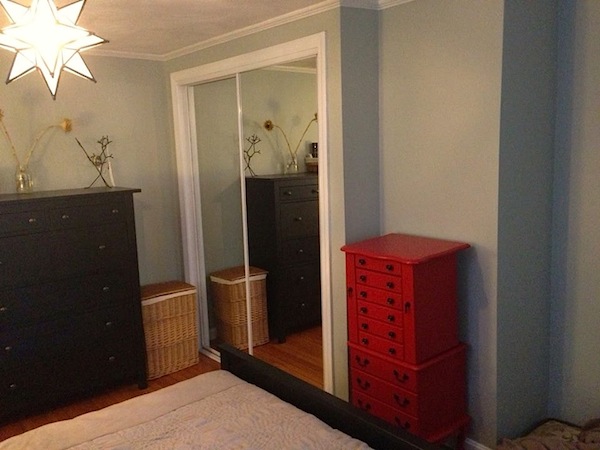
In this post I’ll focus on how we painted the walls.
See these posts for specific rundowns on each project in the room:
- Refinishing Gold Mirrored Closet Doors
- Refinishing Furniture
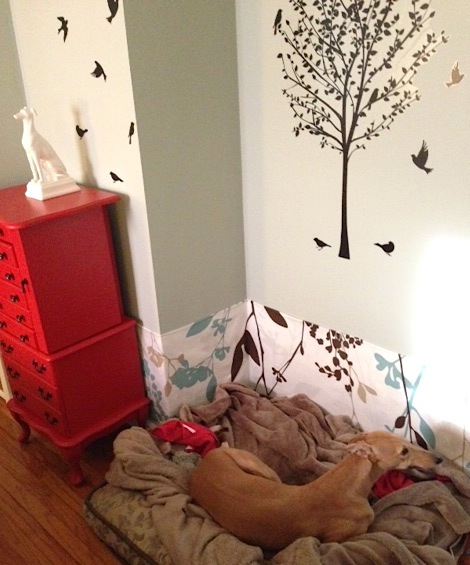
- Final Frugal Finishing Touches (curtains, light fixture, and the dog corner!)
Total Cost: $163.70
(includes all of the above listed projects)
Wall Painting Supplies:
- Spackle
- Spackling knife
- Sandpaper
- Painter’s tape:
- Frugal tip: it’s expensive. Don’t buy it unless you really need it.
- Drop cloths or paper bags
- Paint:
- We used Restoration Hardware’s Silver Sage in the subtle velvet finish.
- Frugal tip: this is tough, but, try not to pick the wrong color. You don’t want to redo this project because paint is expensive. We selected Silver Sage after seeing it in other homes. Know what your paint color looks like in different lighting and try to be as thorough as possible in researching color choice.
- Paintbrushes
- Personal paint cup:
- Frugal tip: use old plastic food containers.
- Paint rollers
- Roller trays
- Damp rags:
- Frugal tip: we cut old t-shirts into rags.
Here’s How to Paint a Room!
Step 1: Remove all nails from the wall and spackle the holes.
- Nails can be removed with a nail puller or the back of a hammer.
- Scoop spackle with a putty knife (not really a knife at all, it’s flat!) and insert into holes.
Step 2: Sand.
- After your spackle is completely dry, sand to remove excess and even out the space around the erstwhile hole.
- You might need a few rounds of spackle-n-sand if you have deep holes.
- Feel free to sand any other imperfections you find on your walls.
Step 3: Remove debris with a damp cloth.
- Make sure you wipe off any sanding or spackling detritus–you don’t want to paint over any gunk.
- This is a good time to wipe down baseboards and generally remove dust and dirt. You really, really, really do not want to paint over it.
Step 4: Move furniture and cover floors.
- Make sure you have enough space to work in: move furniture to the center or out of the room entirely.
- Then, drape cloths over any remaining furniture and cover your floors. You can buy plastic (cheaper) or cloth (easier to work with) drop cloths.
- Frugal tip: use leftover grocery sacks and paper bags instead of buying drop cloths.
Step 5: Remove outlet covers and tape over.
- Using a screwdriver, remove any outlet or light switch covers.
- Put them in labeled ziplock bags along with their screws. You don’t want to hunt for screws later!
- Put a piece of painter’s tape over the exposed outlets and switches.
Step 6: Tape.
- This is optional. I recommend taping when there are a lot of tricky angles, like with a staircase, but I don’t think it’s particularly necessary when painting a straightforward wall.
- However, if you’d feel more comfortable with tape, by all means tape it up!
- Frugal tip: painter’s tape is pretty expensive, so you might forgo to save on overall costs.
Step 7: Prep your paint.
- Pour a small amount of paint into a personal paint cup/old plastic container.
- Don’t dip your brush into the gallon of paint because it might contaminate the whole supply.
- With a personal paint cup, if you get debris on your paint brush, you’ll only ruin a small amount of paint.
- Use a hammer and nail to punch small holes into the rim of your paint gallon–this allows excess paint to drip back into the bucket. Cover your gallon and hammer down the lid.
- Frugal tip: paint is the most expensive part of this project, but by following the above paint conservation techniques, you’ll use less paint! Don’t open a second gallon until you absolutely need it–you can return paint for a full refund if you don’t use it (I’ve returned many a can of unopened paint).
Step 8: Start painting by cutting in around all edges.
- “Cutting in” is what the pros call framing out your wall with paint. Basically you paint the sections next to the ceiling, floors, and any other trim (doors, molding, etc).
- Frugal Husband and I watched This Old House’s video on how to cut in about 10 times before starting to paint.
- Frugal tip: if you cut in correctly, you won’t need expensive painter’s tape to frame out your wall.
Step 9: Continue painting using rollers.
- Once your room is framed out, pour some paint into a roller tray and roll it onto a roller.
- Apply to the walls in a W shape–this enables you to spread the paint out evenly across the wall.
- This Old House offers a great overview.
- Frugal tip: thoroughly wash out all brushes and rollers so that you can re-use them.
Step 10: Determine if additional coats are needed.
- We didn’t prime our walls since the original color was lighter than the new color. So, we ended up needing two coats.
- Multiple coats are usually a good idea since it allows you to smooth out any imperfections from the first go-around.
- Frugal tip: don’t skimp on a second or third coat if you really need it. It’s not worth the time and money if you’re not satisfied with your final result.
Step 11: Rejoice and admire!


Taping (and removing tape) are my biggest pains when painting. I just practiced until I got good at cutting in. I agree that a new paint job can make a world of difference in how a room looks!
Yes, cutting in is the great painting time saver!!!
Hi, great post, love the blog, keep it up guys!
The links to This Old House are invaluable. I had no idea that this is how the pros do it! What can I say – the internet is a big place, and I live in Europe and would not have known about this TV programme. So now I feel empowered to repaint my home office myself and save several hundred euro in the process. Thank you!
I’ve been running my own small side business of painting other peoples homes and businesses for several years now. So I though It’d share some tips.
Tarps: I use plastic shower curtain liners and make sure to overlap them. I paint one wall at a time then move my tarps so I don’t need lots. I have three. Always use a tarp when rolling, rollers splatter, EVERY SINGLE ONE. There are no exceptions, much as my sometimes helpers want to disagree.
Paint buckets: to easier hold onto your paint, white cutting in, use a container you would otherwise recycle. I use an old Folgers coffee can; it has a little handle so it’s even better. I don’t drink coffee and I’ve had it so long I don’t remember where it came from. Always keep your paint buckets, pans and such on tarps because you don’t want to have to try to get paint out of carpet. Believe me. (Check your shoes before stepping off the tarp!)
Tips on cutting in: only get paint on the side of your brush touching the wall (in other words dip only the tip of the brush in the paint and scrape one side off on the side of the can or paint bucket). Watch what you are doing. Get on level with the paintbrush – on a ladder or laying on your belly. If you can see what you’re doing you’re less likely to mess up. Don’t be afraid to take your time.