
It’s holiday time, which for many of us means it’s holiday card time, which for many of us means it’s holiday photo-taking time! Who doesn’t relish the thought of matching reindeer sweaters, antlers on dogs, and babies doing everything but smiling at the camera?! Fun, right??? I actually do love taking our annual holiday photo (although I’m pretty sure the rest of my family does not share this sentiment… ) and making our annual holiday postcard to mail to family and friends. Do you know how much I spend on this photo every year? Exactly zero dollars. And today, you are in luck, because I will tell you how.
As you likely already know, based on how frequently I write about the holidays (I’M OBSESSED), my frugal philosophy is not to skip the holidays or nix the greeting cards. Rather, I’m a proponent of frugalizing, simplifying, and otherwise finding hacks for creating warm, loving holidays for a fraction of the cost. No reason to spend tons of money and no reason to forgo the season altogether. I’m all about finding a tenable, balanced approach to lifelong, luxurious extreme frugality–the epitomization of a marathon and not a sprint (being someone who runs only when chased/my child is about to knock something over across the room at someone else’s house, I can only imagine this metaphor is appropriate).
The Patented Frugalwoods Cheap Holiday Card Hack

Last year (and the year before too, actually), I divulged my secret frugal formula for mailing out epically inexpensive holiday photo cards and this year, I’m going to tell you how to get the photos for free too. If you don’t want to read those two posts, the quick story on cheap cards is that I order business postcards from VistaPrint, which are less expensive than their “holiday card” options. You can locate these supremely cheap postcards by going to “Marketing Materials” and then selecting “Postcards.”
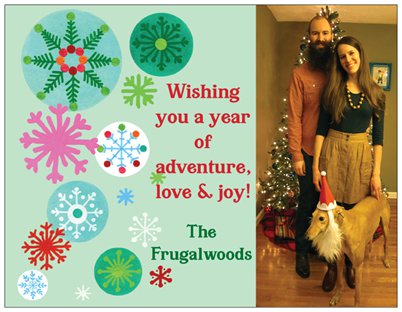
Postcards are also the cheapest way to send greetings through the mail as: 1) they don’t require envelopes and, 2) their postage is less expensive. Savings all around! Business postcards for the win. And don’t worry, you don’t need to feature a fax machine alongside your faces–there are plenty of options for lovely, holiday-ish backgrounds (see our card last year at right). You can also upload your own background image for a wholly customized experience! Another advantage to using a postcard is that the photos themselves aren’t huge, which means your photos don’t need to be of a particularly high quality because you’re not blowing them up to a large size.
The Best Part: FAMILY FOTOS!
Now, for the crowning jewel: the photos! In order to obtain our pics for free, Mr. Frugalwoods and I take all of our own photography. Before you roll your eyes and close this article, rest assured that we’re not professional photographers and we don’t have a particularly fancy camera (we currently use our iPhone cameras and before we had iPhones, we used an old Canon Power Shot–and, the iPhones are actually better!). We also don’t transform our home into a photography studio (hah! Like I’d have the time/patience for that… plus, sounds too much like crafting).
I do, however, take a metric ton of photos for Frugalwoods, which I post daily to Instagram, should you be interested in perusing. Plus, I have a kid and feel an unrepentant and inexplicable compulsion to document every moment of her life. And before that I had a dog, which I similarly felt required excessive photographic documentation. Suffice it to say, I’ve taken some photos in my day.
I also want to add that there’s absolutely nothing wrong with hiring a professional photographer to capture shots of your family. However, this comes with a pretty hefty price tag in a season where many families are already feeling strapped.
If hiring a photographer is your thing and you have ample funds to cover this expense (and $0 in debt), then go for it! If, however, you feel you should or must hire a photographer, but really can’t afford to (or it conflicts with your longterm goals of paying off debt or reaching financial independence, etc), then I’m here to tell you that you can take your own photos!
Additionally, as a parent, I am personally a bit shocked at just how many “special occasions” parents hire photographers for: the birth itself, the newborn shots, the monthly shots, the first birthday party shots, the Christmas shots… you get the picture. This adds up to a fairly ridiculous sum of money and your kid isn’t even two years old yet! Again, there’s nothing wrong with hiring a photographer, but think carefully about whether it’s something you need to do for every single event. Your child is not deprived if you don’t hire a photographer and you will have plenty of photos to cherish for years if you take them yourselves.
That being said, there are some occasions where it really makes sense to hire a professional. This past summer, we celebrated my parents’ 50th wedding anniversary, and my siblings and I paid for a photographer to come to my parents’ house to take family photos. We did this because with such a large group (8 adults, 4 kids, and 1 dog), the likelihood of DIY photo success was pretty low (we’ve tried it before… ). Additionally this was a once-in-a-great while event and so worth it to us to pay for a professional.
Mrs. Frugalwoods’ Tips for Successful DIY Photography (with dogs & kids!)
Over the years of conducting successful and extremely not successful home photo shoots, here are the top tips I’ve uncovered:
1) Plan everyone’s outfit in advance.
I find that one of the more challenging aspects of a successful photo shoot is the question of what everyone will wear. For this, it’s easiest to map out a battle plan strategy in advance. Being an extremely frugal person, I do not advocate buying new clothes for a photo shoot (or a holiday or really for anything at all) as it’s totally unnecessary. Plain, solid-colored clothing works well and, more often than not, you can’t even see the full outfit in the photo anyway.
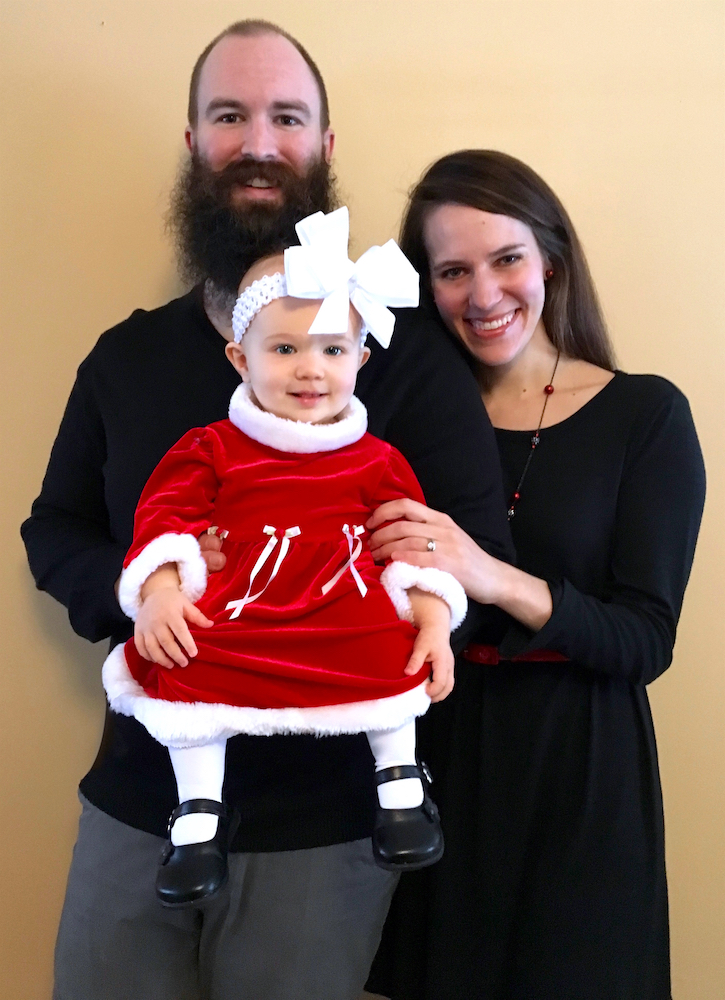
Don’t overthink this and just choose clothing that isn’t too flashy and that doesn’t clash. If the kids will be decked in brightly-colored Christmas outfits (as ours usually is, because why not), consider going all black for the parents, or a similarly plain, unoffensive color (see our black outfits last year at right). Plaids and stripes (which I’ve made the mistake of using before) often look weird and too busy in the finished photo.
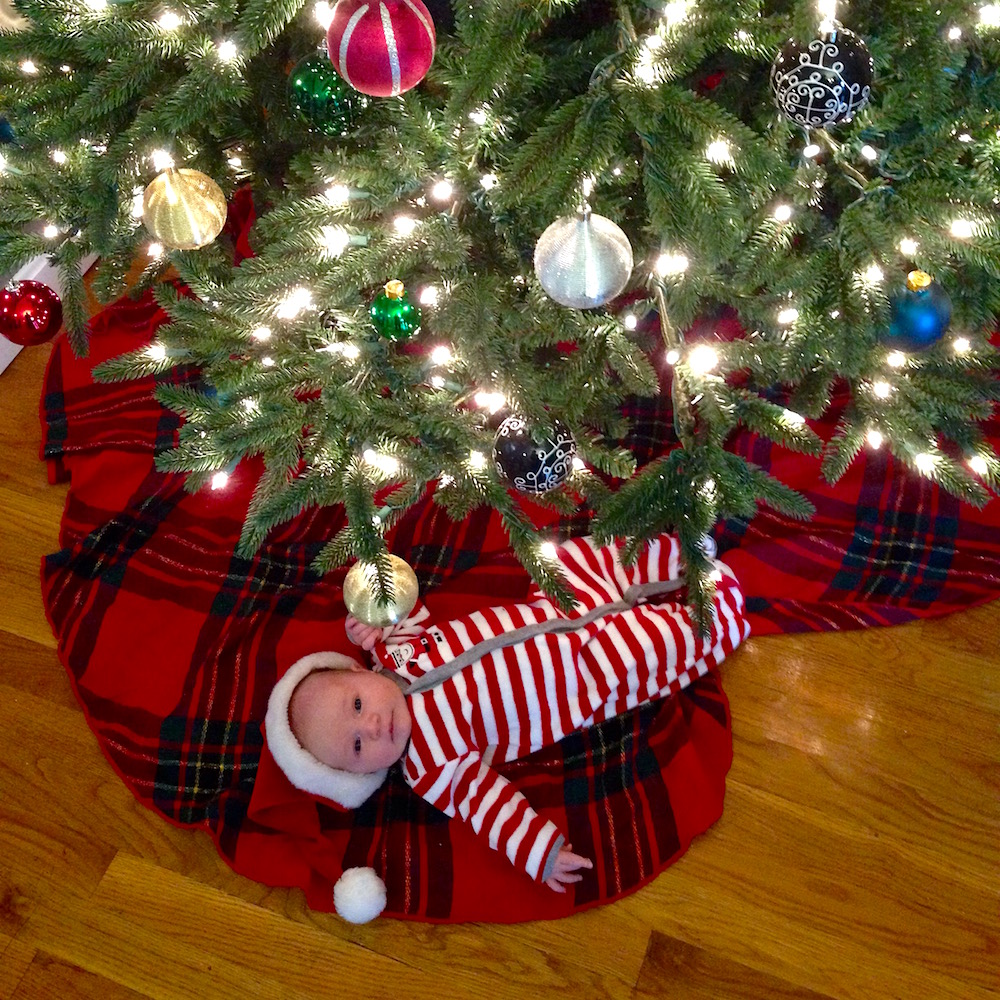
Simplicity is best and don’t worry about looking too plain, especially if you have an active background like a lit Christmas tree or the great outdoors. Sidenote: In the photo at right, I thought the plain wall (which is our dining room), would look nice, but I actually think it’s too boring. I’m going back to the Christmas tree backdrop this year, but I do love the plain/black outfits!
Also, I cannot emphasize this enough: try the kids’ clothes on their bodies ahead of time. They hate getting dressed up anyway and if you have to cycle through several pairs of tights, they’re just going to revolt and bolt. Have everyone’s complete outfit (dress, tights, shoes, headband) tried on and laid out in advance. This also lets you ensure you don’t have National Lampoon-worthy clashing going on between family members.
If you need/want holiday-themed outfits for your kiddos (or dogs!) see if you can borrow something from a friend, or, check out the used market. Buy and sell groups, as well as Craigslist, garage sales, and thrift stores are loaded with barely-worn holiday dresses and suits. All of Babywoods’ clothes are used–holiday dresses included–and there’s just no reason to spend more than a few dollars on festive garb. They’ll wear it once or twice and then outgrow it. Don’t waste your money. Check out this post for guidance on how to source second-hand stuff: How To Find Anything and Everything Used: A Compendium Of Frugal Treasure Hunting.
2) Prepare and stage your photo shoot area in advance.

Similar to the plan-ahead mentality of outfits, you do not want to be scrambling on your backdrop while the whole family stands around dressed, ready, and waiting (not patiently, let’s be honest) for you to set the scene. Consider in advance where you want the photo shoot to take place and then stage that area.
Let’s say, for example, that you want to take the photo in front of your Christmas tree. Awesome! Stand back and see what else is in the frame. A random table edge? Cords? Toys and a dog bed?
Unless you want that stuff in the photo, simply move it aside. And if your tree happens to have a string of burnt out lights, don’t be like me and forget about it (see photo at right… ) just turn the tree around so they don’t show (I mean, you could replace them, but let’s be honest, turning the tree around is what’s going to actually happen).
3) Decide if you want to take your photos outdoors or inside.
Although we live on what I consider to be a glorious paradise of 66 gorgeous acres, I actually take all of our “staged” family photos indoors because I can control the environment inside my house (I mean, sort of). Conversely, I cannot control the weather, the temperature, the wind, the angle of the sun… there are too many variables outdoors for me to handle when I’m trying to get our family shot.
Last year, to compensate, I included several outdoor pics on our card for good measure. Outdoor photos are beautiful, and are actually my preference, but there’s just too much to take into account for me to be successful with them at this stage of life (toddler, pregnant… need I go on?).
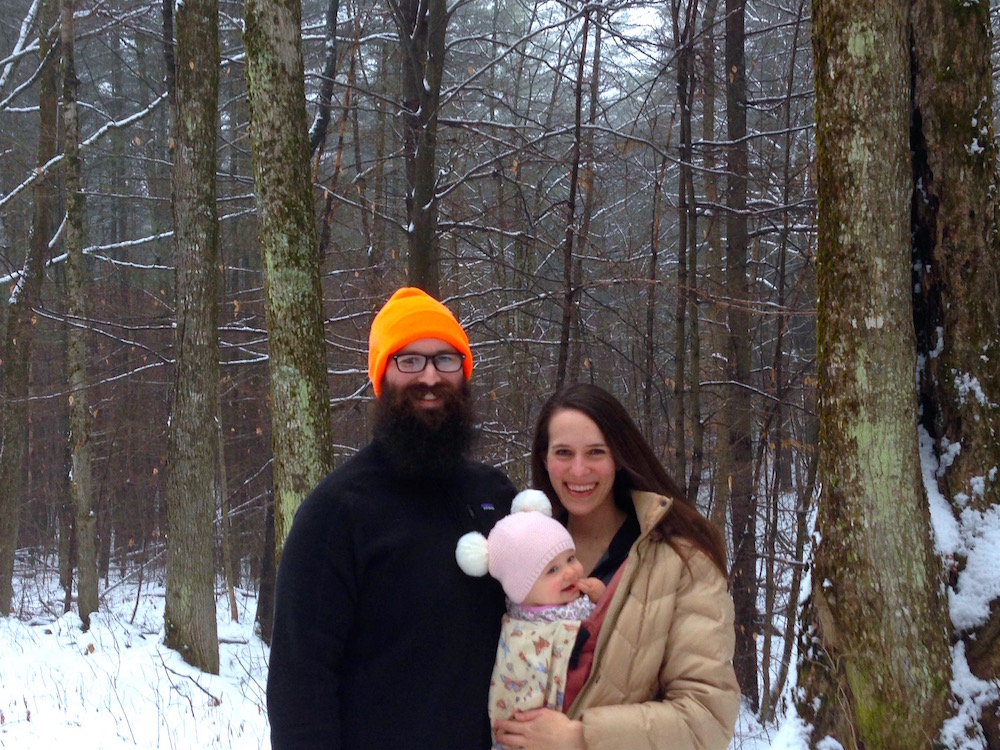
Also it’s like 20 degrees here right now so it would kind of defeat the whole holiday outfits thing if we all had our coats on. Plus, everyone squinting into the camera is just not attractive. More informal, fun shots taken outside seem to work best (see photo at right).
4) Consider your lighting.
Light is the #1 determinant of whether a photo will be terrific or terrible. Almost all bad photos stem from a problem with lighting. You need a lot of light for photos to look good and that’s about all there is to it. Given this, test out the lighting in your desired location ahead of time. Turn on the overheads, move some lamps into the room, open the curtains. One thing I’ve discovered is that often, I can actually achieve the best light indoors without the aid of the sun. Sunlight streaming through the windows often casts shadows or creates weird glares indoors. Seems counter-intuitive, but I often find that relying on artificial lighting is best. After you’ve set up your optimal lighting configuration, it’s time to….
5) Take test shots without people.

This is another crucial element of planning ahead: take test shots of your photo shoot area before populating the frame with people and/or animals. Take several photos and review them. Is anything jutting into the frame? If so, move it out of the way. Does your backdrop look ok? How’s the lighting? While, of course, the photos will look different with, you know, actual people in them, there’s a lot you can trouble-shoot before your subjects arrive on the scene.
6) Take test shots with another adult.
If you have another adult (or older child) handy, have them stand in the frame for a few test shots so you can see how the lighting works on a person. This also gives you a chance to ensure there’s nothing bizarre in the background that will create the illusion of horns coming out of one’s head.
7) Figure out where the camera will be.
Over the years, Mr. FW and I have employed two different tripod systems for our camera. One is a traditional tripod, which we found in a pile of trash in Cambridge. The other is this GorillaPod bendy arm tripod that we bought a few years ago on Amazon. I would say that they work equally well, but the GorillaPod is undeniably easier to set up, more versatile, and can be used in more contexts (outside, on railings, etc).
You can also simply set your camera on a table or chair. Determine at what level you need to set your camera in order to capture the whole family (keeping in mind the tops of everyone’s heads!). Next, figure out how to set your camera to take time-delayed shots and practice this function in advance. Make sure you take your test shots from the exact location where the camera will be.
8) Pose in front of the mirror.
Once everyone is dressed and ready to go for the photo shoot, do a quick family pose in front of the mirror just to make sure everyone looks as you thought they would. This is a speedy practice that’ll save you the heartache of an oddly-placed arm later (arms are, like, impossible to edit out of photos… I’ve tried).
9) Take the photos!
It’s telling that most of what goes into a successful photo shoot is the prep work. The photo shoot itself takes us only about 15 minutes (or less) from start to finish because we prepare everything in advance. The pros of a short shoot are that you’re more likely to retain child and dog interest in posing for the camera. The longer it drags on, the less desirable the photos become.
The main recipe for success with taking the photos is to take a ton. I don’t mean 10, I don’t mean 20, I mean 100 shots. At least. The more kids/pets you have in the frame, the more shots you need to take. Trust me on this. You’ve gone through all the work of preparing the scene and dressing everyone up, DO NOT call it quits after one or two frames. What I find is that, invariably, in a photo shoot of 200+ photos, there are literally just one or two good ones. This is 100% the hidden secret to my success.
Almost every photo you see on Frugalwoods is the cherry-picked best from a rather large phalanx of shots. This is what professional photographers do and you should too. Do not apologize for taking lots of photos and do not let your children weasel out of it. It doesn’t take very long to have the camera whir through a ton of shots and it is well worth it. There’s nothing worse than scrolling through the photos you just took and realizing… there’s not a single usable shot (ask me how I know this… ). Take a lot of shots!
10) Kid solo shots: distraction is key.
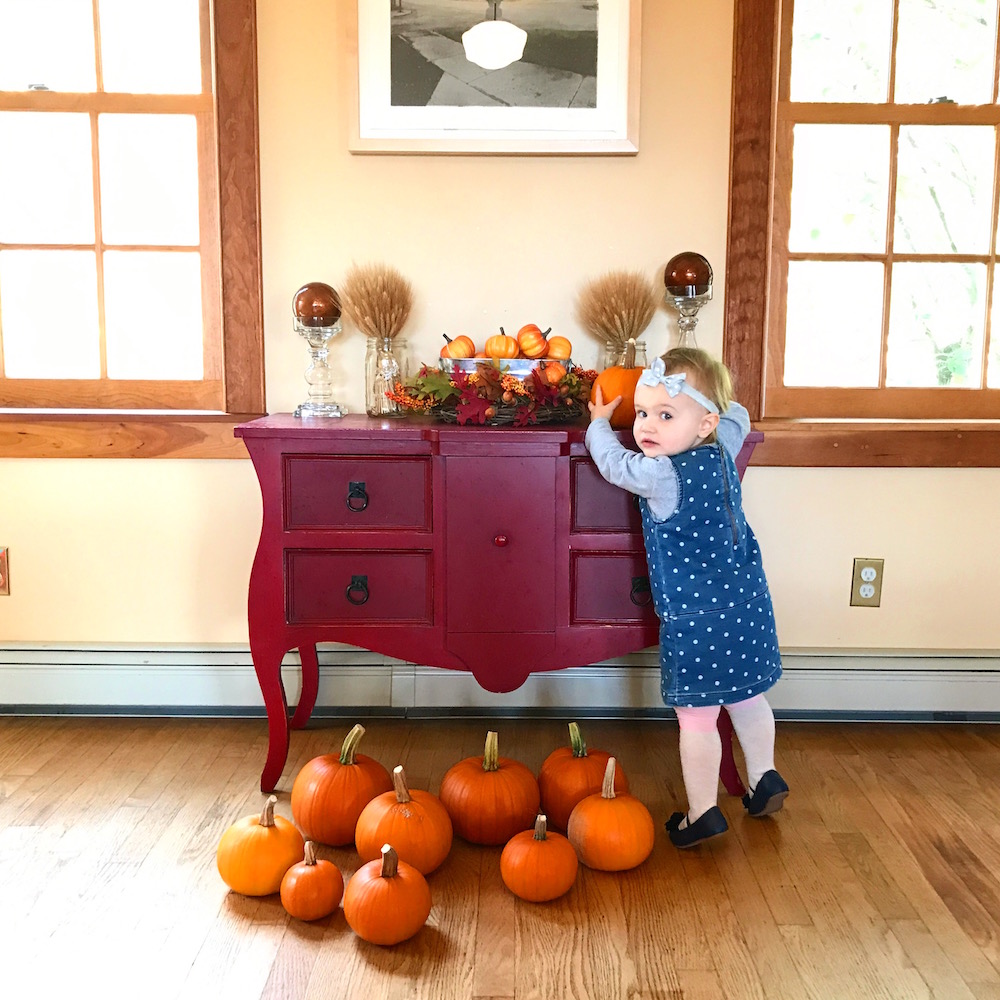
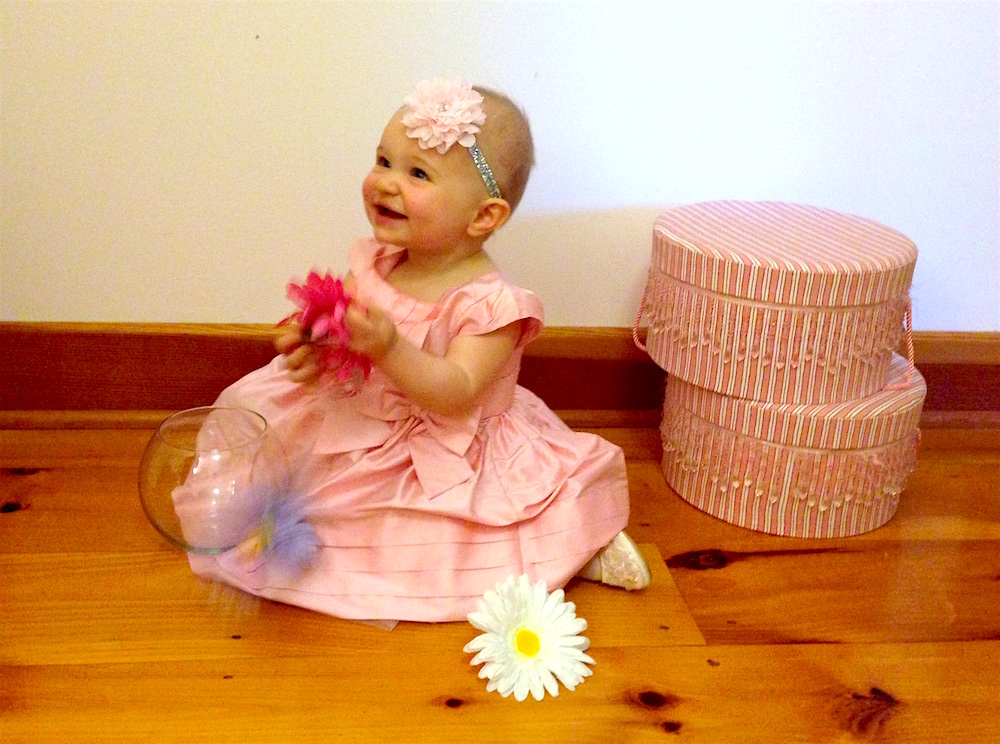
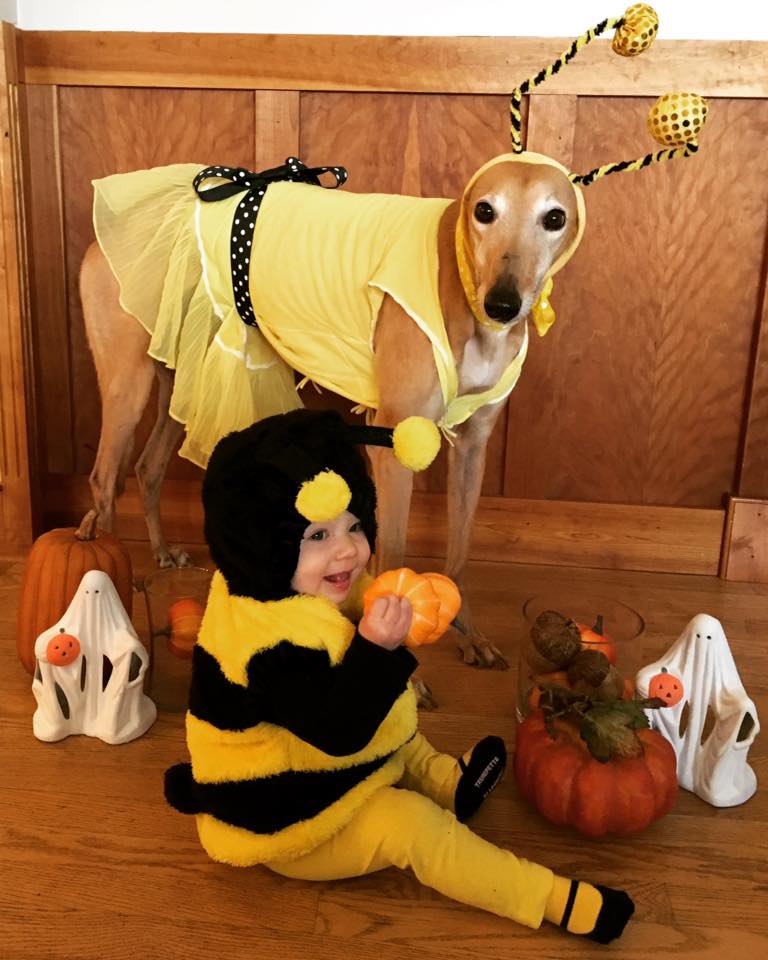
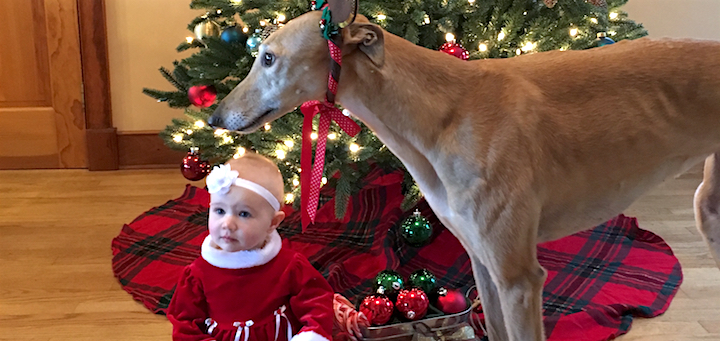
If you want some pics of your kids on their own, be prepared to distract them. As you will note in nearly every single photo of my daughter on her own, there is something tantalizing for her to grab in the shot. I set up little scenes with props in advance and then place her among a bevy of usually-forbidden-to-touch objects, such as decorative pumpkins, candy canes, ornaments, etc. I then have roughly 30 seconds of her looking adorable with these newfound goodies before we devolve into this:
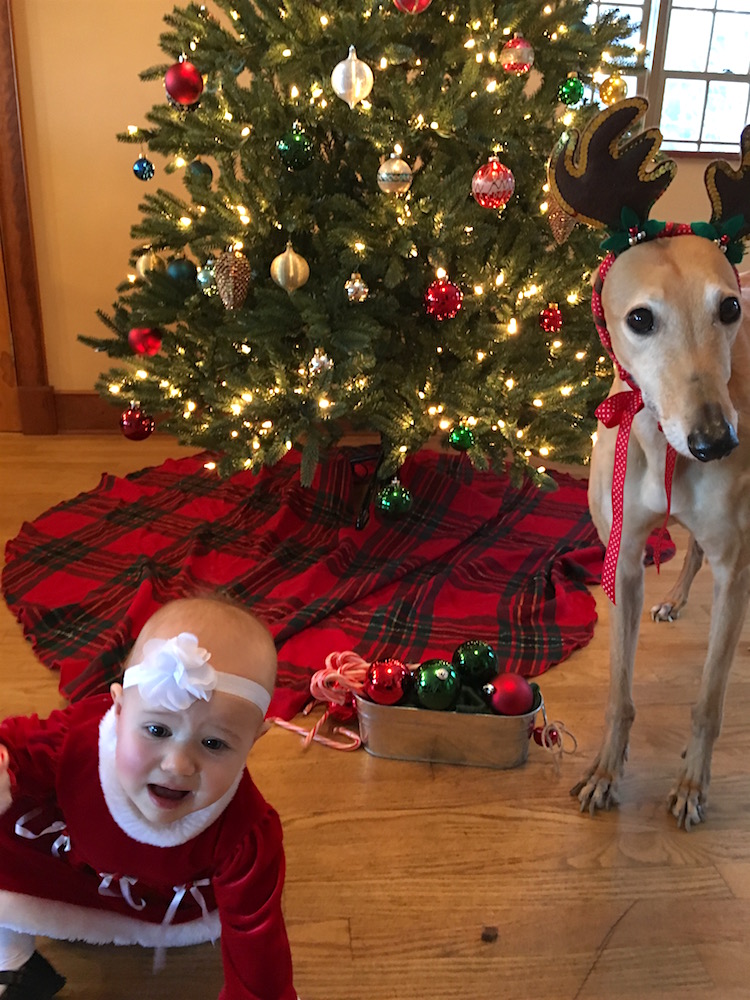
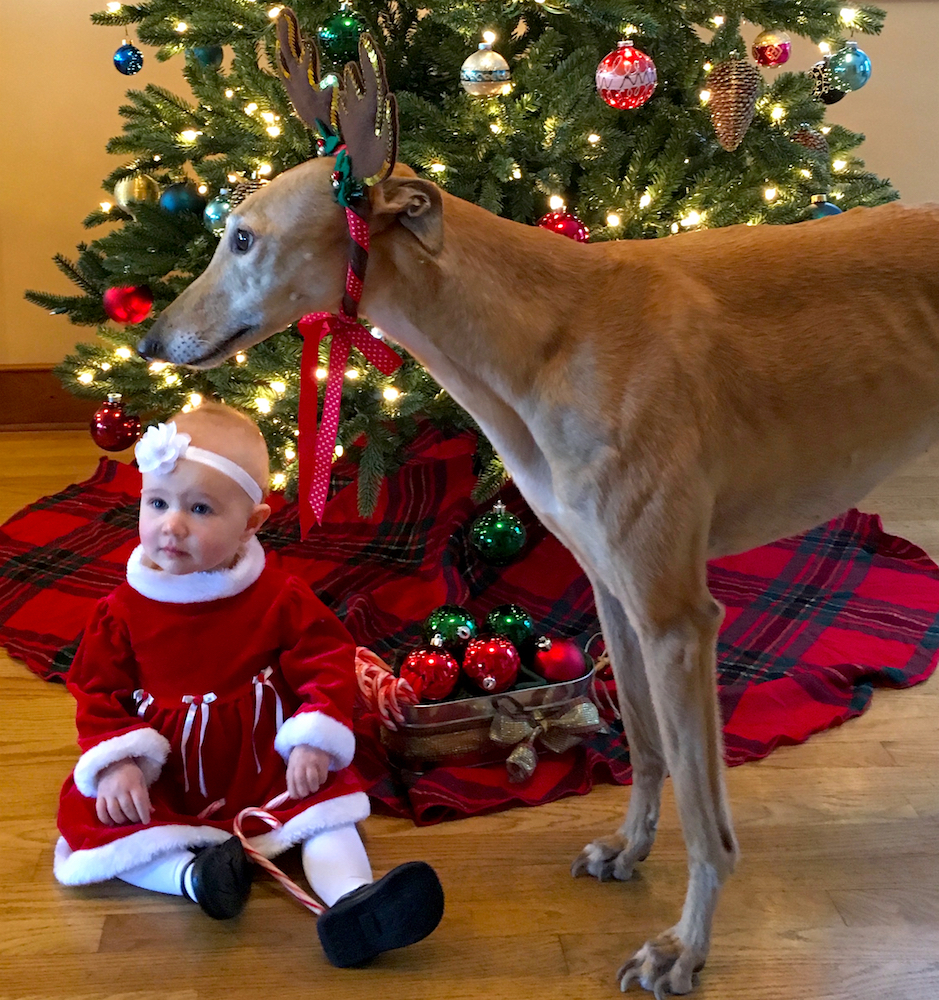
I’m pretty sure the above happened in under 15 seconds. But since I was prepared, I was able to capture the money shot at right, which was seriously THE ONLY usable photo from that little photo shoot (I had to sacrifice my goal of both baby and dog looking at the camera, but what can you do).
This rapid devolution (the younger your kids are, the faster it’ll happen) is why you want to prepare EVERYTHING in advance. You DO NOT want to be fussing with the lighting or moving a table out of the way during these precious few minutes (or seconds if its my kid). If everything is staged in advance, you’ll be able to snap a few good shots before your child loses it.
Additionally, if you have two adults present, have one stationed behind the camera and the other on distraction detail. Have the non-camera parent doing whatever it is that makes the kids laugh (dancing, singing, or, in the case of our daughter, putting something on your head and then letting it fall off… I can’t make these things up). She laughed so hard at Mr. FW doing this during a photo shoot with her cousins and grandparents that she almost threw up. Great smiles in the photos though!
11) Pet solo shots: treats are key!
Much like kids, pets have a very limited bandwidth for being photographed and some won’t do it at all. If you want solo shots of your pet, be prepared with treats. I find it works best if one parent stands just out of the frame with a treat held aloft while the other parent snaps pics. Then, reward your pet with a treat every few shots and you just might get a usable photo. In case you’re wondering, the reason families are always holding their kids/pets in photos isn’t to demonstrate great love, it’s to contain them and have a prayer of actually including their entire little bodies in the frame.
12) Edit your photos.
Now that you’ve taken your 1 million shots, scroll through them and select the best. I find it easiest to download every photo that I think might possibly be #1, save them all in a folder on my desktop, and then eliminate from there. Once you’ve chosen your favorite(s), I recommend a bit of photo editing.
Primarily, I edit photos to boost color and enhance lighting. I have a Mac, so I use the free “Photos” editing software that came with my computer. The editing available in “Preview” mode is also quite good. I don’t recommend spending money on editing software–just use whatever you have.
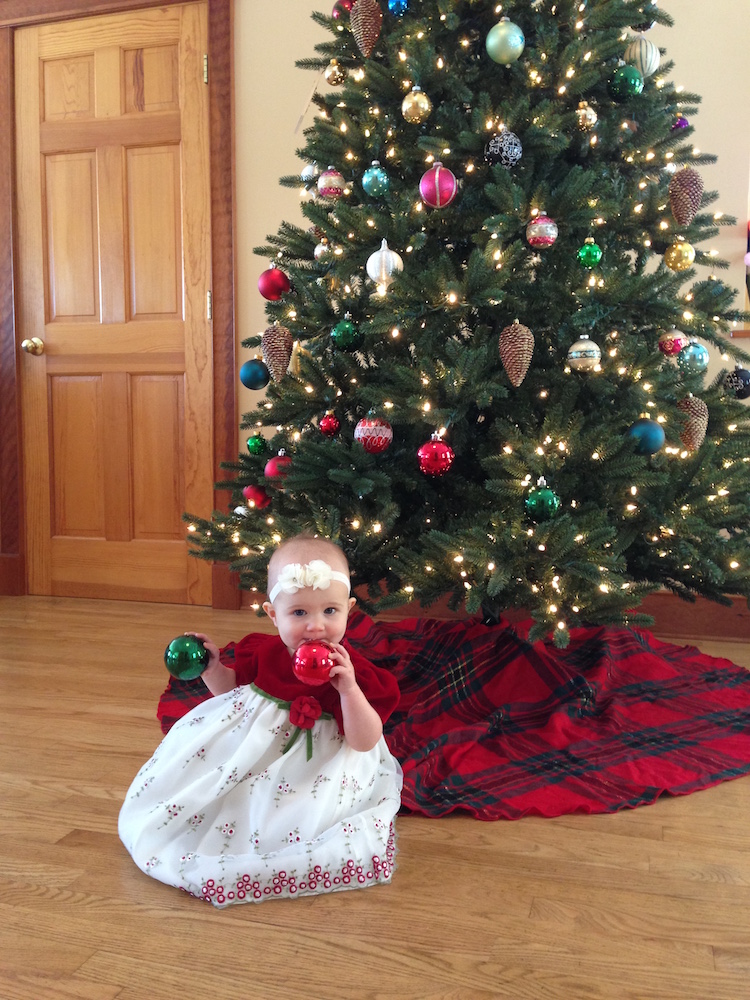
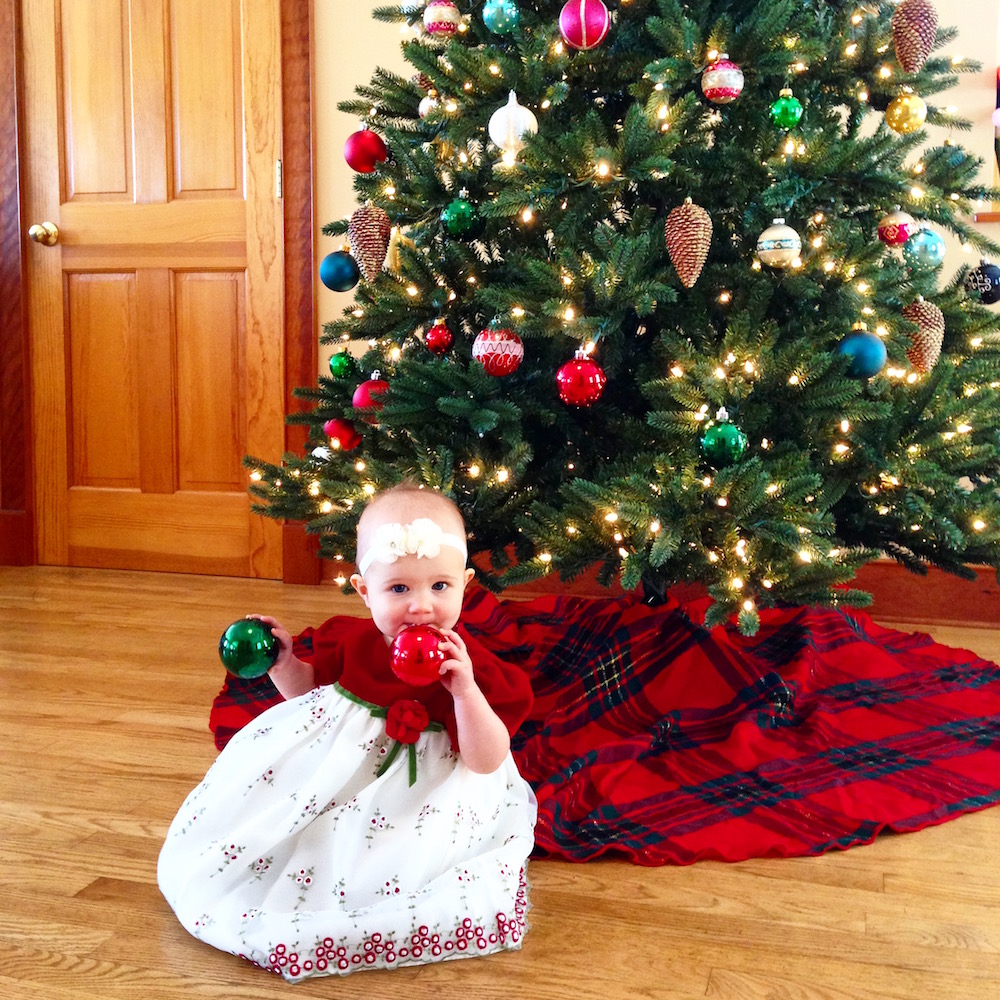
Another hack I use all the freaking time is editing my photos in Instagram and them using my Instagram photos as finals. Instagram crops pictures nicely and the color boosting options are awesome. However, DO NOT use a pre-set filter, instead select “Edit” and then manually edit the photo using all of their various options. Easy and lovely! Above and below are the before and after of a photo of Babywoods I edited in Instagram (which, by the way, is a lot faster than editing on your computer with software).
When editing photos, play around with all of the different settings to work on boosting and enhancing the light. Most of what you’ll be doing is adding brightness and deepening colors. Editing is also excellent for removing red eye and any weird things that happened to pop into your frame (such as the cord to the lights of our Christmas tree, which I totally forgot about one year and saw weirdly climbing the wall behind us in the photo… ).
Use the “retouch” option to erase any such interlopers in your photo. Don’t be afraid to play around with editing as you can always go back to the original if you made things look worse (something I do all the time). A bit of judicious editing will make your photo look professional. Cropping a photo is also often a good idea as it allows you to tighten the focus on faces and remove any distractions in the background.
I will caution, however, not to get too excited about the possibilities of editing because the best editing of all takes place before you take the photo. The background, the lighting, and the placement of the people is all best handled before you ever take the shot. Trust me, it is not possible to edit out a neon-colored sippy cup in an otherwise beatific photo of a toddler. I’ve tried.
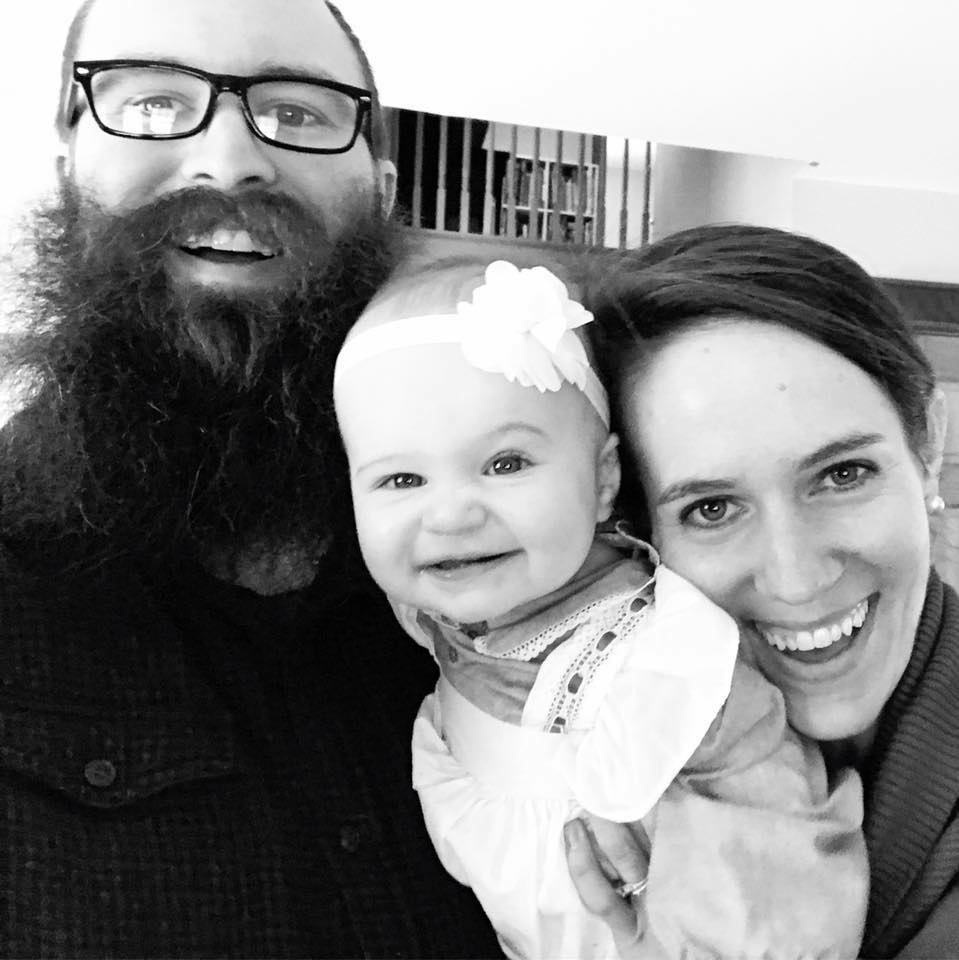
13) Forget the preceding 12 steps and just take a selfie.
Seriously. This can also 100% work. Some of our best shots are selfies (see the black and white pic below), especially with some editing. Since I didn’t plan our outfits or stage a background or consider lighting, the below photo has some pretty loud, awful clashing colors going on. However, by turning it into black and white using editing software and cropping it tightly around our faces, it transformed into one of my favorite pics. So, consider if an existing photo or a simple selfie can suffice.
These Photos Will Not Be Perfect
Before you start to think anything to the contrary, allow me to disabuse you of any notions of perfection post haste. These photos will not be perfect. They will not be as good as a professional’s (although I have to say, my headshot below came out pretty darn professional looking and it was taken by Mr. FW in our backyard while Babywoods 1 played around my legs).

I find the whimsy and imperfection of our homemade family photos to be part of their charm. Just like everything else that we DIY in our lives–from our haircuts to our dog grooming–these photos are a reflection of a skill we’ve learned and a process we’ve been able to do ourselves for vastly less money. It’s part of who we are.
…But You Will Be Happy With Them
Plus, even a professional’s photos will not be “perfect.” Such a thing as “perfect” doesn’t exist. Why spend hundreds of dollars only to be disappointed with the way the photos come out? Better to spend $0 and say “oh well, these are NOT usable.” When we hire someone to do a job for us, we expect a higher level of perfection than if we do it ourselves. Our expectations are extraordinarily high, which means we’ll often be left disappointed.
Conversely, when we do something ourselves–be it take our own photos or refinish our own kitchen cabinets–we are actually happier with the result, even though it’s likely to be a bit homemade-looking. Behavioral economics researchers have documented this phenomenon, dubbed the “IKEA effect” and posit that when we do work ourselves, we take pride in this work and appreciate it all the more. I know that I, personally, am always thrilled (and relieved) when I see how well our photos come out because they’re a reflection of the ethos of frugality and simplicity that I live by.
Frugality In All Things = A Lifetime of Savings
Taking your own holiday photos is just one more way to ingrain frugality and a DIY mentality into your life. It’s not a revolutionary thing and it won’t make you a millionaire, but it is a way to save a couple hundred bucks and teach yourself a new skill.
I’ll point out you can employ these tactics for all of your photos throughout the year and, with practice, your photography will improve. At least, mine sure did (although to be fair, I started out abominable, so there was a lot of room for improvement… ).
The key to remember with a lifestyle of frugality is that all of these seemingly small dollar amounts–spent on photos and haircuts and dinners out–add up to quite a bit of money over the course of a year and a lifetime. By permanently eliminating these expenses, you simultaneously decrease the amount of money you need to live on and increase your savings rate. As a result, you don’t need to earn as much money in order to live your version of the good life. Every element of frugality is compounding and savings in one area are likely to lead to savings in other areas. Plus, if you invest the money you save, you will grow your wealth tremendously. By approaching life with the mindset of frugality, you’ll find you spend less, need less, and ultimately, are happier with less.
P.S. I WROTE A BOOK! I’m a little bit excited, can you tell?!? My book is now available to be pre-ordered, for which I will mail you a signed bookplate. And if you pre-order your book by December 1, I will mail your signed bookplate in time for Christmas. Check out this post for all the details.

Your pictures always look good, you wouldn’t know they’re homemade:-)
Thanks for the tips. Hopefully practice will make it perfect one day 🙂
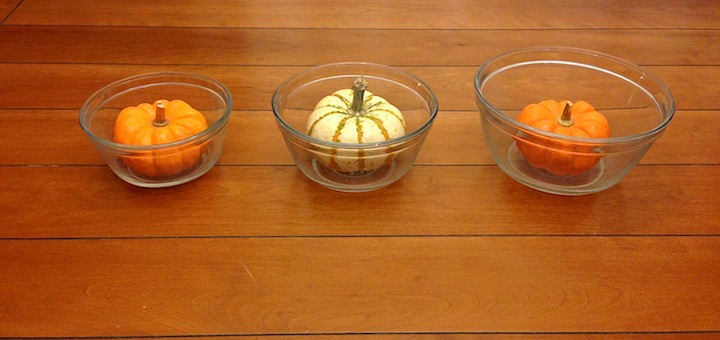
Your photos are always stunning! I figured it was part of the Frugalwoods brand (because my goodness were those pumpkins organized to perfection!).
Photos are definitely becoming more and more important since you don’t need fancy tech. I like this post made no mention of DSLRs or anything unfrugal like that for the average family.
I will say posed pictures doesn’t do much for me. Especially with kids. I love it in cards where the lighting is good, the set is clean etc. but everyone in the photo is natural. They’re not posing or even looking too serious at the camera. I like it when things are natural. We had a special pet photographer come over once for free and his approach was snap 1 billionnnnnn photos of my dog playing naturally.
And he selected the best 3 🙂 best photos I’ve ever had taken of my pooch!! She was just having fun and doing what dogs do.
My wife and I also do not hire anyone to take our photos. We did it once an it was a disaster as we preferred the pics that we took. Plus with the camera technology with phones today it’s almost as good as high end professionals. Great tips and we’ll definitely be using vista prints in the future.
We take our own photos, and with 3 kids, that’s a feat! Something we do is swap with family. I take their family pictures if they will snap a few of mine. It’s a great system to get a family photo frugal style!
We take our own photos and they are often just photos from the year (a family snap from a day at the pumpkin patch, a picture at an overlook near one of the Great Lakes, or just an afternoon selfie in our yard). They capture the “real us”… not too staged or set up. Sure, we’ll try to make them look nice, but the casual photos typically feel more comfortable to us.
Keep up the lovely photos! It is really nice to see your personal photos here and on your Instagram 🙂
Oh, professional photos of the birth? That sounds risky. Great advice! You definitely take great pictures!
We hired a photographer once and I was so uncomfortable! A photo session is not my typical or ideal day!
I took your advice last year and started buying the Vistaprint postcards. What a great idea! We got my sister to take our photos in the yard this past week, right at that place where the sun and the shadow meet (I learned that trick in a freebie online photography course) and we ended up with beautiful do-it-yourself photos. I just placed the order yesterday and got 250 postcards for less than $40 including shipping. I like our amateur photos just fine, because that aesthetic is more in keeping with our actual lives, which are low-key and woodsy. 🙂 Happy Christmas season!
Great pics and advice! I do graphic design as a side-hustle so I usually try to design homemade cards. But the same principles apply, I know people enjoy getting something created for them by me, and it’s way cheaper for me as well. Win, win!
What a great list! And a good reminder to get around to writing the holiday cards. I’ll be behind the camera rather than in front of it, but I still think it’s a lovely tradition! I should try to write more cards throughout the year, I think. They are such a lovely surprise in the mail and I’ve never met anyone who didn’t like receiving a little handwritten something! 🙂
Great ideas. Taking a picture with a baby is not easy, adding a dog makes it more challenging. The holiday photo cards look gorgeous. I can feel the warmth and holiday spirit. All the pictures in yours posts look so beautiful. I like the bright colors. Sometimes it reminds of the pictures in “The Sound of Music” movie. Job well done!
Thank you! Yeah, the combination of a toddler and a dog almost made this year’s photo fail… but we managed to get a good one :)!
I have long been a frustrated amateur photographer so I read your pointers with great interest! Now to set up the shot, check the lighting, get the treats and put antlers on my two beagles and the cat. Wish me luck!
Good luck! You can do it :)!!! Have lots of treats on hand 😉
Wow thanks for sharing the great tips, Mrs. Frugalwoods! I once printed a stack of free business cards on Vista. I didn’t know you could print Christmas cards too.
Our family doesn’t send family or friends Christmas cards and have never done so. We didn’t grow up celebrating Christmas, so that’s the main reason. However, we still enjoy the holidays. We’re planning to take Baby FAF to the mall to take a picture with Santa. That’s something I’ve always wanted to do for our son. It’s $25 a photo, but we believe it’s money well spent. Other than that, we will just take photos at home with our cell phones hehe.
Most malls will let you snap photos yourself on your cell phone. They’ll still try to upsell you to the professional ones, but I’ve never had anyone stop me from taking my own.
Hi Mrs. FAF–if you live anywhere near a Bass Pro Shop they do free pictures with Santa!
Some tips for better outdoor photos: Look for overcast days, even shade (meaning, not dappled. I bet your porch has great light!), or time them for golden hour, the periods when that yellow slanty light shines through your trees near sunrise and sunset. Also, don’t face your subjects into the sun–pose them so that the sun is behind or angled to the side of them, and look for places where it is screened through trees or leaves. You’ll get that magical “bokeh” effect, and they won’t squint! I’d also argue that outdoor photos are less hassle and work in the long run, because you don’t have to worry about cleaning up the laundry or dishes or etc in the background. Plus, you won’t get that yellowish or washed out look that artificial lighting produces. I’m a professional pet photographer, so it’s slightly different, but I do some human photography as well and those strategies have served me faithfully. 🙂
Love these! Thanks for sharing. I used to intern at a photography gallery and lighting is absolutely the number one thing that makes a photo.
No tips to share, but I’m amazed that you can get your dog to cooperate so easily. Our dog would eat the hat/ears, then start on the cats, if we tried to put anything on her, much less leave it on her long enough to get a picture.
Great tips, thank you. I should make notes as we find it a real challenge to get good pics of our three kids!
Sarah
Using natural lighting is great. I prefer a slightly overcast day. It ensures the sun is not in anyone’s eyes and gives more of a glow to the subjects.
I couldn’t tell your headshot was not ‘professional’. It looks great!
You guys are so cute!!
I gave up on snail mail holiday cards. I started making combined holiday cards-family newsletter in the form of an annual 4-page briefing presentation using GoogleSlides. I graphic-design it up with festive colors, clip art, and a bunch of family photos, with a quick paragraph summing up the year in a little nutshell (because I hate those interminable booklets people impose on their extended families)… I have a big Christmas email list that I send it to, and anyone else for whom I don’t have email addresses, I send it through FB…
Better for the environment, too!
I send a personal email to each family with the PDF letter/photos attached. So much easier. I’ll never go back to snail mail version.
Great tips Mrs. FrugalWoods! I really have to emphasize #4 — light is everything. Don’t be afraid to move lights around or bring in additional lights to get a good photo.
The only tip I might add is to take A LOT of photos. The money shot might happen in a mere fraction of a second, so it really helps to know how to set your camera to take multiple photos as quickly as possible. Better cameras can help with this.
You probably*won’t* be able to take a decent picture with a flash. Somebody will blink at exactly the wrong moment, or it will give the photos that blown-out look from too a flash. Skip the flash, and get better lighting (see my earlier comment about moving lights)
I’ve had great luck getting a friend to take the annual Christmas photo of me with my dog – both times outside, once with freshly fallen snow, once in the dirt and dead leaves (ah Ontario winter!). Both of the friends just used iPhones and I boosted the colour and cropped before uploading it to VistaPrint. We don’t have different rates for postcards in Canada so I do a regular mailed card. Stamps have gone up here though (almost a buck a stamp!) so as much as I enjoy this annual tradition, I keep a trimmed list of recipients to keep the cost reasonable and might nix it in the future. Your photos look great and I appreciate your tips! Enjoying the holiday theme of your recent posts-keep ’em coming!
We only do professional pictures every 3 years or even less. They can be good because it means everyone is included in the photos, and with 3 *very unphotogenic and impossibly awkward* children (they’re actually attractive to look at. Till there’s a camera. Then… not so much. Even their grandmother concurred and she was stalwart and avid supporter and on their side in all things!), you get a few with all of them looking nice, as a representation of the family over the years. It isn’t free, of course, but we wait for very good deals and aren’t wedded to any particular occasion, just wait until a good deal comes up then get them done. Otherwise, phone cameras for the win!
Love these tips! I had planned to take our own portrait this year (it’s me, my spouse, and our dog), but things were nuts. Instead, I chose a card with a collage layout, and then I simply scrolled through my phone / Instagram feed and picked 9 photos from throughout the year that I liked and that work well together. I did wait for a 40% off deal through Walgreens, but next year, I’m going with Vistaprint. I’ll just buy a pack of envelopes separately – I prefer to send in envelopes because I’ve had bad luck with the USPS and postcards!
Thank you for saying, “your child is not deprived if you don’t hire a photographer…”. I had felt that I was depriving my child in the past when friends were hiring photographers and I was taking my own photos. I often feel like the “homemade” photos feel more real and personal.
Fantastic article -thank you – and your photos are always amazing!
What a great read and fun article! I do lots of photos, but I never thought of staging the backdrop so it’s fairly foolproof. A great idea, especially when kids and pets are involved. I always love your photos and think they do look very professional. Really like the one of a soon-to-be-howling Babywoods 1! Just proves that you need to know your subject-and kids and pets have nanoseconds of interest. Your Christmas postcard is just beautiful.
“Nanosecond” is absolutely right!!! The photo shoots are hilarious to scroll through and always end with Babywoods running off into the other room…
I LOVE the idea of the Vistaprint business postcards and indeed sent these out from our family last year at your suggestion. However, several family/friends noted that the post office machine put a huge “scrape” down the center of our postcards in the sorting/mailing process. Has anyone else had this problem? Are there any suggestions to keep this from happening again? I was so disappointed. My father-in-law showed us his and it went right through the photo of our faces! It almost looked like a photo error on our part. Ugh
Without using an envelope there is no way to prevent the scrape. It happens on about 80% of the postcards I receive (and I get a lot since I trade postcards as a hobby.)
I send to grandparents in an envelope, and figure it is cost of doing business for the rest. Not many people save the postcards anyway, it’s just a quick snapshot.
Your pictures are fantastic! My daughter is a semi-pro photographer and one of the secrets she has taught me while on wedding shoots, family portraits, etc, is to take pictures BEFORE the posing begins – when people are laughing, or arguing over which spot to stand, or messing with hair and makeup. These photos are many times among the client’s favorites.
We followed your postcard advice last year and were thrilled with both the results and the savings! So fun! Thank you!
Thanks for the photo tips Mrs. Frugalwoods. We don’t hire photographers too but find it difficult to take pictures with a baby. Since they are over the place, you have like 5-10 seconds to get some good shots with the baby or else they will move around and get out of the shot.
I never really thought about wearing dark plain clothes for taking family pictures, that seems like a great idea because wearing anything too bright will be busy for the picture.
If you shoot pix outside, try to get the shots in the ‘golden hour’ just before sunset. That gives a gorgeous golden glow around everyone !
Totally agree! Unfortunately, this is also toddler witching hour, so not an option for us right now 🙂
What size do you order?
I get the standard size “Marketing Materials” postcards, which measure 5.47″ x 4.21″ and use a postcard stamp (much cheaper than a regular stamp!). Just ordered ours yesterday as there’s a good Cyber Monday sale still going on until tonight!
Love my Vistaprint postcards! We are slowly working on our photo skills, and I really want to do more editing to fix them up. Thanks for the tips!
Awesome! Yeah, a bit of strategic editing really helps–especially with color & light boosting. Good luck and have fun 🙂
I love this post! Thank you so much. With my little $200 phone (Moto E Plus) and the right lighting, I can really snap some good looking photos. The post card trick is spectacular too. Having a rather large family this will save me lots of $$$. 🙂
Love this! I never thought of just sending out postcards without envelopes, and I’m not sure why as I sell print all day to clients that do bulk mailers with postcards. I take advantage of my wholesale print ability and tag on a small order of postcards that I design for Christmas cards for such a nominal cost compared to what I used to pay to buy designated ‘Christmas cards’. But the cost of envelopes has always annoyed me, this is a great hack. We do professional photos once in a while with a family friend who is an amazing photographer and she always gives me one heck of a deal and I absolutely LOVE her work and happily look at them on the wall all year long – not Christmas themed photos, just an outdoor fall photo shoot that I repurpose for family holiday gifts, my own pleasure and more so I feel I get good value for my money. For me, that is an important use of my money.
I shudder at some facebook photos of small children friends, as the girls know how to line up and fake smile and pose whenever the camera comes out.. Not natural at all, especially as the parent is taller and looking down at them.
I have read of photographers who blow bubbles to have the child look or reach up.
Thanks for writing out your whole process!
Excellent work as aiways, Mrs. FW! Thank you for your suggestions and your fine writing. Merry Christmas! to you and the FW family!
Great advice, thanks! After what you mentioned about editing in Instagram, I just might have to get around to creating an account there, hmmmm decisions, decisions…
Nice photos! I normally take similar steps when planning for a family shoot. Kids can be “awesome” to get in the right pose, but after a few trials, we get it done!
As a former professional photographer, it is fairly easy for me to take great shots of my kids or family for the holidays 🙂 If you’re not a pro, check out Digital Photography School’s website for great tips or other awesome YouTubers who share so many simple ways to take great images with any camera, even a phone! It’s all about the lighting…
The change we’ve made in frugal Christmas cards has been to opt out of the “photo cards” that tend to cost more and buy boxed cards and send a 4×6 print of the family in them. This way, those who need photos get them and can replace them in their frames, and those who don’t really care about the photo (younger generations we send to) we can skip the print. That saves quite a bit!
Fabulous tips. I’m sending out a photo card this year for the first time in years. Will be sure to follow your advice!
Another tip for family photos is to find places that offer them for free around the holidays! A local church that I attend a MOPS group at offers free family portraits in November. You get a free print of the photo plus a digital copy of it. It’s an easy way to get a family picture for our Christmas card.
Great post! Any suggestions when you have multiple kids in a shot??? Like you said, you probably get 1-2 good shots out of 200+ with one child. So when you have three, statistically speaking, it’s like finding a unicorn!
Can I add another suggestion for improving family photos? Head to your library. I have one of the tiniest libraries and they had a book for the everyday person. It had easy to implement changes that made my pictures SO much better instantly! Looking at Amazon the book Capture the Moment seems similar to what we have at our library and I think the author is a blogger too. Overall, patience is the most important skill.
We ordered our Vistaprint postcards this weekend 🙂
Proper lighting is the biggest thing that makes a photo stand out. We now have inexpensive umbrella reflectors for off-camera flashes, but before that, we had set up sunshade reflectors (the kind that go in your car to block the sun).
Between baby announcements and Christmas photos, having a photography happy husband is really coming in handy!
I use Gimp to edit on my computer — I think of it as a free, open source version of Photoshop. It might be more complicated than is necessary for some things, but it lets you arrange photos and add text. (Technically not optimized for printing but I think it’s ok for the layperson.) Snapseed is a nice app on the phone if you want a little more control than what Insta has.
Another simple tip I hear from photographers is to have people stand closer together than they might normally — it might feel awkward but it looks natural and like everybody likes each other! The shapes that the bodies make up are also usually more pleasing to the eye when they’re closer. That lovely selfie black and white pic reminded me of this one!
I’m doing everything I can to simplify our holidays this year-I’ll consider using a photo I took but can not guarantee I’ll get one I like lol! Looking forward to more frugal ideas for the holidays, since the moment it starts getting cold I want to buy everything I see…..and even Xmas music makes me want to get presents.
And speaking of presents-I’m asking for your book for Christmas from my hubby this year!!
Just a quick question, you mentioned that you have iPhones. I just called Boom mobile (the service you use) to see if I could move my iPhone SE over to them and they said that it was not compatible. Do you have a newer iPhone? The rate you pay for Boom is very reasonable so I wanted to check it out but don’t want to give up my phone to do so.