
Howdy! If you haven’t read Part 1, you’ll want to do that first.
Step 12: Prep your primer (and later, your paint).
- Pour a small amount of paint into a personal paint cup/old plastic container.
- Don’t dip your brush into the gallon because it might contaminate the whole supply–eek!
- With a personal paint cup, if you get debris on your paint brush, you’ll only ruin a small amount of paint.
- Use a hammer and nail to punch small holes into the rim of your paint gallon–this allows excess paint to drip back into the bucket. Cover your gallon and hammer down the lid.
- Frugal tip: paint is the most expensive part of this project, but by following the above paint conservation techniques, you’ll use less paint! Don’t open a second gallon until you absolutely need it–you can return paint for a full refund if you don’t use it (I’ve returned many a can of unopened paint. I’m kind of a legend.).
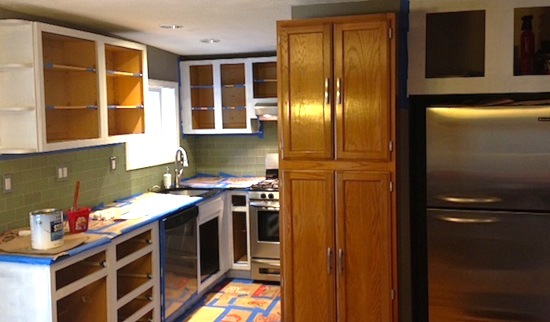
Step 13: Apply primer coat #1.
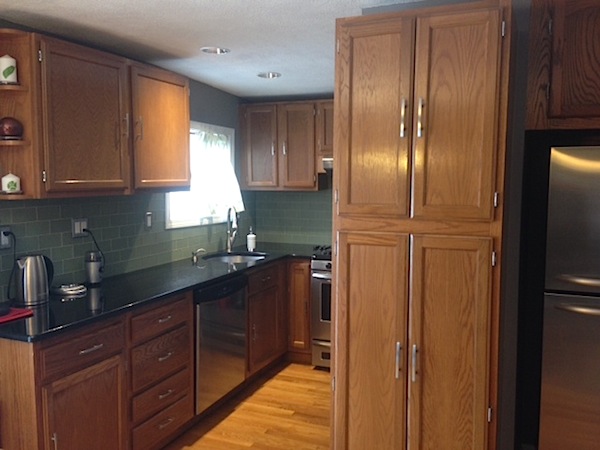
- If you’re going from wood to white like we did, priming is key.
Step 14: Lightly sand.
- We lightly sanded our cabinet door fronts in between the two coats of primer to ensure a smooth finish.
- Use fine grit sandpaper (220) for this step, NOT liquid sander.
- Being lazy & pragmatic, we didn’t sand the cabinet boxes since they’re not as noticeable as the door fronts.
- It’s all about priorities and this fits in with the Frugalwoods 80/20 home improvement principle.
Step 15: Apply caulk.
- Frugal Husband caulked the seams between cabinets after the first coat of primer. These gaps weren’t noticeable when the cabinets were wood, but when they’re white, whoa are the voids prominent.
Step 16: Apply primer coat #2.
- The wood grain of our cabinets definitely needed a double primin’ to cover its ugly self.
Step 17: PAINT!
- Finally, the pièce de résistance!
- Since kitchen cabinets are high-use items touched by paws (human and otherwise) with great frequency, buying the right paint is important.
- We used Benjamin Moore Advance, which is specially formulated for cabinetry (who knew?).
- Two coats were needed to achieve a smooth, even finish. Be prepared to allow for drying.
- Frugal tip: this is one of those times when it makes sense to invest in a product that’ll ensure your cabinets will last for years. Don’t skimp on paint and find yourself needing to redo the project in a year.
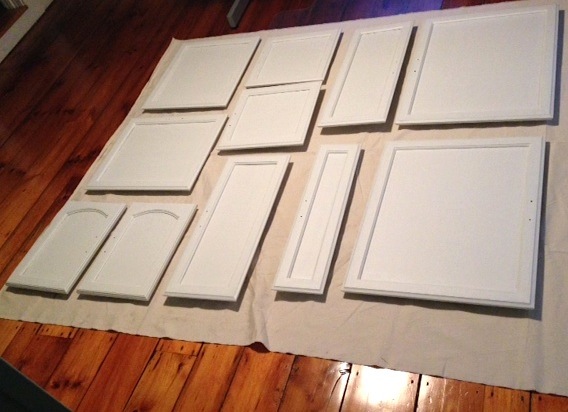
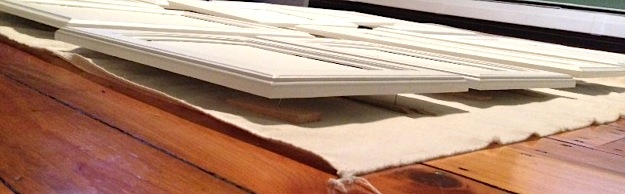
Step 18: Painting cabinet doors.
- Hey! You’ve just realized that the doors have four sides, all of which you need to paint. Never fear, we made a bunch of mistakes, which you don’t need to make!
- You can buy plastic door prop triangles but, being Frugalwoods, we made our own in three different styles, which we tested so you don’t have to! Style #1 was our fave, but the others worked too:
- Style #1: hammer a brad (fancy name for a small nail) into a shim (fancy name for a piece of wood)
- Style #2: cut off the corners of cardboard shoe boxes (I KNEW I was saving those for a reason!)
- Style #3: twist a piece of 12-gauge solid copper wire (salvaged from a dumpster by Frugal Husband)
- Utilizing your custom-made door props, you’ll be able to paint all sides of your doors at one time and leave them to dry atop a drop cloth/paper bag.

Step 19: Painting drawers.
- How to paint drawers without smudging?! Let them hang over the edge of a table covered with a drop cloth/paper bags.
- How to let drawers dry??? Prop them up on a shoe box or package of sponges (those were the things I grabbed as Frugal Husband held the wet drawers and Frugal Hound tried to lick them. I told you, mistakes were made.)


Step 20: Let paint dry and apply a second coat.
- Use your judgement on whether or not you need a second coat, but don’t skimp if you think it’ll help.
- Vastly easier to apply the second coat now than realizing after the fact that your wood grain is peeking through. So embarrassing.
Step 21: Put it all back together.
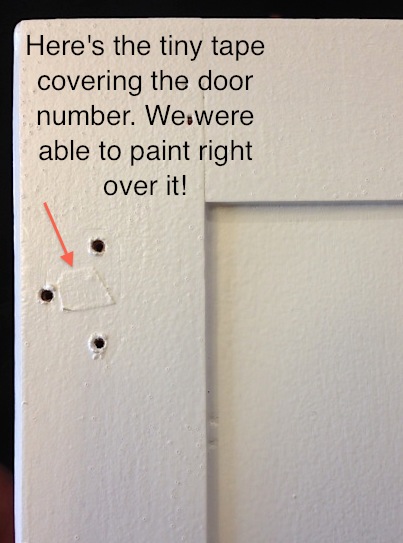
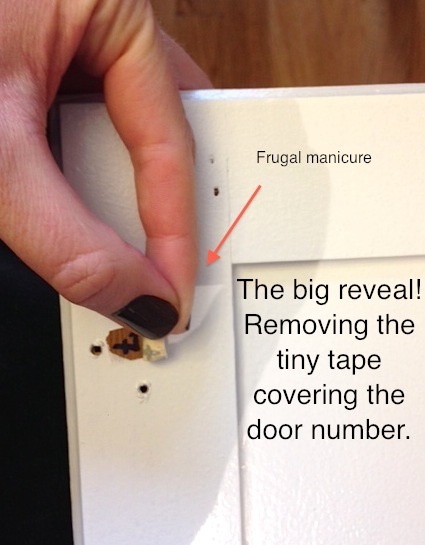
- Pat yourself on the back for copiously labeling your hardware, doors, and cabinet boxes!
- Peel off the tiny tape covering the numbers on your cabinet doors and match it all up.
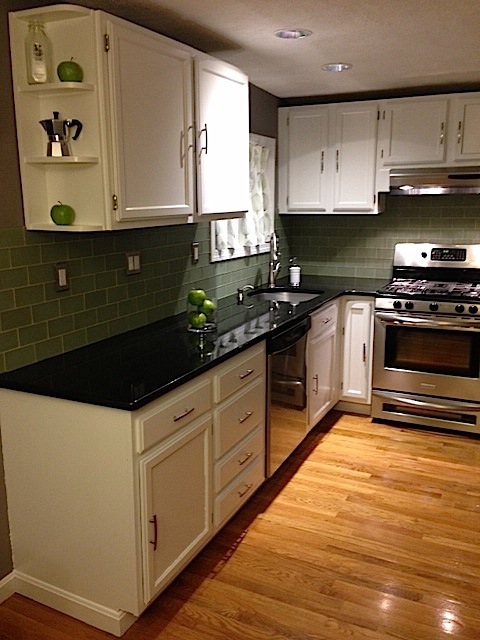
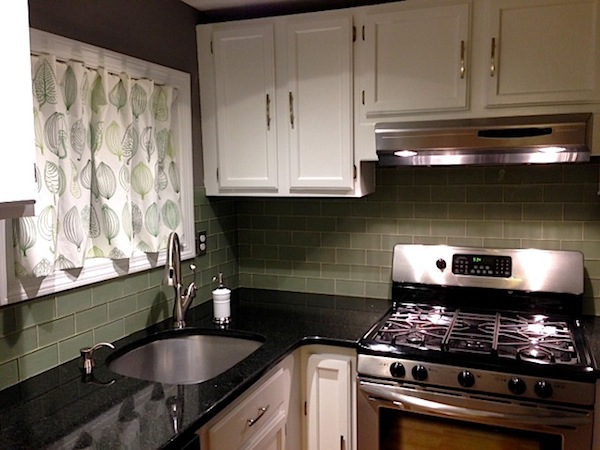
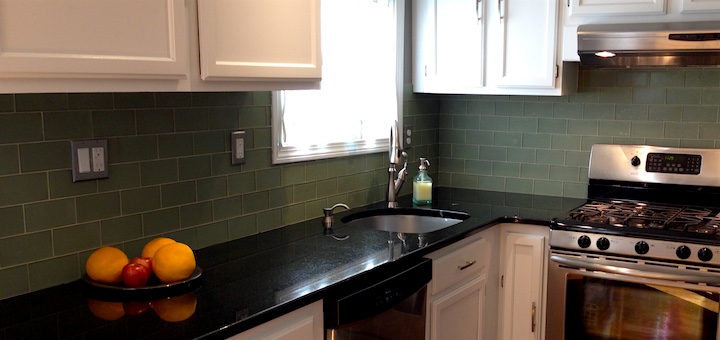
Step 22: Rejoice & admire! Woot!

DIY-ers who came before us and wrote up their tips, which we found very helpful!
Thanks for writing these instructions up. I’ve been doing a lot of around-the-house work lately to spruce up our residence for a potential sale (DW and I are thinking of downsizing) and one of the things that came up was cabinet refinishing. Seems like a very cost-effective improvement — and your kitchen, post-job, looks terrific.
Thanks for reading! I hope these posts are useful as you make your decision–you can learn from our mistakes! It’s a somewhat time-consuming process, but I think it’s well worth it. And, as you note, it really is cost-effective. I say go for it! We had a great time doing it and are thrilled with the result. Good luck!
“The big reveal!” Hilarious!
Nice. Looks like you used a roller. How did it turn out?
I recently read another article on this and they recommended using a paint sprayer. I didn’t like that so much because sprayers are a pain and expensive to rent.
Also, I had no idea you could buy paint just for cabinets. Another tip to file away in my grey matter. Thanks!
Thanks so much! We did indeed use a roller and it worked just dandy. We considered renting a sprayer for about 30 seconds, after which time we realized that sprayers:
1) are super expensive
2) create a gigantic mess requiring massive drop cloths, moving of furniture, and relocation of greyhounds
If you peer intently at the cabinets from a certain angle, in a certain light, you can see a teensy bit of dimple from the roller, but otherwise, they appear completely smooth.
We used 2-inch foam rollers, which I highly recommend. And yes, get the specially-for-cabinets paint (which I also had no idea existed until we started our research).
Got it and thank you! Can’t wait to try this myself on a future project.
I have read more kitchen cabinet DIY painting tutorials than I can remember. This one is by far the most useful! I love that you address all of the little headaches that I wouldn’t have thought about until I was right in the middle of the project. Love all of the frugal tips too!
Hi Cece! I’m so glad to hear it was helpful! We certainly learned a lot as we were doing it and I tried to write it all down in these steps. If you have any questions, don’t hesitate to ask. Best of luck with your project. Thanks so much for reading :)!
This is fantastic. I love our kitchen floor plan and we have new appliances, but the cabinets are hideous. Functional, but ugly. I think you just saved us about $7k… Thanks!
Yay! So glad to hear it! It really did make our cabinets look new–people asked if we’d bought new ones. It’s a great way to cheaply makeover the space. Best of luck to you with the project!
Cabinets have been on our to-do list since we moved in (6 years ago!) We aren’t the most handy of folk, so they were a bit intimidating but your outline has made it seem manageable! We have the same ugly brown cabinets and want to go white as well so it’s literally a step-by-step list just for us. One question, did you (liquid) sand and prime all sides of the cabinet doors? I am assuming yes but wanted to clarify before doing more work. Thanks again!
Yeah, we did all sides. Figured it would be weird to not paint the interior, and you definitely need to sand and prime any surface that will need paint.
Good luck, it’s a dramatic and cheap change for a kitchen!
This is the most informative tutorial I have read so far on painting kitchen cabinets and I have researched a lot. I will be using your tutorial, but would like to add that if you buy a quality water based polyurethane, clear satin lake Varathane. It will really add a protective coating that will protect your paint. I have done this with painted furniture. This is what I plan to do with my cabinets. Thanks for the best tutorial ever! can’t wait to do this!
This is amazing and funny at the same time! How long did it take from start to finish?
Thanks for the instructions- we will be doing a remodel from the same ugly oak to white. If you did not pain the inside of the cabinets, did you paint the back of the door? I’m guessing you did, but I have to be hit over the head with a hammer. thanks!
Thank you for all the time it took to instruct us all in, hopefully, having a kitchen that will have the beauty that you have acheived in yours. I do wonder how your painted hinges have held up, though, since I have not been able to get a tight fit for any replacement hinges that I have tried at most box and even specialty shops. Yes, I plan to try painting them so am wondering if you found the paint chipping on the most used hinges? Your best tips for hinge painting? Again, thanks again from one DIY lover to another. Jackie
We didn’t paint our hinges and I wouldn’t recommend painting the hinges or hardware. We removed all of our hardware before painting and then reinstalled it once the paint was dry. If possible, I’d just use the same hardware since it’ll be a perfect fit and it’s free! Good luck with your project!!
Hi. Would you be so kind to tell what the name of the de-glosser was? Thanks a lot. Appreciate it
Hi there! I’ve read this post (Pts 1&2) countless times over the past year, trying to mentally ready myself to do this, thank you for the excellent information! How is the BM Advance holding up? Would you still recommend? Will you do an update, perhaps include close-up pics of how paint has held up in key areas? Cheers 🙂
I don’t think the before looks that sad… I think it’s quite nice. But I’ll admit the white is a nice improvement, much brighter which helps make use of the limited amount of sunlight it gets from the window 🙂